Table of Contents
For this lesson you’ll start by using a pre-saved project file that already has the ice gem blast sound Effect you used in the last lesson.
-
Launch Wwise and click Open Other... at the bottom of the window of the Project Launcher.

-
Navigate to your
Lesson 2\Wwise Project Lesson 2folder.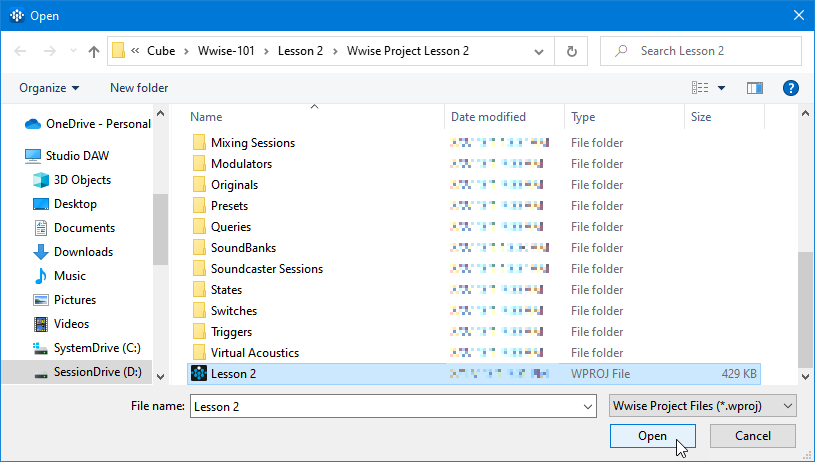
A Wwise project is not a singular file, but instead a specific structure of many different folders and the files contained within. In most cases, you won’t need to directly work with the content inside these folders, as the necessary items will automatically be created and updated as you build a project. Projects are launched from a Wwise Project file, which is located on the same level as these folders.
-
Select the Lesson 2 project file and click Open.
-
In the Actor-Mixer Hierarchy, expand the Default Work Unit to reveal the IceGem_Blast Sound SFX object you created in the last lesson.

Instead of first creating the Sound SFX object and then adding a sound to it, you’ll take a different approach by simply importing the audio files to the desired Work Unit, and letting Wwise automatically create the necessary Sound SFX objects.
-
In the Actor-Mixer Hierarchy, select the Default Work Unit.

![[Note]](/images/wwise101/?source=wwise101&id=note.png)
You may see that the IceGem_Blast Sound SFX object appears in blue instead of white. Blue indicates that the audio file being referenced is the original imported file, while white indicates that the file has been converted. Unless the object appears in red–indicating a file is missing, the color difference does not change the operation of the exercises used throughout this tutorial. If you prefer, you can convert all of the audio files in your project at any time by going to the menu bar and choosing Project > Convert All Audio Files.... You’ll learn more about Conversion Settings in Lesson 7.
-
From the menu bar, choose Project > Import Audio Files or press Shift+I.
![[Tip]](/images/wwise101/?source=wwise101&id=tip.png)
Using key commands for things you do on a regular basis will make you much more efficient as you work. Wwise displays key commands for features found in the menus, so you should take the time to learn them.

-
In the Audio File Importer, click Add Files....
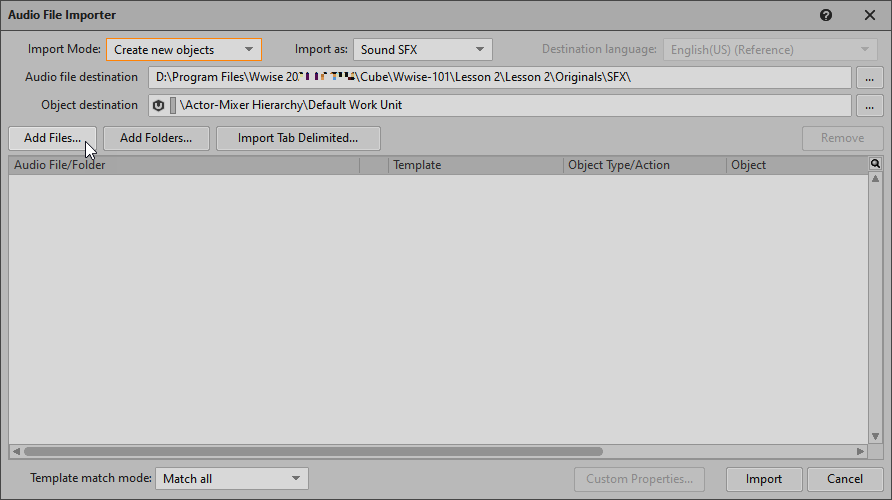
An Explorer window opens where you can navigate to the file that you want to import.
-
Navigate to your
Lesson 2\Audio files for Lesson 2folder. Select theGem_Recharge.wavfile and click Open.
The Audio File Importer window displays the current location. You’ll also see an Object Type/Action drop-down menu indicating that the imported file will automatically have a Sound SFX object created to contain it.
-
Click Import.

The Gem_Recharge Sound SFX object is displayed within the Actor-Mixer Hierarchy’s Default Work Unit.
-
Click the Gem_Recharge SFX object to view the Sound Property Editor with the parameters for the newly created object.

In the Contents Editor (under the Sound Property Editor), the Gem_Recharge.wav file is shown as the source that feeds the Gem_Recharge Sound SFX object.
-
To listen to your newly imported audio file, make sure that the Gem_Recharge Sound SFX object is selected in the Project Explorer and then click the Play button in the Transport Control View, or press Spacebar.

You hear a woosh sound followed by the crystaline chime of an ice gem magically recharging.