Table of Contents
To properly adjust an Attenuation curve, you need to understand the meaning of the game's distance units. A distance unit is defined by the game itself and is determined in the initial phases of the game’s development. For example, for a game about being an ant, the distance unit may be a millimeter, while for a game about intergalactic space travel, the distance unit might be in light years. In the case of Cube, the distance unit represents approximately 0.25 meters.
The X axis of the graph represents distance, and the amount of distance represented on the graph can cover any range by modifying the Max distance property.
-
Change the Max distance property to 50 and press Enter.

Currently, the Attenuation curve shows that the sound gets quieter as the distance between the sound emitter—the teleporter, and the listener—the player increases.
You can audition how this change in distance affects the sound by dragging the Distance parameter cursor left and right as you play the sound.
-
Play the Teleporter sound and adjust the Distance parameter value, then leave it at a value of approximately 25.

![[Note]](/images/wwise101/?source=wwise101&id=note.png)
The Teleporter sound is set to loop indefinitely. This is very convenient for this exercise as you won’t need to constantly play the sound to audition the sound as you make adjustments. Just remember to press the square stop button in the Transport Control to stop playback. Also, be sure to only play the sound one time to start it. Pressing the Play button multiple times will cause multiple instances of the sound to be played simultaneously.
As with RTPC curves, the shape of the Attenuation curve can be modified. So that the sound isn’t heard too far off in the distance, modify the sound so that a significant volume reduction occurs when the listener is 30 meters from the teleporter.
-
Double-click the parameter curve to create a new control point and set it to a distance of 30, with an Output Bus Volume of -17.
![[Tip]](/images/wwise101/?source=wwise101&id=tip.png)
Use the X and Y coordinate values to help you see the exact values.

After volume, one of the most important changes to a sound as it travels through the air is that high frequencies are diminished over distance. This can be achieved by mapping the Distance parameter to Low-pass filter.
-
In the Curves group, select the Low-pass filter and set its Curve type to Custom.

-
Hold the Ctrl key and select the Output Bus volume curve to display both curves. Experiment with how the change impacts the sound.

In some cases, after you get the shape of the curve just right, you may find that you want to adjust the overall scale of the curve. This can easily be changed without having to re-create your curves.
-
Change the Max distance value back to 100.
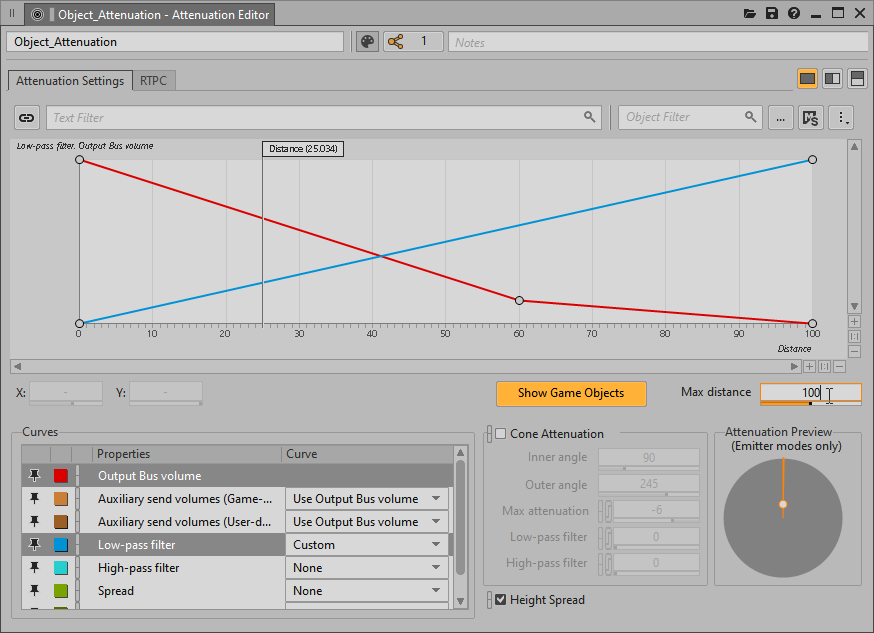
Notice how the overall curve automatically scales to the new distance range and the bulk of the sound tapers off when the listener is 60 meters from the teleporter.