Table of Contents
You’ll begin by creating a new Wwise project. Wwise projects are not a single file, but a folder with a number of sub folders that collectively contain the various resource files needed to carry out the instructions of how you’ve integrated sound into a game.
-
From the Audiokinetic Launcher application, select the Wwise page and launch the Wwise application.
The Wwise Project Launcher opens and all available Wwise projects are displayed.
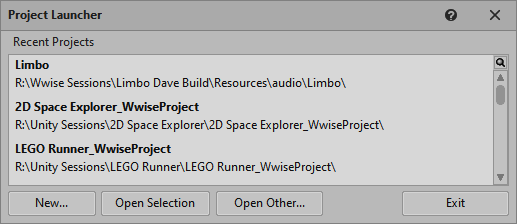
The number of projects you see here will vary depending on what other projects you may have opened on your computer. Most likely you see nothing in this area at this point. In this case it makes no difference because you are going to be creating a completely new project for this lesson.
-
In the lower-left corner of the Project Launcher, click New.

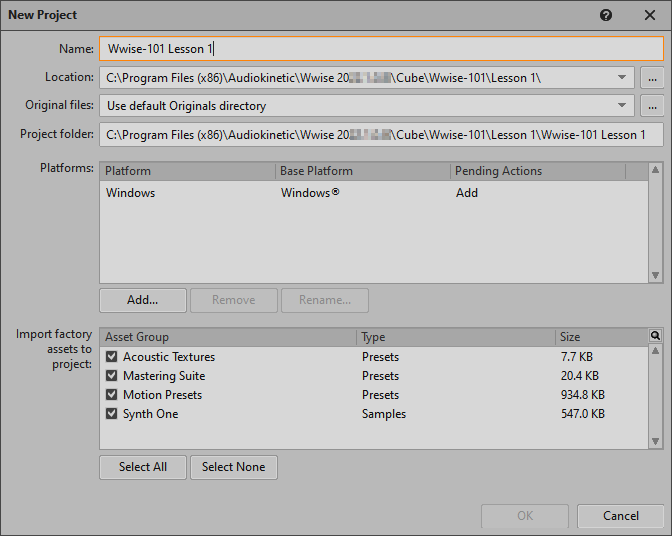
A dialog window opens asking what you want to call your new project and the line below indicates where the Wwise project folder that's about to be built will be located.
-
In the Name field, type Wwise-101 Lesson 1. Click the […] button to the right of the location field, navigate to your Wwise-101 folder and select the Lesson 1 folder.
![[Note]](/images/wwise101/?source=wwise101&id=note.png)
Mac users: Upon selection, the path in the Location field will be displayed as:
Z:\Documents\WwiseProject\Wwise Lessons\Lesson 1\.The Z: path designation occurs because Wwise for Mac runs within a PC emulator and it uses this letter as a drive designation.
-
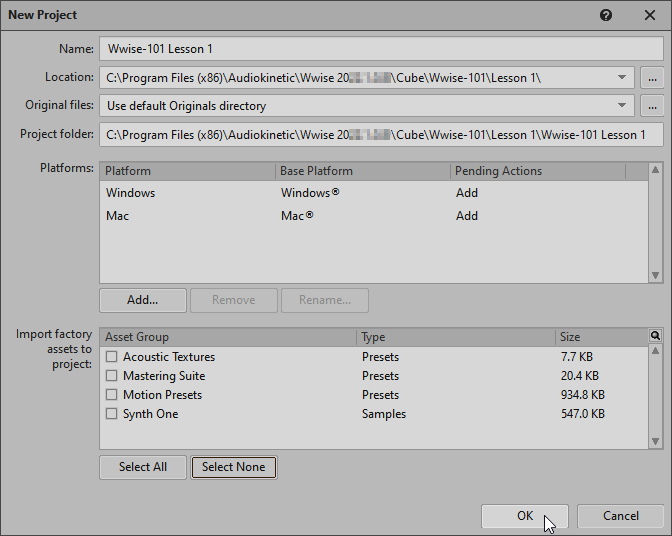
In the Platforms panel, click Add.... The Add Platform dialog pops up. Select Mac® as a Base Platform.

-
Click OK in the Add Platform dialog.
You'll see that this project will now support building your sound design for both Mac and Windows versions of the Cube game.
In the lower section of the window there are checkboxes where you can choose to import necessary assets for some of the optional plug-ins or features within Wwise. These are unnecessary for the Cube game, so you won't be importing those assets.
-
In the Import assets to project area, click the Select None button and then click OK to create the Wwise project.
There’s a brief pause while Wwise builds your new project folder. When complete, the Wwise License Manager window opens and explains that Wwise is running in its trial version. The trial version of Wwise is identical to the fully licensed version with the exception that there is a maximum of 200 media items across all SoundBanks. For more information on the fully licensed version, please visit the frequently asked questions page on licensing here: https://www.audiokinetic.com/licensing/faq/ . You’ll learn more about SoundBanks later in this lesson, but be assured that the material provided with the trial version is more than sufficient for you to gain an understanding of Wwise.

-
In the License Manager window, click Close.
You now see the Wwise software interface.

Depending on your screen size and resolution, it may look slightly different, but across the top you’ll see a main menu bar, with toolbars below. These are static and will always be visible. Below you’ll see multiple areas called views. Each view provides functionality that can be used to visualize and manipulate how sound is integrated into your game. There are around forty different views available within Wwise. This may seem a bit overwhelming, but it is not imperative that you know what all of these views do to make Wwise work for you. In fact, rarely will any one person use all of these views, as Wwise is used by teams of people, many of whom have specific jobs that only require them to use specific sections of Wwise.