
Implement music more efficiently
When implementing game music using Wwise, you need to play back the entire piece of music to confirm that the music loops naturally. For example, if you have a two-minute segment of music, you'll have to listen to it for two full minutes to ensure the loop point is seamless.
The same goes for checking a segment shift and transition in interactive music. Especially for transitions that happen near the end of a long track, one preview might be enough if there are no issues. However, if there are any problems, you'll need to play back the long segment again after correcting the settings and assets.
This kind of repeated checking can be time-consuming, mentally taxing, and the quality may be compromised if time is limited.
To address such a problem, PlatinumGames developed “Music Render”, a unique tool which helps check audio loops and transitions more efficiently using Wwise’s offline rendering API. This article will introduce examples of the tool's use and its technical configuration.
Music Render: Usage Examples
Below are some practical examples of how Music Render can effectively address common problems in implementing music with Wwise, using the Wwise sample project “Cube” as an example.
Example 1: Simple Loop
The Story Playlist Container is a simple loop using a single Music Segment, approximately one minute in length, meaning that you must spend one minute to check the loop.
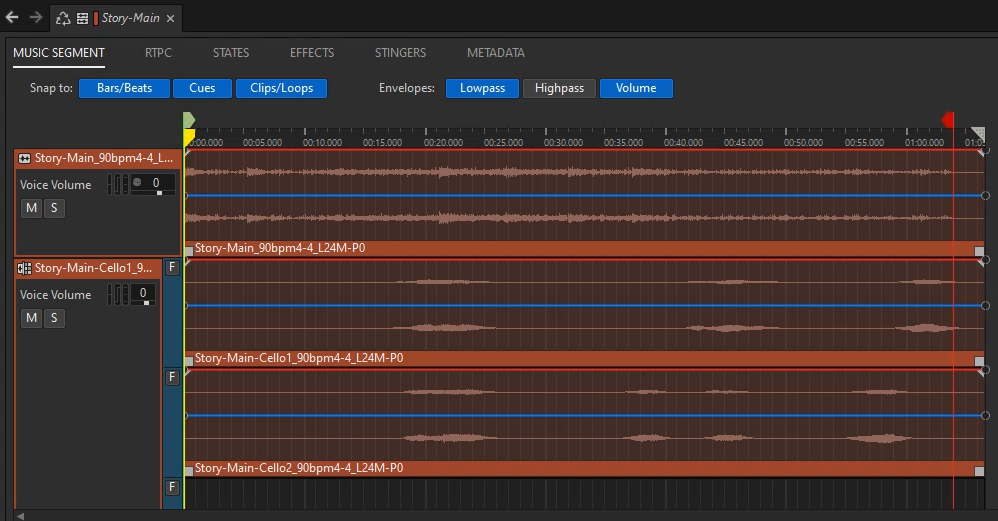
That's where Music Render comes in. Activate the tool from the Wwise Playlist menu and set the following parameters.
- Rendering time: The duration necessary to check the loop (1 to 10 minutes)
- Application to open the WAV file: For example, MAGIX's SOUND FORGE.
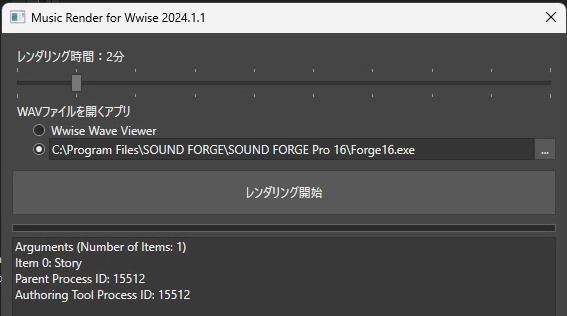
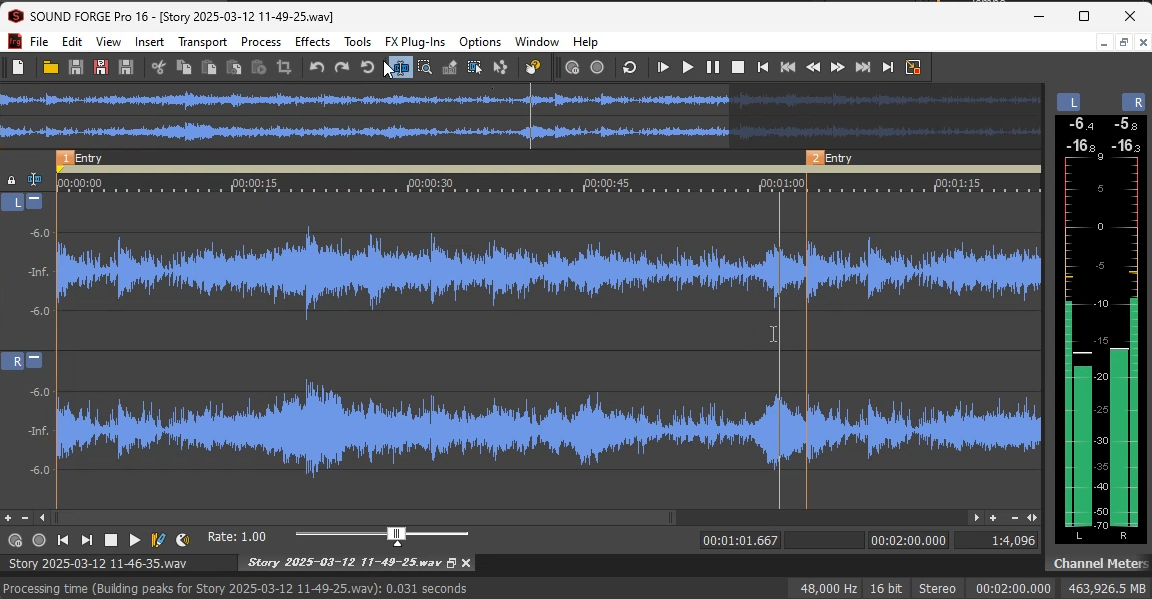
Click [Start Rendering] to create a SoundBank and conduct rendering automatically, and after the process is completed, a WAV file opens in SOUND FORGE. You can quickly play back a music segment from the loop point to check the loop.
Example 2: Complex Playlist
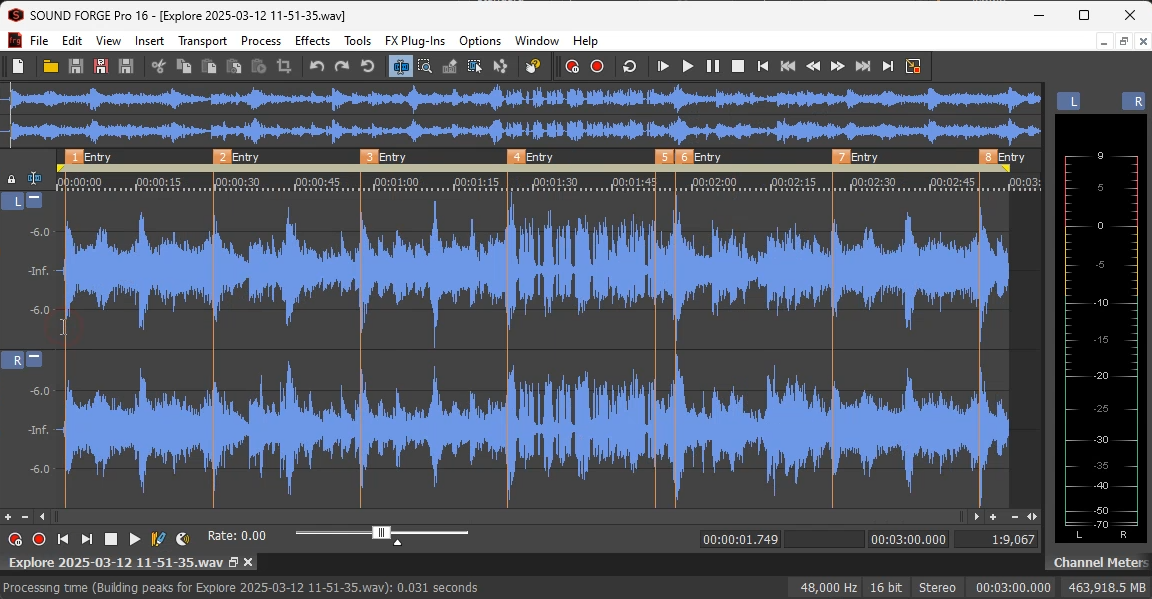
The Explore Playlist Container contains multiple Music Segments. Without the tool, you must spend a long time playing back the whole Music Segments to check for any problems in their transitions.
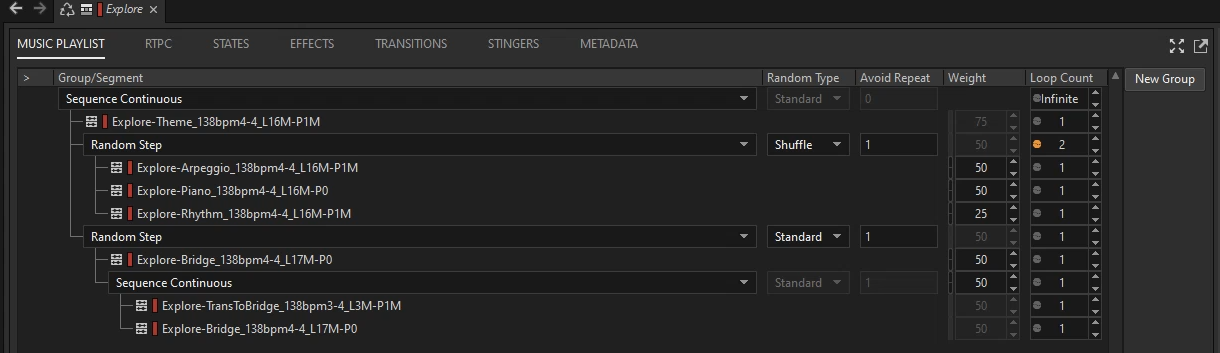
During rendering, Music Render automatically adds markers to the segment transition points in the generated waveform file. This allows you to check transitions without having to listen to the entire track; they simply pick up playback from these marker positions
Example 3: Interactive Transition
The Wwise 201 Music Switch Container switches the track to Combat or Explore, triggered by the Gameplay_Switch switch.
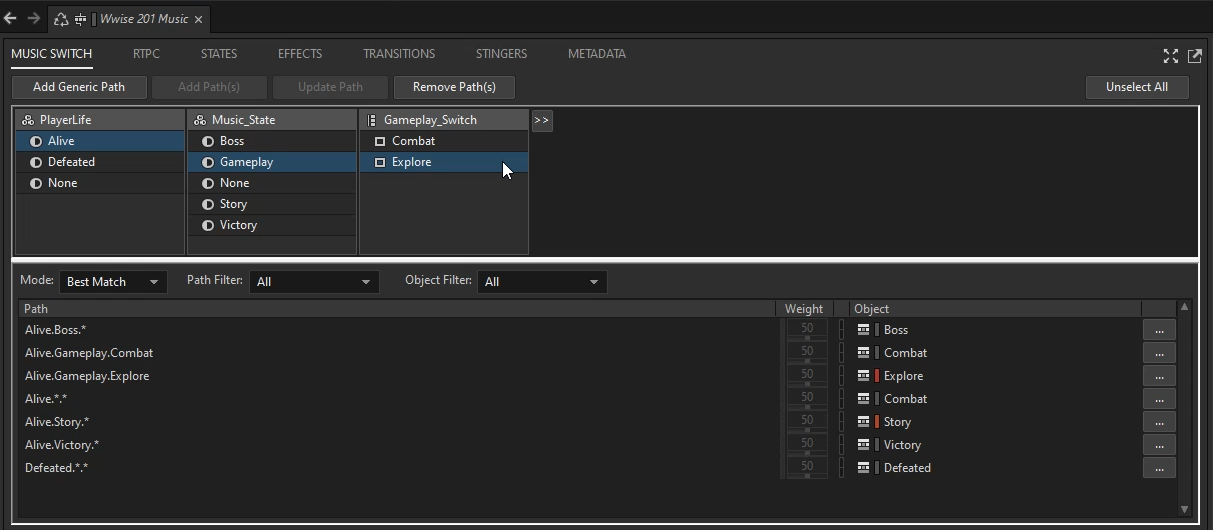
Checking the transitions usually requires manual switching of the track, but Music Render offers more efficiency by helping create and render an event where such switching is automated.
A sample event here is created by configuring the following:
- Play back a Switch Container
- Change the switch value every 15 seconds
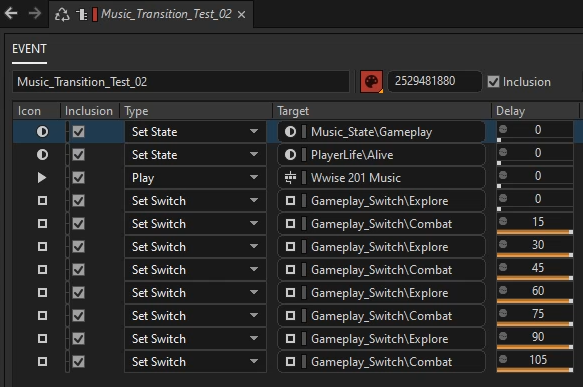
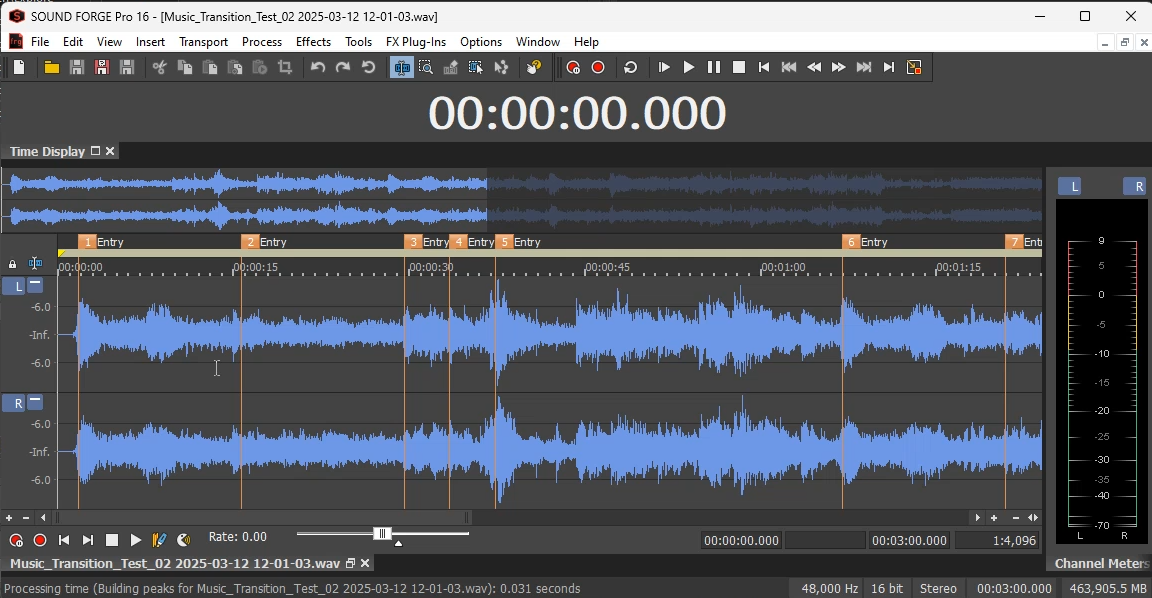
Rendering the event offline with Music Render creates a music waveform where the track switches at 15-second intervals (15, 30, 45, …). If you find any unnatural transitions, you can modify the transitions or assets and then re-render to confirm the fix. This automation ensures that even issues difficult to reproduce manually can be reliably checked and corrected.
Technical Configuration
Music Render consists of the frontend and the backend.
Frontend (UI)
- Programming language: C#
- UI framework: WPF
- Activation: Activated as an add-on (.exe) to the Wwise authoring tool.
- Features:
- Communicating with the Wwise authoring tool via WAAPI
- Creating Events and SoundBanks
- Sending a rendering command to the backend and after rendering is completed, opening a WAV file
Backend (Rendering process)
- Programming language: C++
- Activation: Activated from the frontend (.dll).
- Features:
- Initializing the sound engine with Wwise SDK
- Loading SoundBanks, posting Event, and outputting audio through offline rendering
- Returning the result to the frontend after completing the process
Backend details
For basic processes such as initializing the Wwise sound engine and loading a bank, refer to the official documents. This section summarizes points to note specific to offline rendering.
Required Global Variables:
AK::OfflineRendering::g_fFrameTimeInSeconds = 1.0f / 60.0f;AK::OfflineRendering::g_bOfflineRenderingEnabled = true;
These variables are defined in AkProfile.cpp. Although you typically need an appropriate Wwise license to access the source code, it shouldn't be required to create an offline rendering tool for yourself.
Offline Rendering API:
AK::SoundEngine::StartOutputCapture(settings.WavFileName);AK::SoundEngine::StopOutputCapture();
Callback to Add Markers:
static void MusicCallback(AkCallbackType in_eType, AkCallbackInfo* in_pCallbackInfo){ AK::SoundEngine::AddOutputCaptureMarker("Entry");}
Entire Code:
Below is the major part of the code including the above. It includes a MusicRender class and structure definitions used in the class. It also includes all the technical points required for offline rendering while excluding error processing.
// MusicRender.hstruct MusicRenderSettings{ wchar_t* SoundBankFolderName; wchar_t* StreamFolderName; wchar_t* SoundBankFileName; wchar_t* PluginDllFolderName; wchar_t* Event; int RenderingDurationSec; wchar_t* WavFileName;};typedef void(__stdcall* NotifyProgress)(float);extern "C" __declspec(dllexport) void __stdcall MusicRender(const MusicRenderSettings&, const NotifyProgress);// MusicRender.cppnamespace AK { namespace OfflineRendering { extern AkReal32 g_fFrameTimeInSeconds; extern bool g_bOfflineRenderingEnabled; }}CAkFilePackageLowLevelIODeferred g_lowLevelIO;class CMusicRender{public: const AkGameObjectID LISTENER_ID = 0; const AkGameObjectID GAME_OBJECT_MUSIC = 1; AkPlayingID m_iPlayingID = 0; void Initialize(const MusicRenderSettings& settings) { AK::SoundEngine::RegisterGameObj(LISTENER_ID, "Listener (Default)"); AK::SoundEngine::SetDefaultListeners(&LISTENER_ID, 1); g_lowLevelIO.SetBasePath(settings.SoundBankFolderName); AK::StreamMgr::SetCurrentLanguage(AKTEXT("English(US)")); AkBankID bankID; AK::SoundEngine::LoadBank("Init.bnk", bankID); AK::SoundEngine::LoadBank(settings.SoundBankFileName, bankID); AK::SoundEngine::RegisterGameObj(GAME_OBJECT_MUSIC, "Music"); g_lowLevelIO.SetBasePath(settings.StreamFolderName); } void Terminate(const MusicRenderSettings& settings) { AK::SoundEngine::StopPlayingID(m_iPlayingID); AK::SoundEngine::UnregisterGameObj(GAME_OBJECT_MUSIC); AK::SoundEngine::UnloadBank(settings.SoundBankFileName, NULL); AK::SoundEngine::UnloadBank("Init.bnk", NULL); } void Main(const MusicRenderSettings& settings, const NotifyProgress callback) { AK::OfflineRendering::g_fFrameTimeInSeconds = 1.0f / 60.0f; AK::OfflineRendering::g_bOfflineRenderingEnabled = true; AK::SoundEngine::StartOutputCapture(settings.WavFileName); { m_iPlayingID = AK::SoundEngine::PostEvent(settings.Event, GAME_OBJECT_MUSIC, AK_MusicSyncEntry, MusicCallback); const int callbackIntervalMS = 10; DWORD lastNotificationTimeMS = GetTickCount64(); float renderTimeSec = settings.RenderingDurationSec; float audioBufferSec = AK::OfflineRendering::g_fFrameTimeInSeconds; for (float timeSec = 0; timeSec < renderTimeSec; timeSec += audioBufferSec) { AK::SoundEngine::RenderAudio(); if (GetTickCount64() - lastNotificationTimeMS >= callbackIntervalMS) { callback(timeSec / renderTimeSec); lastNotificationTimeMS = GetTickCount64(); } } } AK::OfflineRendering::g_bOfflineRenderingEnabled = false; AK::SoundEngine::StopOutputCapture(); } static void MusicCallback(AkCallbackType in_eType, AkCallbackInfo* in_pCallbackInfo) { AK::SoundEngine::AddOutputCaptureMarker("Entry"); }};void __stdcall MusicRender(const MusicRenderSettings& settings, const NotifyProgress callback){ if (InitSoundEngine(settings) == false) { return; } CMusicRender cMusicRender; cMusicRender.Initialize(settings); cMusicRender.Main(settings, callback); cMusicRender.Terminate(settings); TermSoundEngine();}
Conclusion
We have used this tool on several PlatinumGames titles since around 2019. It helps us check music loops and interactive transitions efficiently, and serves as a foundation to create more sophisticated sound production while saving work time. With this tool, you can complete checks with ease and spend more time focusing on refining and experimenting with how the music can be expressed in game.
As a secondary benefit, if you are requested to provide sound materials during the development phase, you can easily combine WAV files that have been divided into segments and output them as one single WAV file that can be used for loop material. As the materials are rendered at the in-game volume, when combined with gameplay video that only contains sound effects, their volumes can be naturally balanced. For this use case, the tool also provides a function to render multiple playlist containers and events simultaneously.
I hope this article helps you implement music more efficiently!

Comments