
Overview of ReaWwise
ReaWwise is a REAPER extension designed to dramatically speed up and simplify workflows. Using ReaWwise 1.07, with a few clicks, you can render files, auto-name them with UCS names or your project's naming convention, and transfer them across your network to any Wwise instance. This allows you to save time by reducing duplicated work, typing, and typos, while creating sophisticated Wwise object hierarchies.
With ReaWwise, you can create and save presets of Wwise hierarchy settings, manage incremental updates, and replace assets. You can also use the REAPER $wildcard system to automatically name any of the objects in the hierarchy. ReaWwise transfer settings can be recalled and used with other REAPER projects, and shared with other team members. The more you use it, the more your productivity increases.
New Features in ReaWwise 1.07
Support for Wwise 2025.1 Hierarchy Names
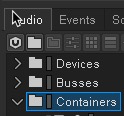
Wwise 2025.1 introduces Containers as the top-level hierarchy of Wwise objects.
ReaWwise 1.07 allows the creation of objects under this new top-level name.
The ReaWwise transfer operation must either create a new Work Unit object at the top of its object transfer structure or target an existing Work Unit in the Containers hierarchy.
![]()
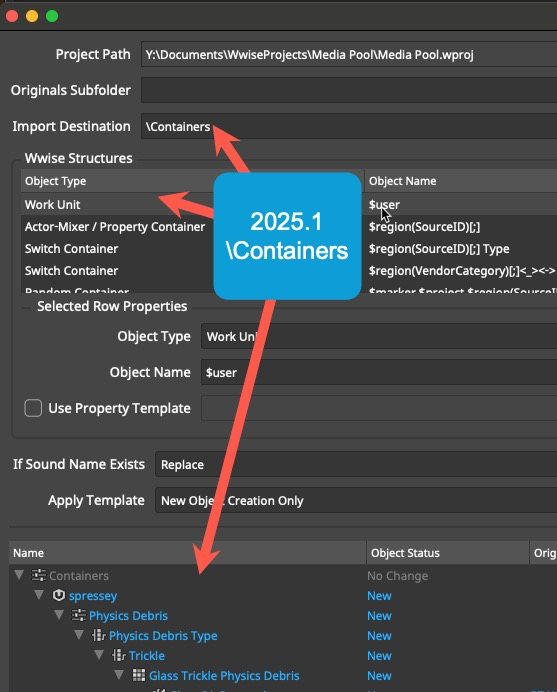 2025.1\Containers
Connection Status Visual Confirmation
As of version 1.06, ReaWwise now includes a connection status indicator. When ReaWwise successfully establishes a WAAPI connection with a Wwise project, the check mark turns green.

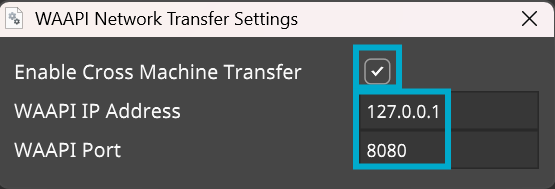
Configuring Cross-machine Network Transfer
It is now possible to transfer from the machine running your REAPER DAW to any open Wwise project on any machine on your local network. Here’s how you do that:
- Click the gear icon to open the WAAPI Network Transfer Settings window.

- Select Enable Cross Machine Transfer, and set the WAAPI IP Address and WAAPI Port to the destination machine.
- In Wwise Authoring, open the destination Wwise project.
- From the Wwise menu bar, click Project > User Preferences and configure the following options:
- Select Enable Wwise Authoring API.
- In the Allow connection from field, type the IP address of the machine running ReaWwise. To add multiple machines, separate IP addresses with commas.
- Set the WAMP port to the same value as the WAAPI port in the ReaWwise WAAPI Network Transfer Settings window.

Transferring Files
You should now have a connection to the Wwise project you want to transfer to.
- The Project path will be displayed in ReaWwise
- The red X will have changed to a green check mark
- In your Wwise Project Explorer Audio tab, under the Containers hierarchy, select the destination you want to transfer files to.
- In ReaWwise, click the Sync with selected object in Wwise button to the right of the Import Destination field.
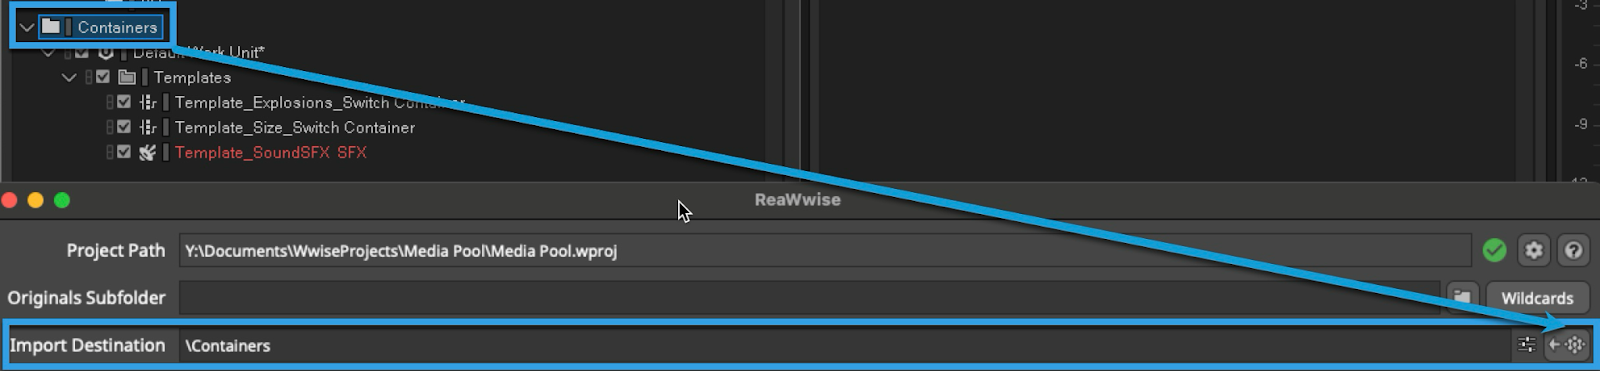 Tip: The destination must be a Work Unit unless you specify the creation of a new top-level Work Unit object in ReaWwise.
Now you have a connection to your Wwise Project and a destination selected for transfer. - In ReaWwise, create a Wwise object structure. It can be as sophisticated as you want, or as simple as a single Sound SFX.
- In REAPER, select the Regions you want to render.
In ReaWwise, the preview pane will update with the object structures and rendered files that will be transferred. - Click Transfer to Wwise. The rendering will start, and the files and objects will be transferred to your Wwise project.
Details on creating Wwise object structures and transferring files can be found in Transferring audio assets to Wwise.
Efficiency built into ReaWwise
Other powerful features of ReaWwise include:
- The ability to use REAPER $wildcards to name the Wwise objects it will create on transfer.
- Using existing Wwise objects as property templates for your new objects.
To speed up your everyday workflow, you can combine these features with the ability to save and load presets of object hierarchies you use often in your Wwise projects.

The Future of ReaWwise
As with all Audiokinetic products, our aim is continuous improvement. We are constantly working on updates and releasing them as alpha and beta versions. Click on Enable pre-releases (bleeding edge) in the ReaPack package browser to try them.

Your feedback is vital. In ReaWwise, click the “?” button, and then the Documentation link. This will take you to our ReaWwise documentation. You can also visit our Help page to request a feature or report a bug. We are eager to hear from you.

Comments