Table of Contents
While the relative balance between instruments should be relatively good, one challenge with a dynamically changing music score is that there’s no way to completely predict what the maximum or minimum volume levels for the combined mix will be. Depending on the game play and the various randomizations, circumstances could arise where the combination of all of the musical elements could create volume levels that are higher than what might have been seen when the files were playing in the DAW. The concern is that the music might overcome the other sound effects in the game, or worse, the combined levels of the sound effects and the music could distort the final output. Inversely, there may be segments where the music is very sparse and may not feel loud enough to support the game play.
In a DAW, you can automate the volume of tracks at the precise points in the timeline where volume problems occur, but in a game, there is no timeline so conventional automation is not possible. Instead, you can insert a dynamic compressor across Audio Busses, which can help you constrict the amount of volume change between the louder and softer sections of the music.
-
In the Mixing Desk, double-click the Wwise 201 Music Audio Bus channel header.

-
In the Property Editor, click the Effects tab.

-
Click the [>>] selector button for ID 0 and choose Wwise Compressor > Hard_Knee_Minus_3dB_RMS.
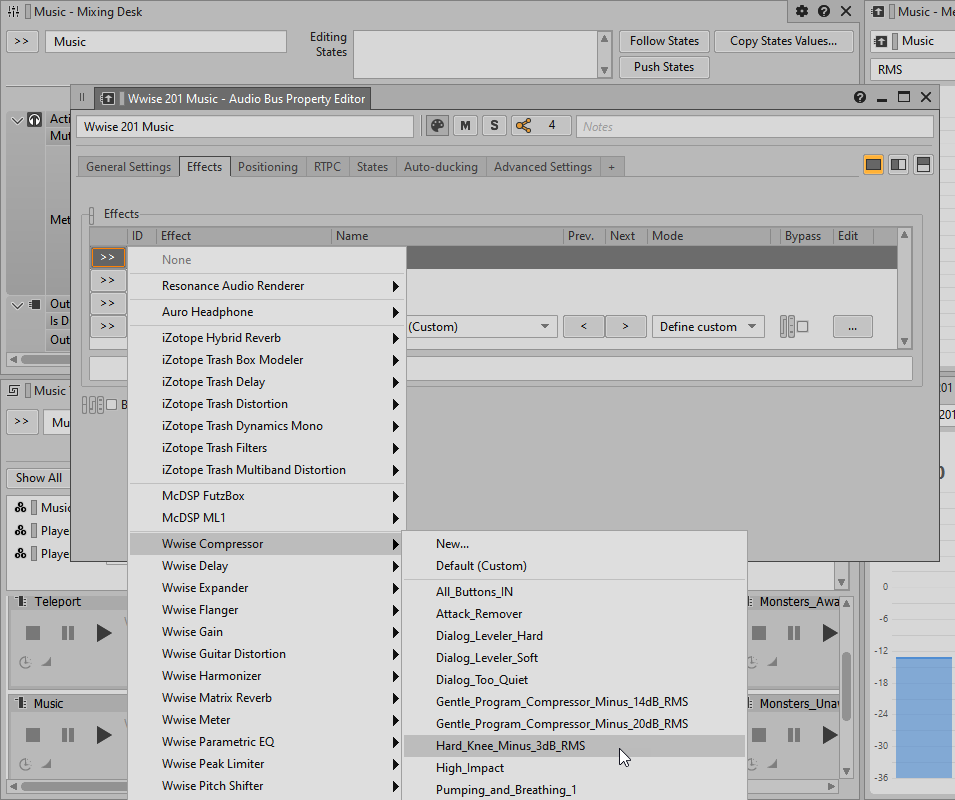
The Wwise Compressor with the Hard_Knee_Minus_3dB_RMS preset is inserted across the Wwise 201 Music Audio Bus.

The selected Preset leaves most of the levels on the bus untouched, but if the signals start to get excessively loud, the Compressor will begin to reduce the level above a defined volume threshold. You’ll modify the Compressor settings so that its effect on the music is more aggressive.
-
Click the Edit button on the right side of the Wwise Compressor row.

You can see that the threshold is set to -3 dB, meaning that the compressor will have no effect for sounds below -3 dB. The compression ratio value can be thought of as a number over 1. With the compression value set to 8, it means that an 8 to 1 compression ratio is applied to sounds over -3 dB. This means for every 8 dB of level over -3 dB, only 1 dB of actual increase in volume will be allowed. When compressors are used with ratios of 10 to 1 or higher, they are commonly referred to as a limiter, which is simply a very aggressive compressor. To hear the effect of the compressor, lower the threshold value so that it is actively compressing even lower level signals.
-
Click Capture and then adjust the Threshold to -40 dB. Then play the Combat music.
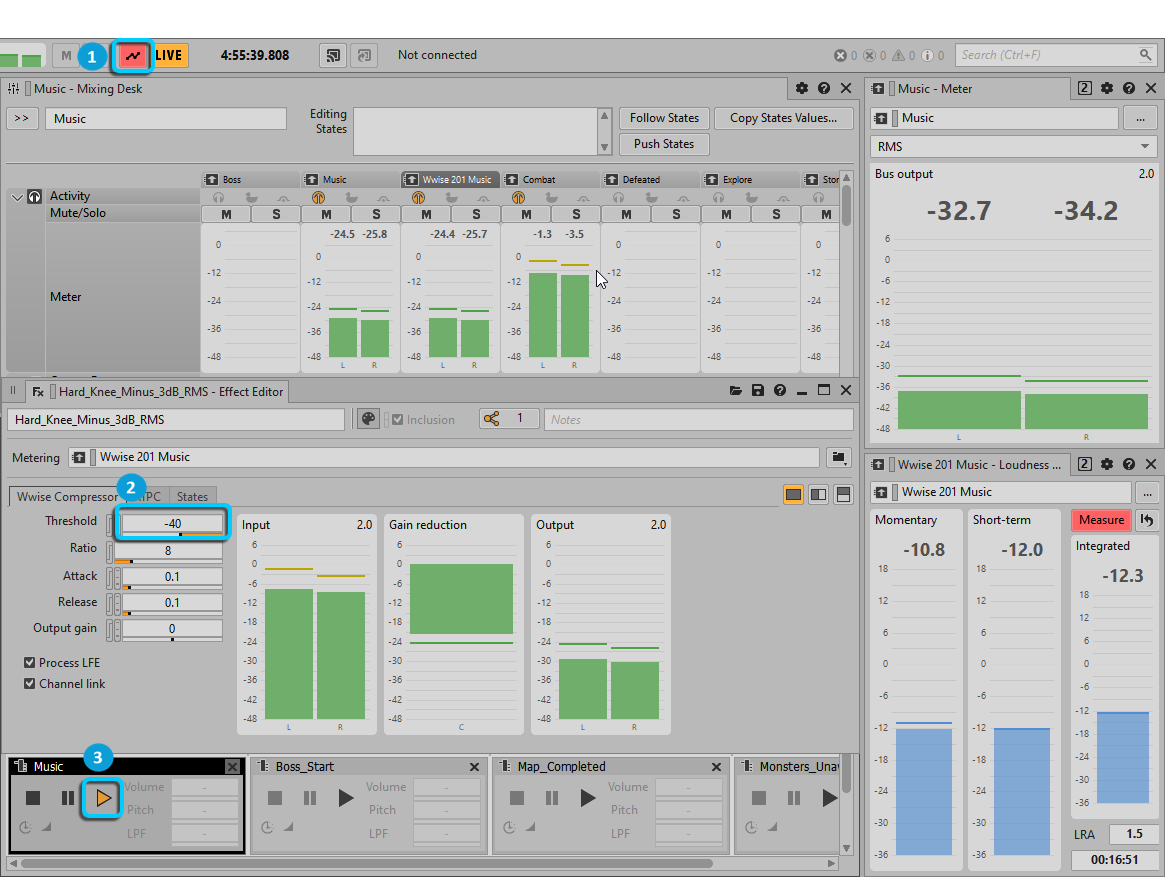
Assuming you still have all of the Audio Bus levels set to 0 dB, you can see the difference between the uncompressed Combat Audio Bus and the compressed Wwise 201 Music Audio Bus. This gives you a sense of how much impact the compressor is having on the music. Right now it’s a bit much.
-
Set the Threshold property to -23.

You can see that this setting starts to bring the levels of the Combat music close to the Target Level in the Loudness Meter.
You should also observe the Channel Link check box. By default, it is engaged; this means that the same gain reduction is applied to all channels and the determination of whether the bus has exceeded the threshold value is based on combining the volume of all of the channels. If this option is not selected, no information is shared between channels, and the Effect is applied on a per-channel basis. This would result in the relative balance between the left and right channels in the stereo mix changing periodically, which is generally not desired with stereo content.
-
Go back and adjust the Audio Bus levels to where the relational values make sense.
-
Close the plug-in windows, stop the capture and playback, then switch to the Designer Layout.