Using Wwise Spatial Audio in Unreal
This tutorial presents new functionalities introduced by Wwise 2017.1 and the new Spatial Audio features introduced in the Unreal plug-in. It explains the workflow to integrate spatial audio components in a game, and provides technical information about initializing spatial audio features (such as 3D busses, 3D positioned Sound SFX, or the Reflect Effect plug-in) in the Wwise Authoring Tool and importing the Spatial Audio component in a game using the Unreal Engine.
It is assumed that the reader has a basic working knowledge of Wwise and the Unreal Engine. However, the content of this document is detailed enough for users of any level of expertise to complete this tutorial. Further information can be obtained from the Unreal Documentation.
Throughout this tutorial, four different virtual acoustic zones will be created, each of these virtual acoustic zones demonstrates one capability of the new Spatial Audio plug-in. Each area has an ambient sound placed at its center that acts as an emitter. The listener is left as the default and corresponds in this case to the camera, which can be moved around to explore the different acoustic environments.
Sections A, B, and C are required steps to build a proper working environment and are expected to be completed in this specific order. Any of the following sections (namely D, E, F, and G) can be completed separately and independently in any order, once the three first sections are completed.
Note: Completion of sections using the Reflect plug-in require the appropriate license.
- A - Setting Up The Project
- B - Preparation
- C - Add Reference Sound in Unreal
- D - Add Late Reverb
- E - Add Surface Reflector
- F - Add Rooms and Portals
- G - Add Spot Reflector
A - Setting Up The Project
Using the latest version of Wwise and Unreal, follow the steps below in order to build your working environment.
- Launch Unreal 4.16.1 from the Epic launcher
- Create a new Unreal Project C++ Blank project (without starter content) called TestSpatialAudio.
- Close Unreal.
- Start the Wwise Launcher.
- Install Wwise 2017.1.0.
- Select the Unreal Engine tab.
- Click the Integrate Wwise into Project... button.
- Launch Wwise using the Open in Wwise 2017.1 button.
- Launch Unreal using the Open in Unreal 4.16.2 button.
B - Preparation
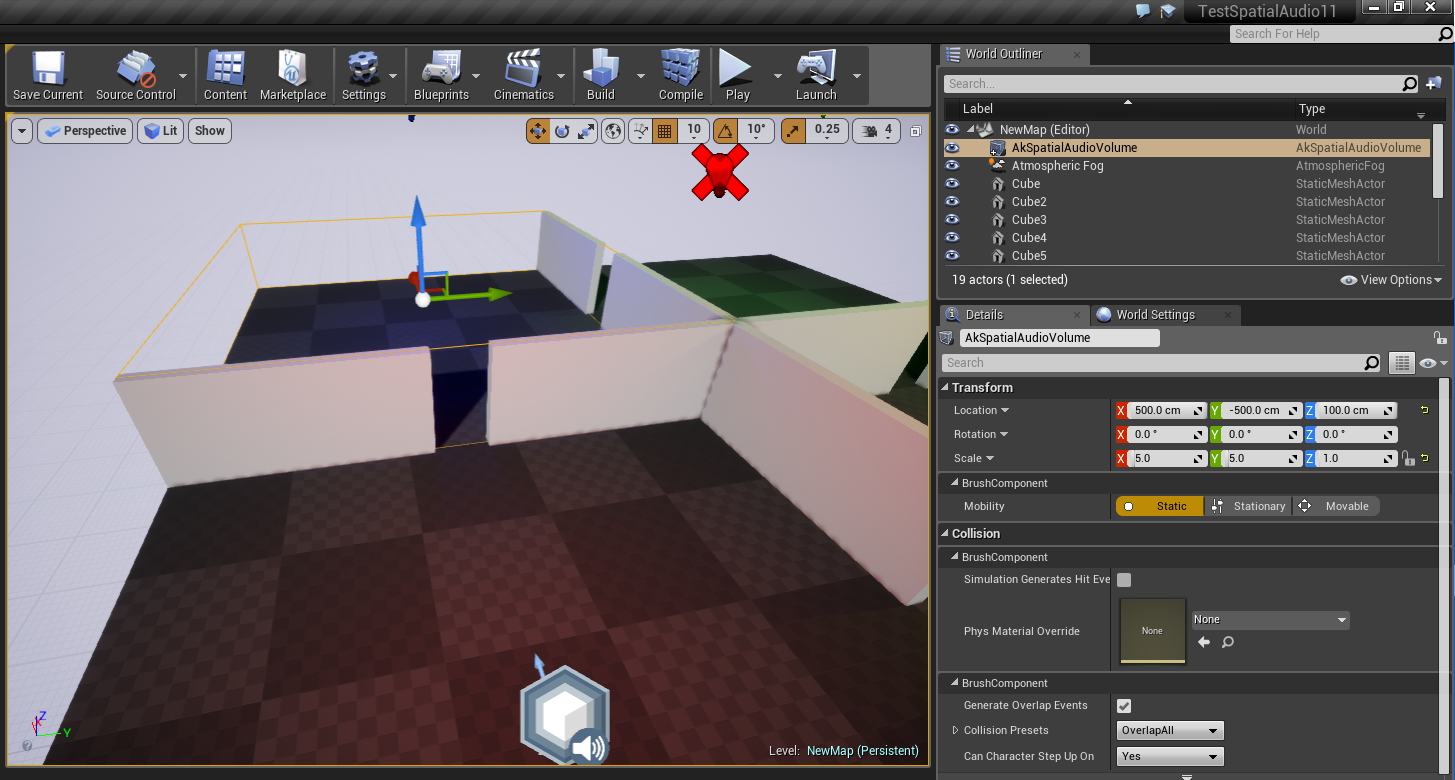
In this section, we are scaling the floor and setting up walls and portals to delimit four different areas that will correspond to the different acoustic environments in which we will put the spatial audio components.
- Select the floor and set a new Transform.
- Set Location to (x=0.0, y=0.0, z=0.0).
- Set Scale to (x=2.0, y=2.0, z=1.0).
- Create walls using 8 cubes with the following dimensions and locations:
- Location (x=775.0, y=0.0, z=100.0) Scale (x=4.5, y=0.25, z=2.0).
- Location (x=225.0, y=0.0, z=100.0) Scale (x=4.5, y=0.25, z=2.0).
- Location (x=-225.0, y=0.0, z=100.0) Scale (x=4.5, y=0.25, z=2.0).
- Location (x=-775.0, y=0.0, z=100.0) Scale (x=4.5, y=0.25, z=2.0).
- Location (x=0.0, y=-775.0, z=100.0) Scale (x=4.5, y=0.25, z=2.0) Rotation (x=0.0, y=0.0, z=90.0).
- Location (x=0.0, y=-225.0, z=100.0) Scale (x=4.5, y=0.25, z=2.0) Rotation (x=0.0, y=0.0, z=90.0).
- Location (x=0.0, y=225.0, z=100.0) Scale (x=4.5, y=0.25, z=2.0) Rotation (x=0.0, y=0.0, z=90.0).
- Location (x=0.0, y=775.0, z=100.0) Scale (x=4.5, y=0.25, z=2.0) Rotation (x=0.0, y=0.0, z=90.0).
- Move Player start to:
- Location (x=-500.0, y=-500.0, z=100.0).
- In order to help differentiate the rooms, add the following PointLights at the specified locations with Intensity set to 50,000:
- Red, Location (x=-500.0, y=-500.0, z=500.0).
- Blue, Location (x=500.0, y=-500.0, z=500.0).
- Green, Location (x=500.0, y=500.0, z=500.0).
- Yellow, Location (x=-500.0, y=500.0, z=500.0).
- Save as "NewMap".
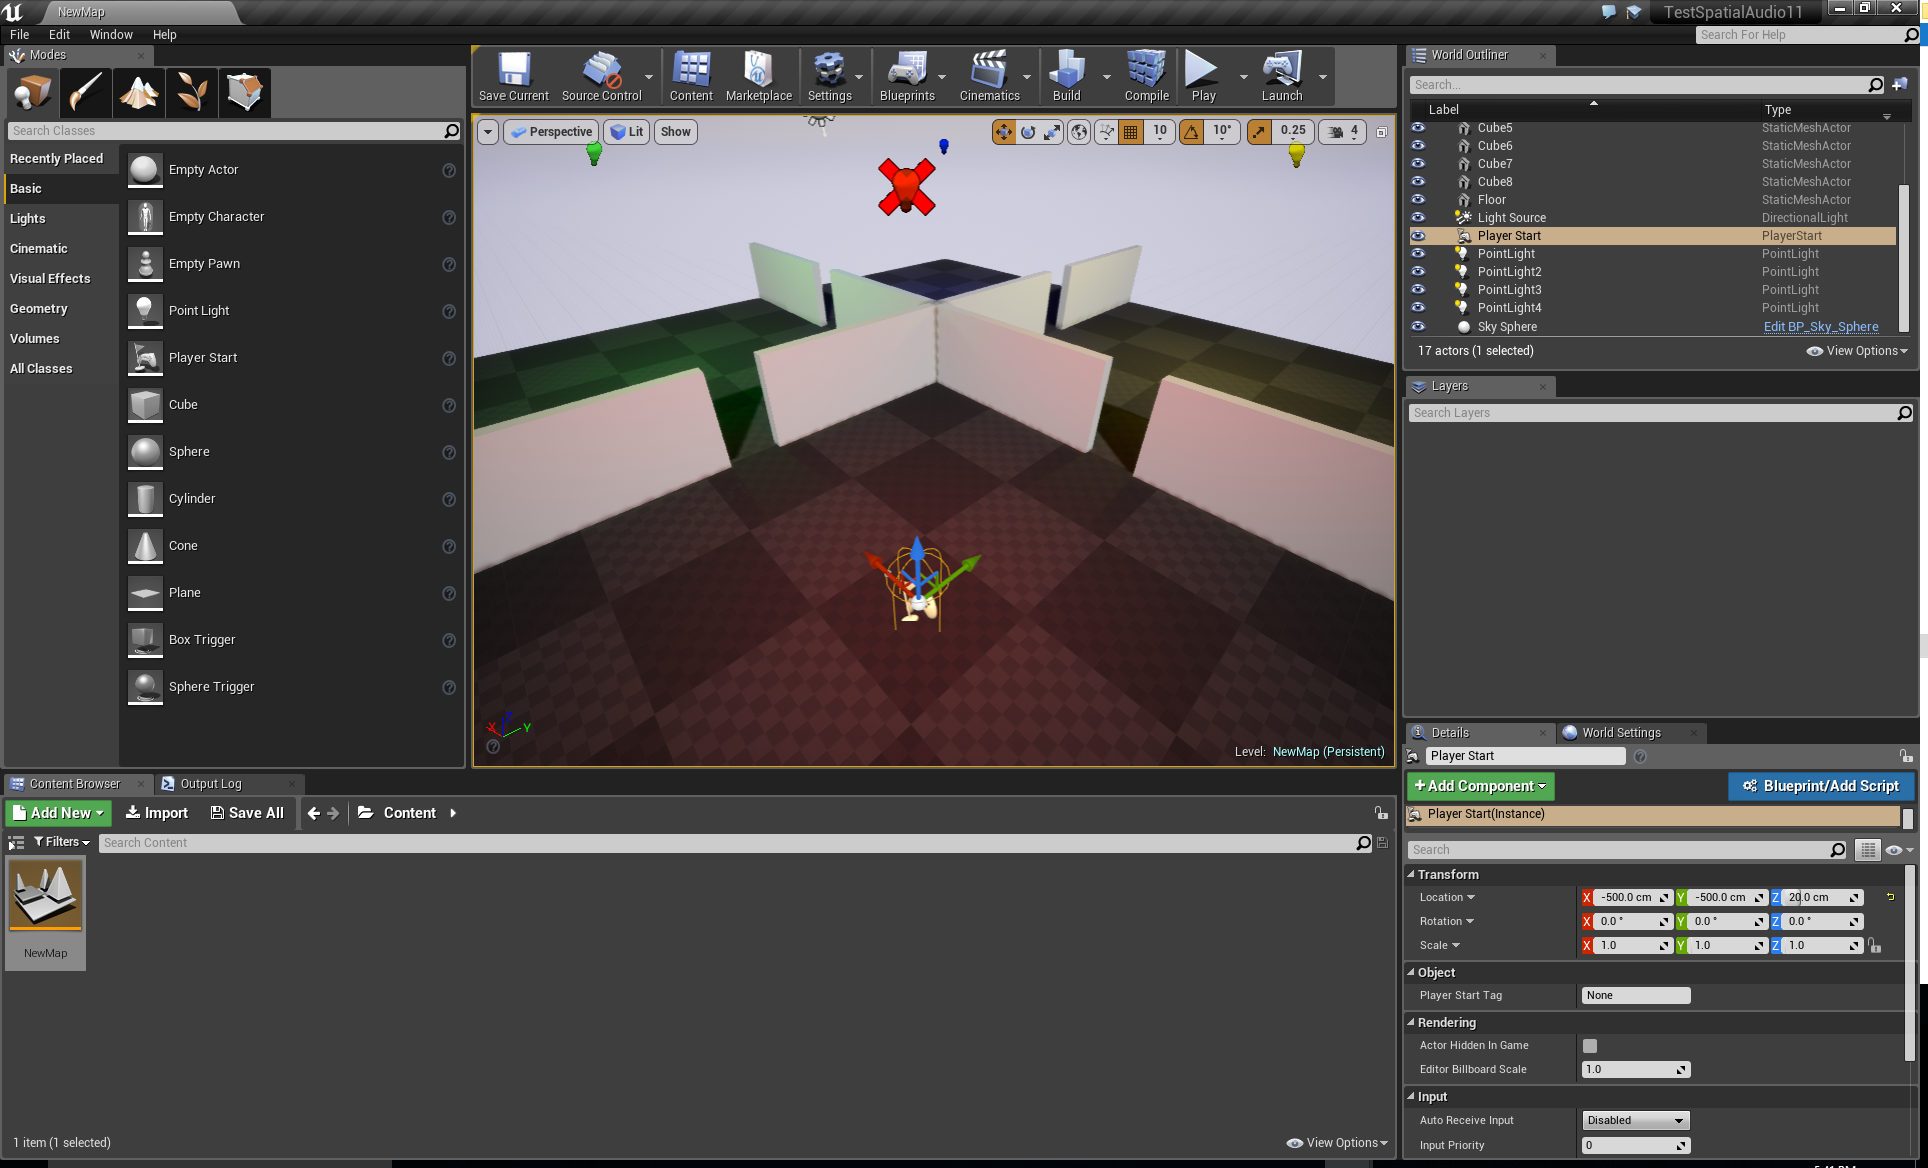
Build working environment
C - Add Reference Sound in Unreal
The first zone introduces a 3D positioned sound which should be panned and occluded/obstructed accordingly as the listener is moving around the source. Occlusion/obstruction occurs when the listener (namely, the main camera) moves outside the area and hides behind opaque components such as a wall, a floor, or a ceiling.
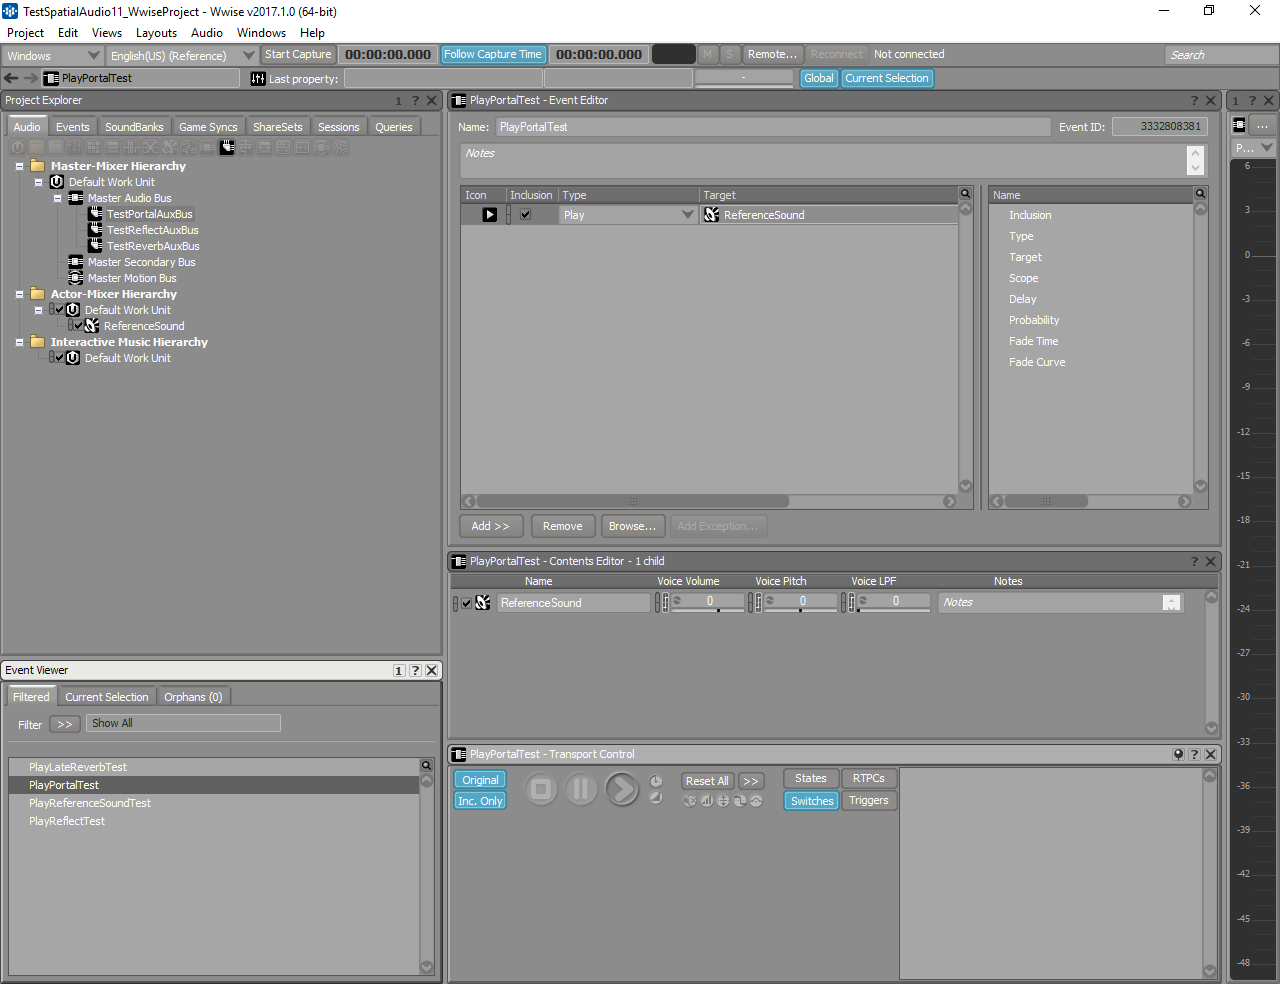
- In the Wwise project, create a new Sound SFX in the Default Work Unit of the Actor-Mixer Hierarchy, name it ReferenceSound, and import an impulse sound.
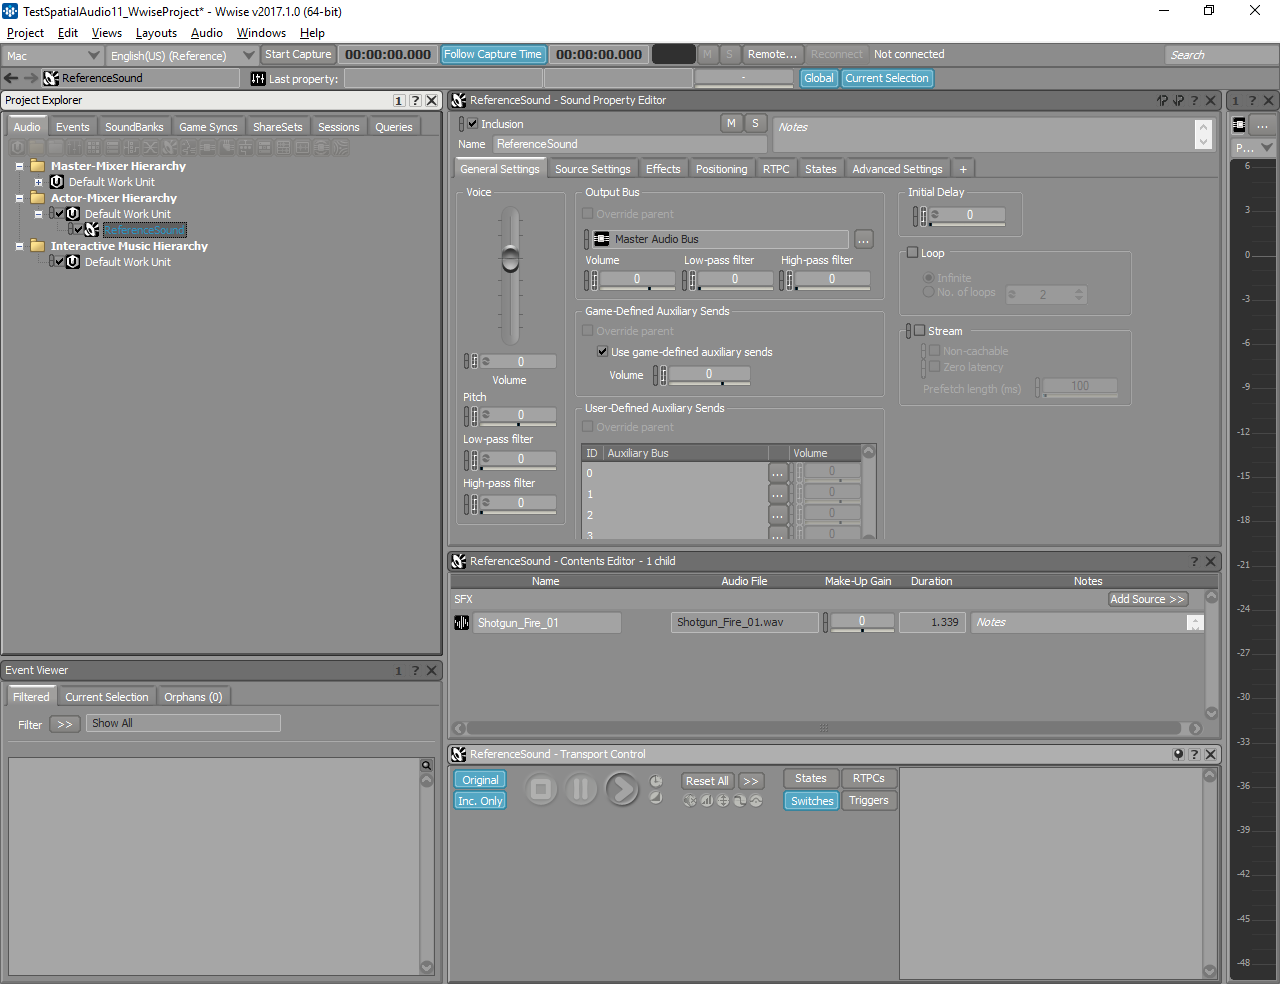
Create Sound SFX
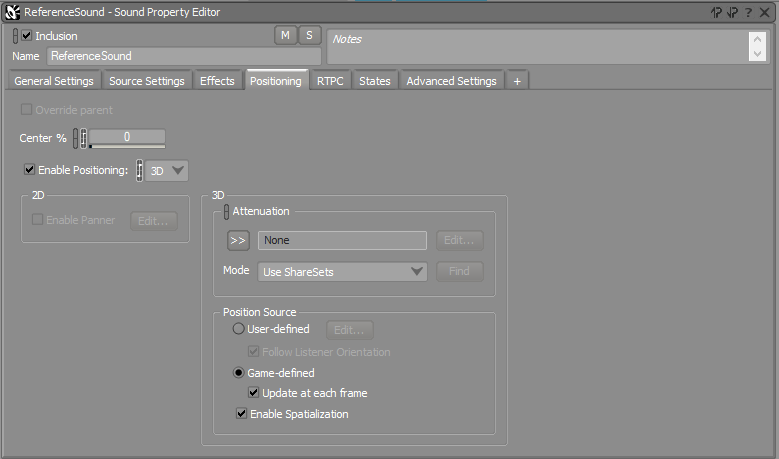
- Make sure to enable Use game-defined auxiliary sends with positioning enabled and type set to 3D.
Select positioning type
- Create the associated Event "PlayReferenceSoundTest", and drag and drop the "ReferenceSound" voice into it.
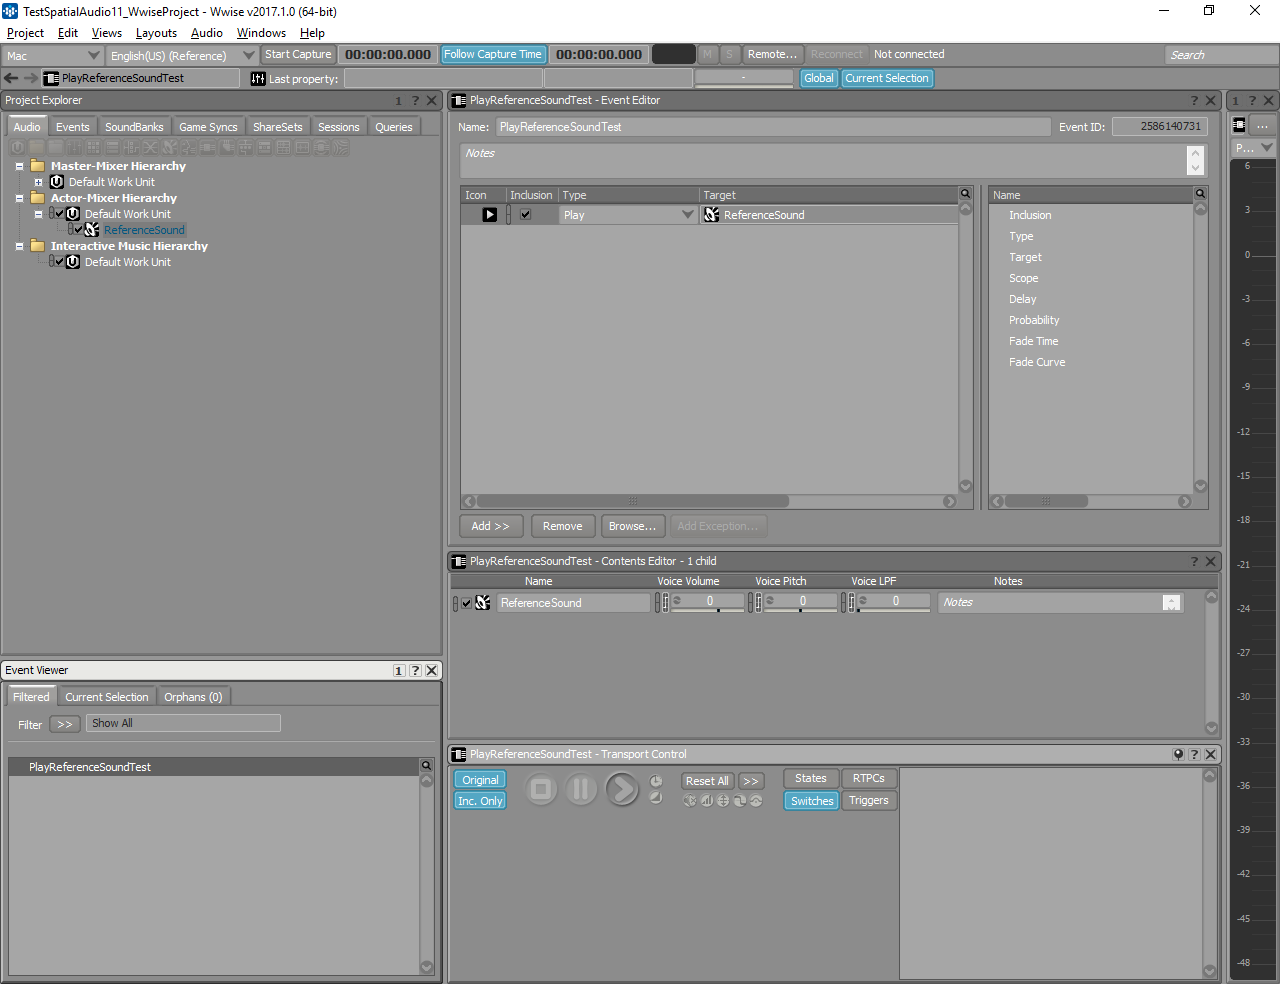
Create sound Event
- Save the project.
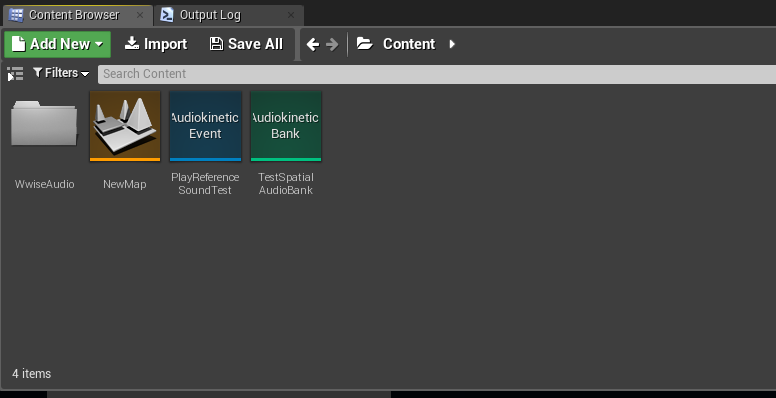
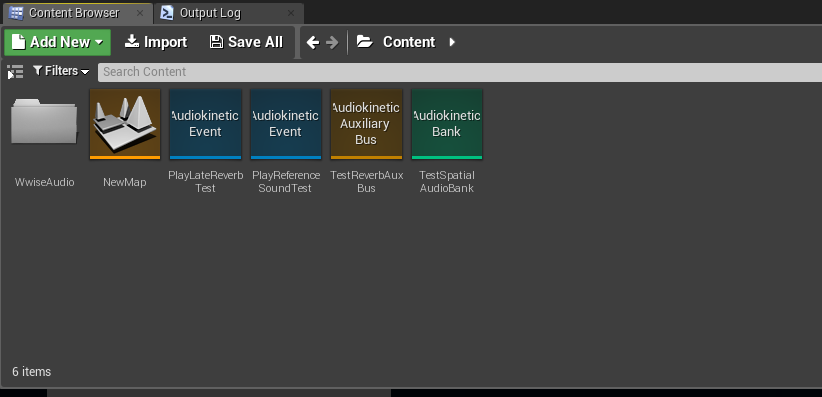
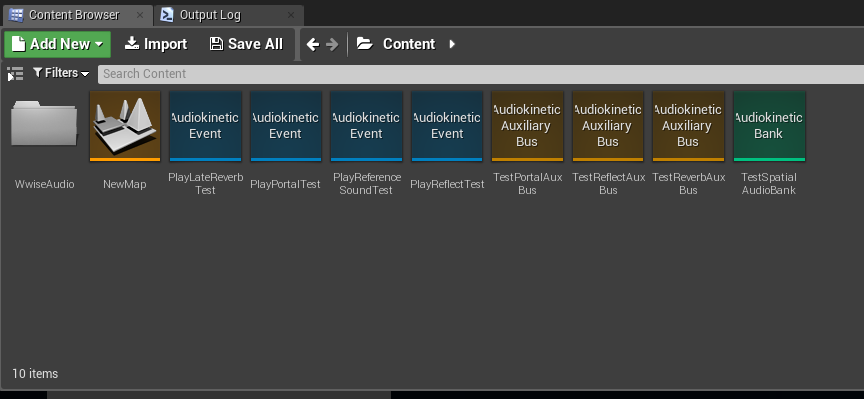
- In Unreal, open Window > Wwise Picker and drag the "PlayReferenceSoundTest" Event into the Content Browser.
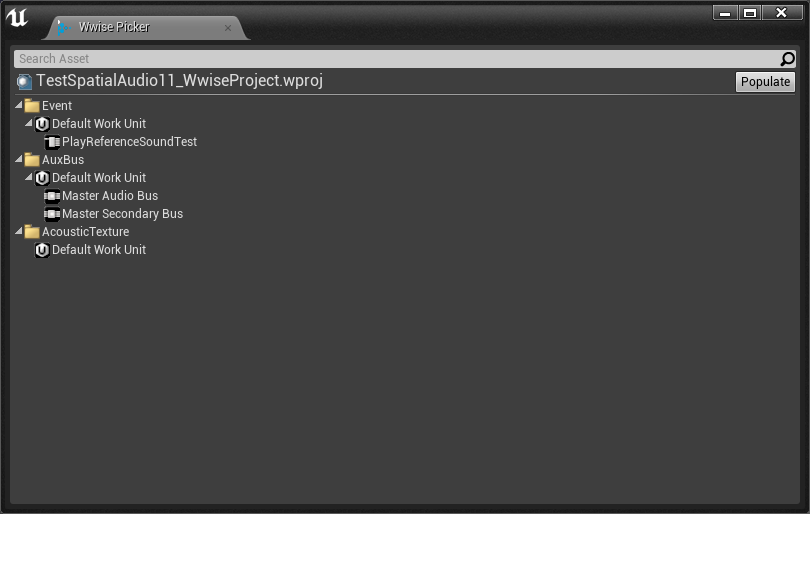
Drag from Wwise Picker to the Content Browser
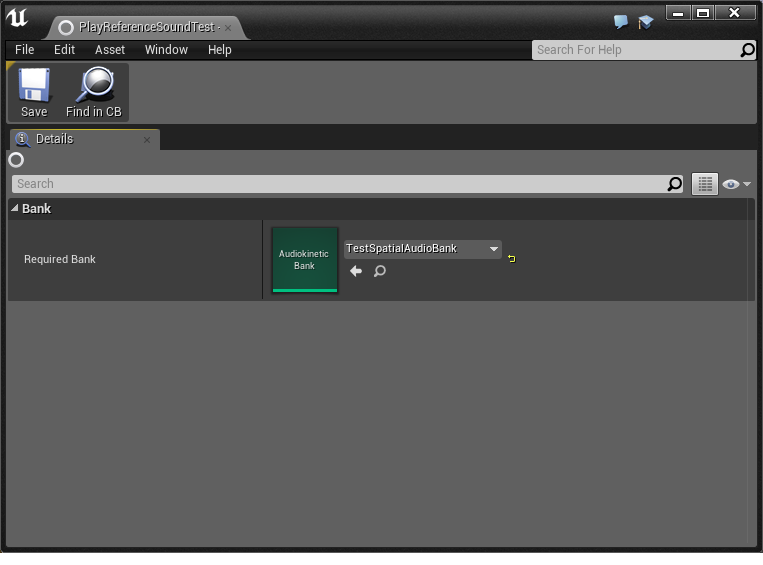
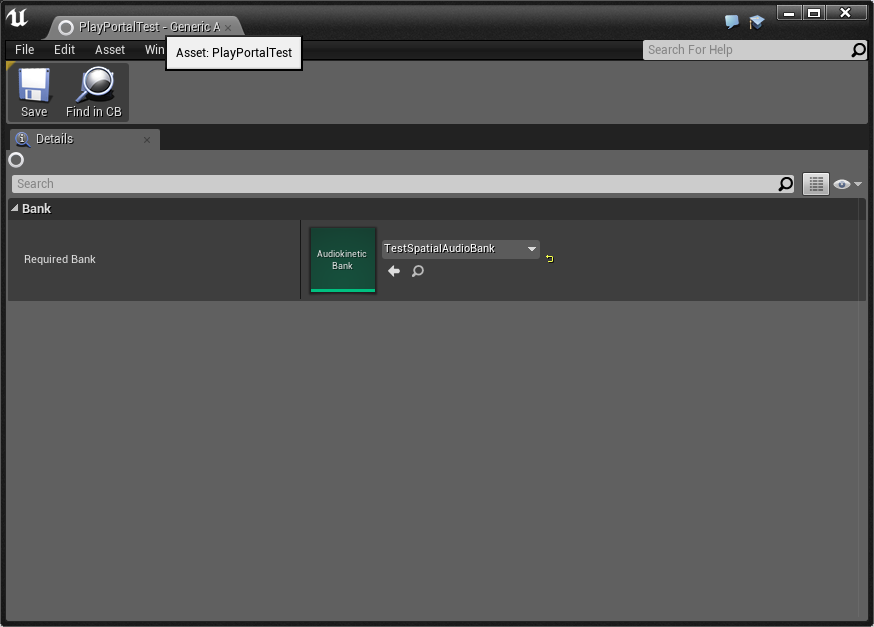
- Double click the "PlayReferenceSoundTest" and create a new SoundBank called "TestSpatialAudioBank" directly from the SoundBank list.
Create SoundBank
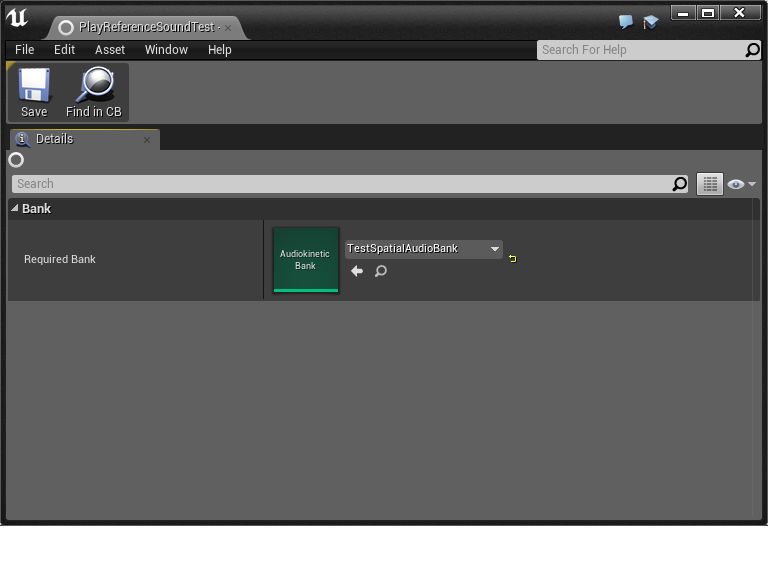
Select SoundBank
- Drag the "PlayReferenceSoundTest" Event into the scene to create a new
AkAmbientSound.- Set Location to (x=-500.0, y=-500.0, z=100.0).
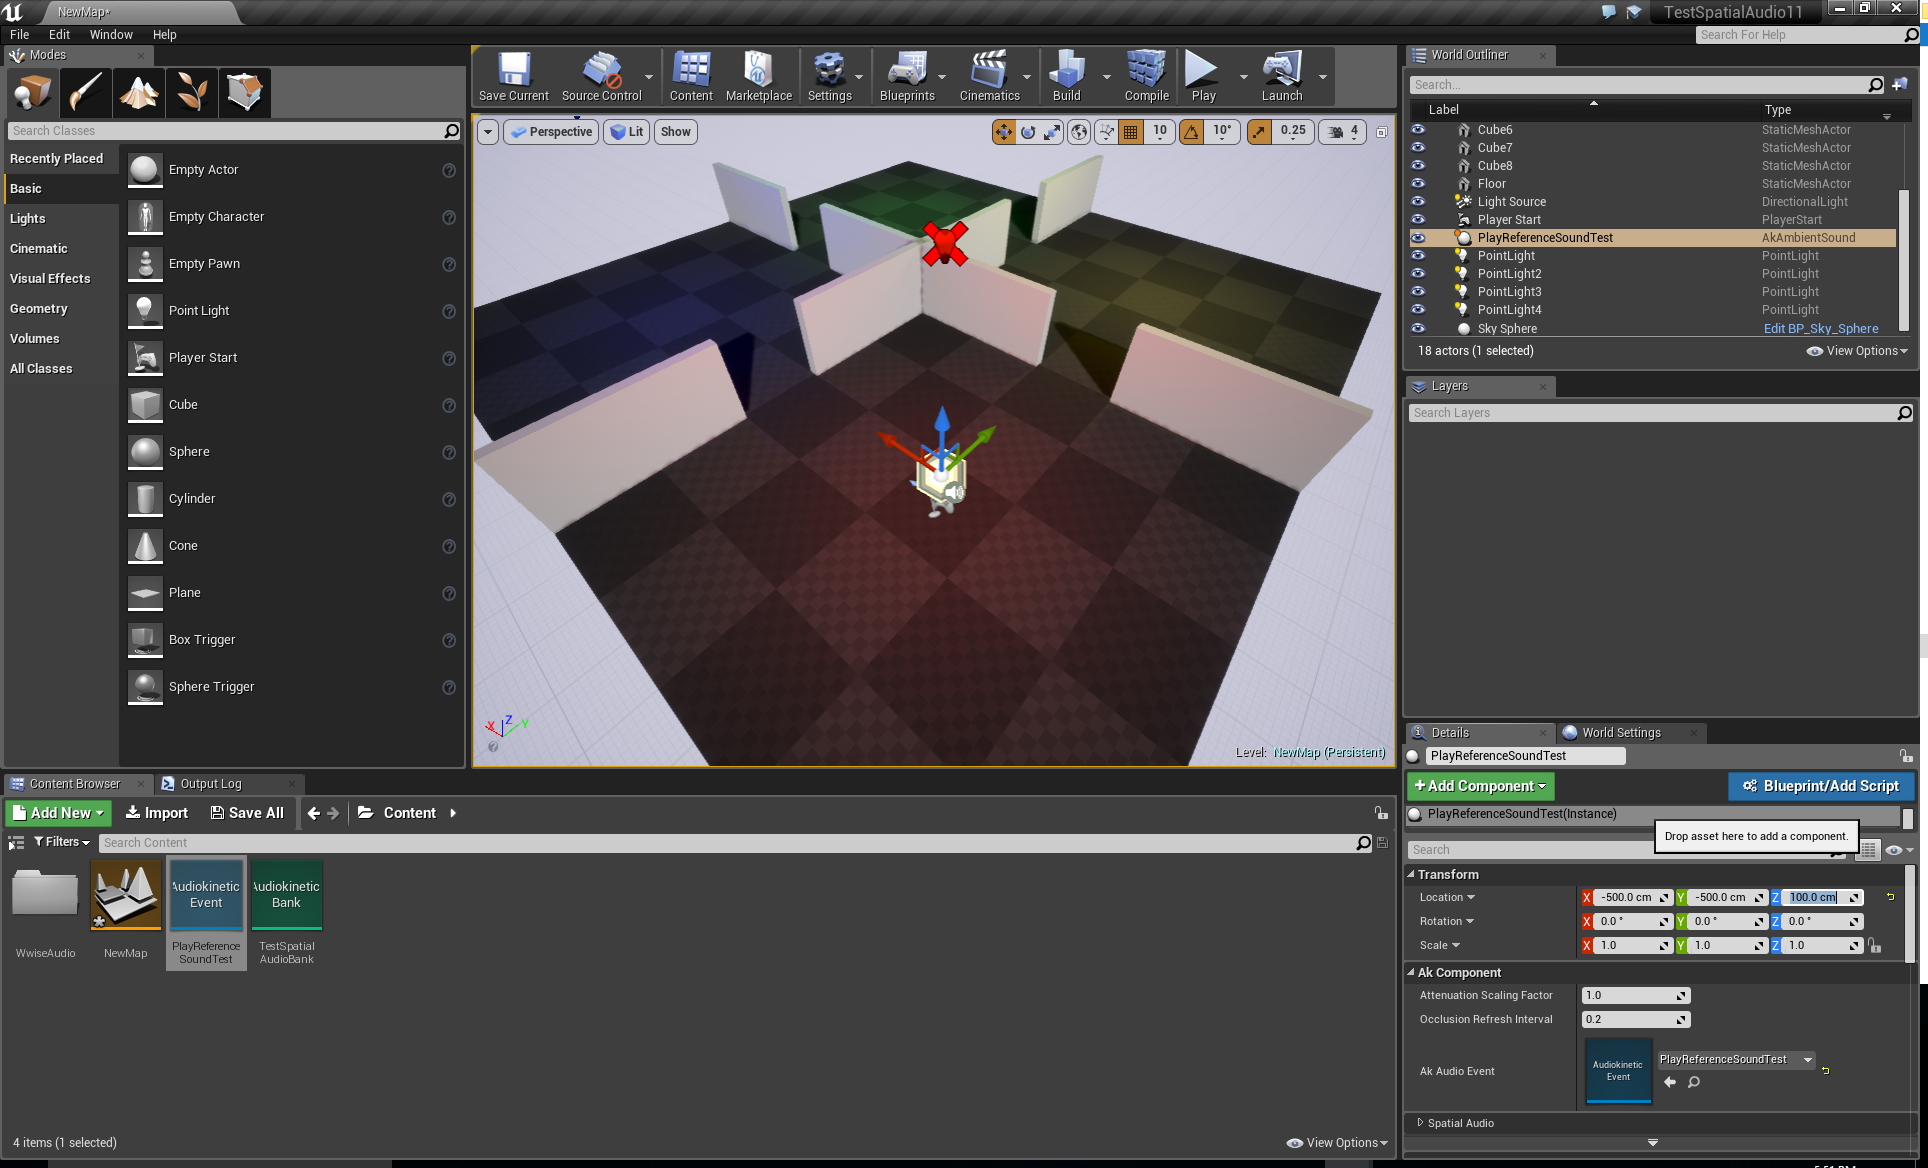
Create AkAmbientSound
- Set Location to (x=-500.0, y=-500.0, z=100.0).
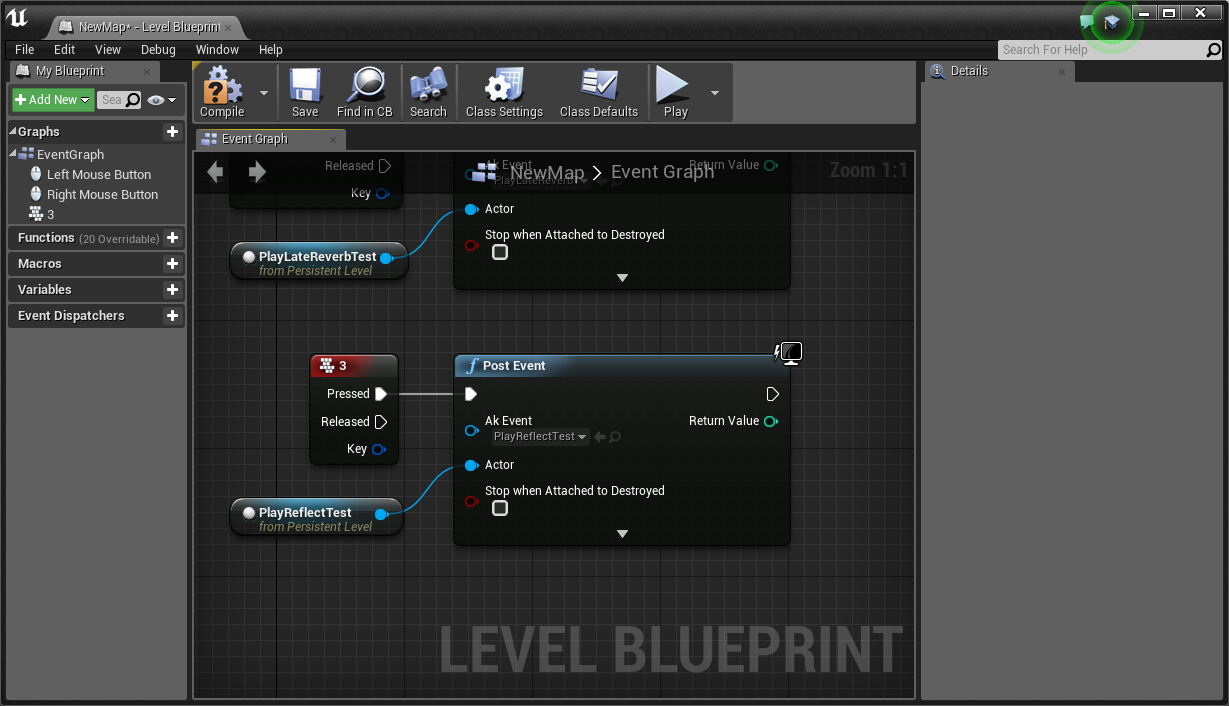
- Open Level Blueprint from the Blueprints menu and remove "Event BeginPlay" and "Event Tick".
- Drag the newly created "PlayReferenceSoundTest" item from the World Outliner into the blueprint.
- Right-click the blueprint background and search for "Left Mouse Button".
- Right-click the blueprint background again and search for "Post Event".
- Connect the Pressed outlet to the Post Event Exec and the "PlayReferenceSoundTest" component to the Actor inlet.
-
Select the "PlayReferenceSoundTest" AkEvent in the Post Event.
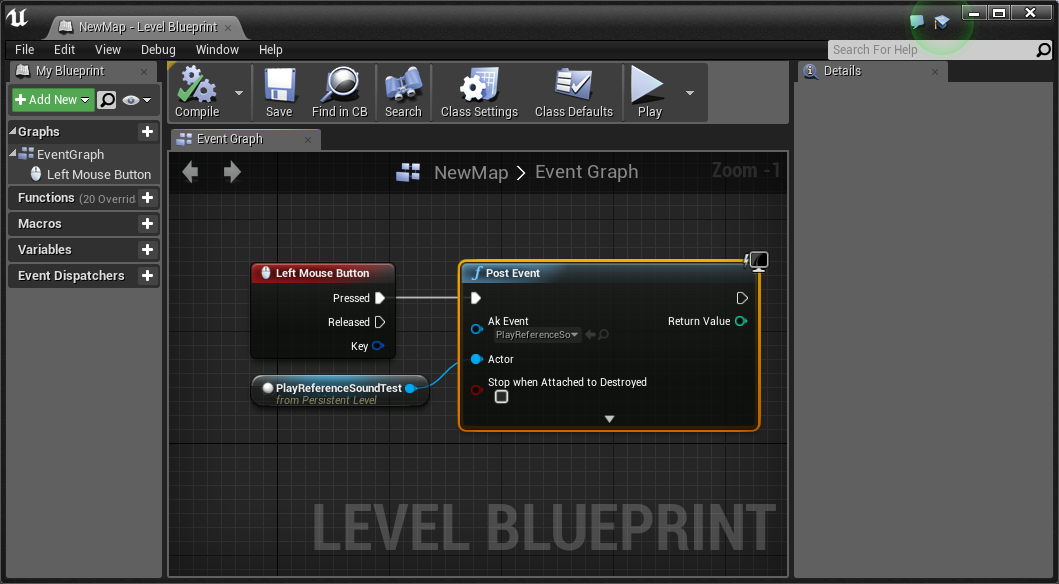
Add user input to trigger ambient sound
- In the upper menu, select Build > Generate SoundBanks.... to generate the SoundBanks for Windows.
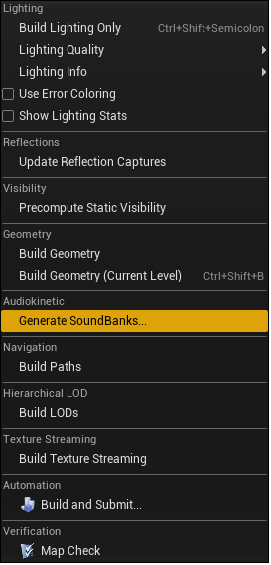
Generate SoundBanks from build menu
-
Make sure the banks are successfully generated in the Ouput Log.
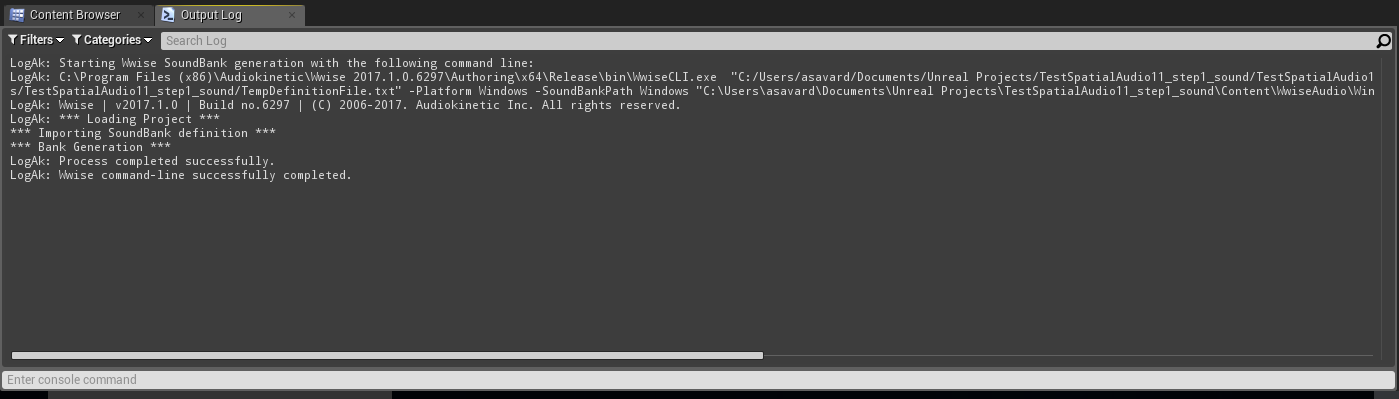
Output Log for SoundBank generation
- Start the scene. You should now hear the sound play, spatialized in 3D, when pressing the Left Mouse Button.
D - Add Late Reverb
The second area is a demonstration of using an AkSpatialAudioVolume to include a Late Reverb applied to an AkAmbientSound inside a contained area.
- In the Wwise project, create an Auxiliary Bus called "TestReverbAuxBus" under the Master Audio Bus.
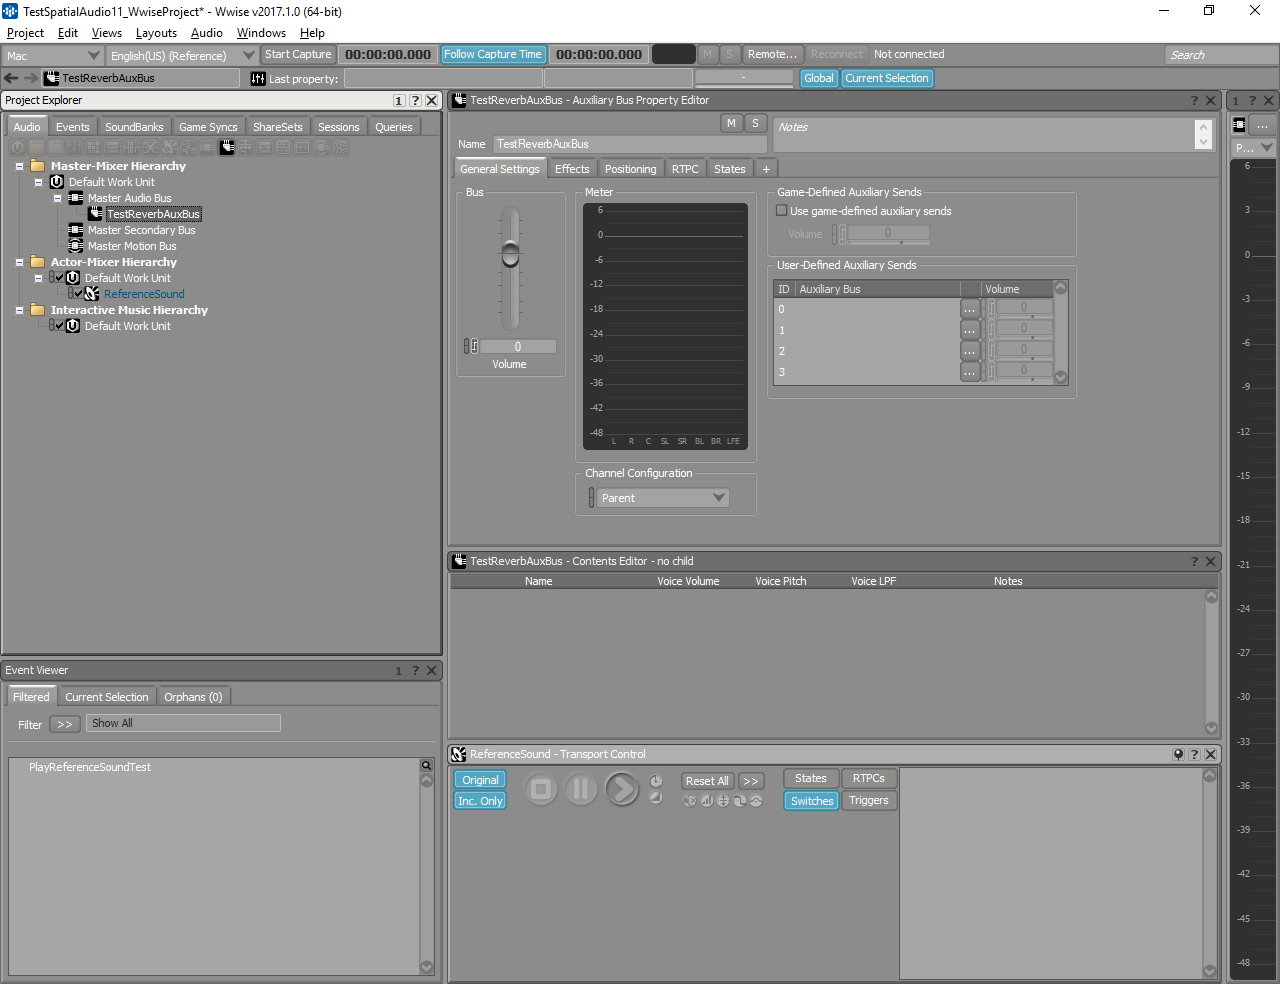
Create an Auxiliary Bus for reverb
- Add a Wwise RoomVerb Effect and use the Cathedrals > Holy predefined ShareSet.
- Create a second Event called "PlayLateReverbTest" and drag the "ReferenceSound" Sound SFX on it.

Create Play Event
- Save the project.
- In Unreal, drag an
AkSpatialAudioVolumevolume in the scene from the Volumes selection.- Set Location to (x=500.0, y=-500.0, z=100.0).
- Set Scale to (x=5.0, y=5.0, z=1.0).
Create new spatial audio volume
- Make sure only Enable Late Reverb is enabled and that Enable Surface Reflectors and Enable Room remain disabled for this
AkSpatialAudioVolume.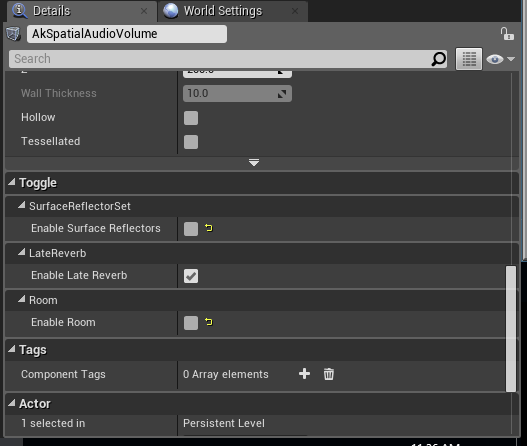
Select 'Enable Late Reverb'
- Drag the new TestReverbAuxBus and PlayLateReverbTest from the Wwise Picker into the Content Browser.
From Wwise Picker, drag Auxiliary Bus and Event
- Double-click the PlayLateReverbTest and assign it to TestSpatialAudioBank.
Adding bus and Event to bank
- Select the new AkSpatialAudioVolume and set the aux bus to TestReverbAuxBus in the Late Reverb section
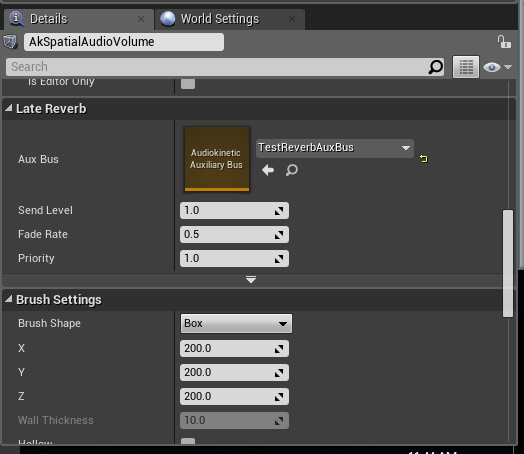
Select late reverb aux bus
- Drag the "PlayLateReverbTest" Event into the scene to create an
AkAmbientSound.- Set Location to (x=500.0, y=-500.0, z=100.0).
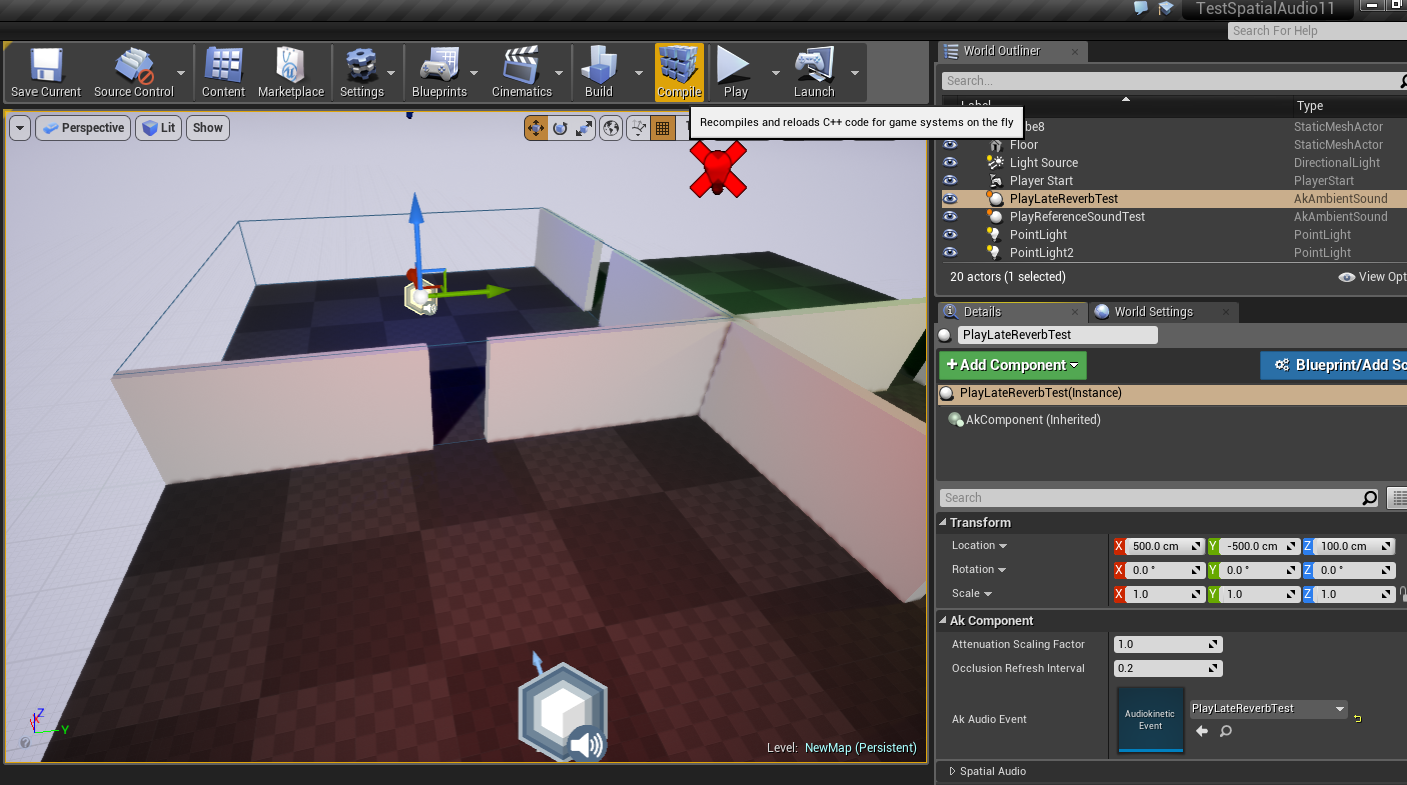
Add Event into the scene
- Set Location to (x=500.0, y=-500.0, z=100.0).
- Reproduce steps C-11 to C-13 for PlayLateReverbTest to trigger the sound. (You can map a keyboard key instead of a mouse button.)
- Regenerate the SoundBanks.
- Start the scene and go inside the volume. Triggering PlayReferenceSoundTest should result in a sound with reverb applied on it.
Note: If Enable Room is checked for the AkSpatialAudioVolume, the Auxiliary Bus containing the reverb must have 3D positioning enabled as well.
E - Add Surface Reflector
The third area demonstrates surface reflectors that are used to simulate the early reflection implied by the propagation of sound in an acoustic environment. The wave propagation is modeled using the image-source method which derives from the game geometry the appropriate time delay (distance), amplitude, and filter parameters in order to recreate a realistic acoustic environment. Real time computation evaluates the different paths acoustic waves take to reach the relative position of listeners in reference to sound emitters. The resulting effect provides a strong sensation of space of the acoustic environment. One can actually see the reflection through the Wwise Reflect Effect Editor, which displays a distance/amplitude representation of each reflection.
- In Wwise, create a third Event called "PlayReflectTest" and drag the "ReferenceSound" Sound SFX on it.
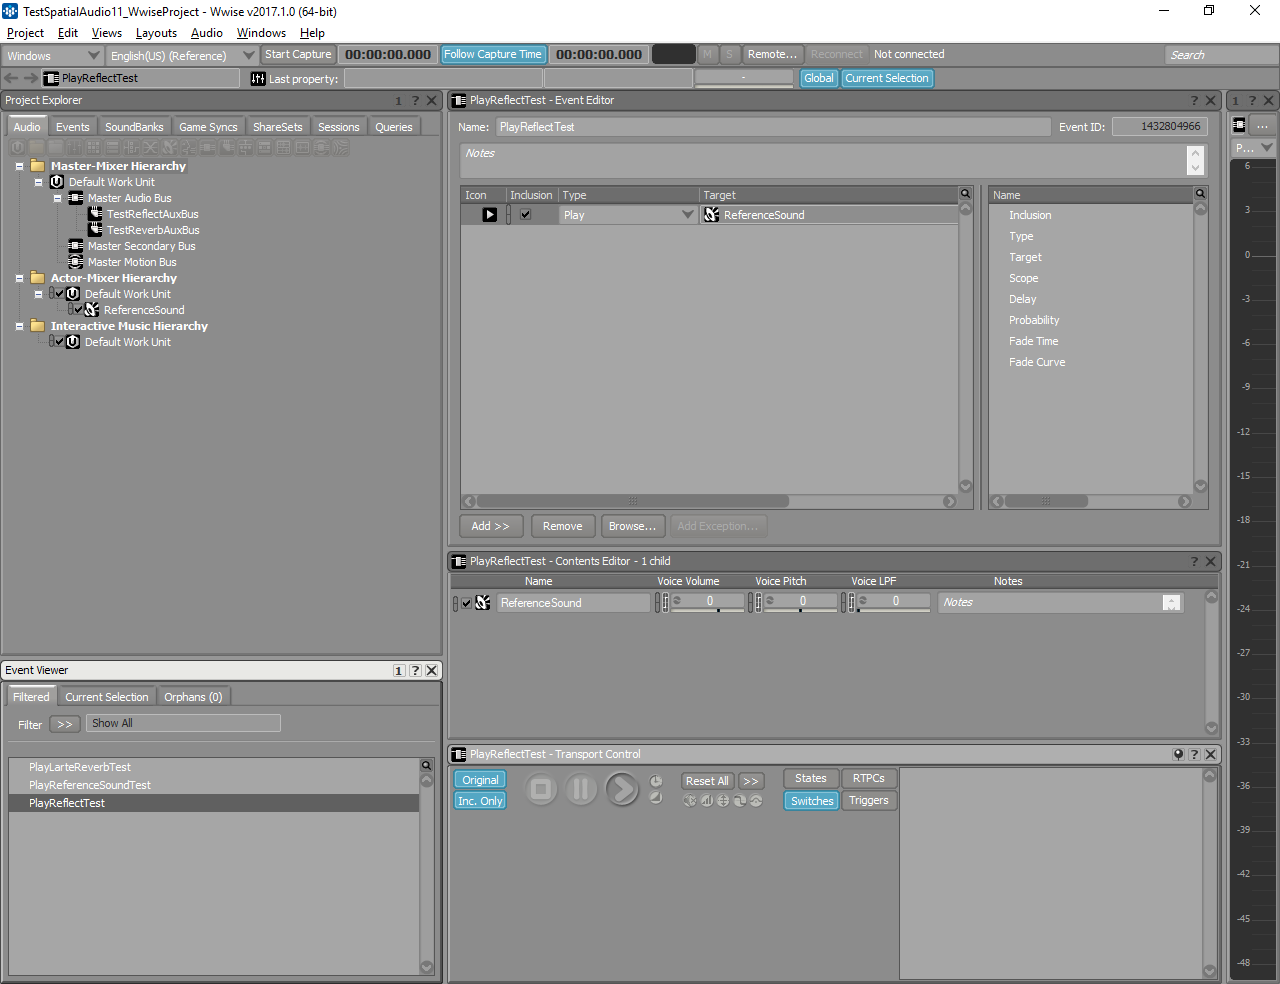
Create new Event in Wwise
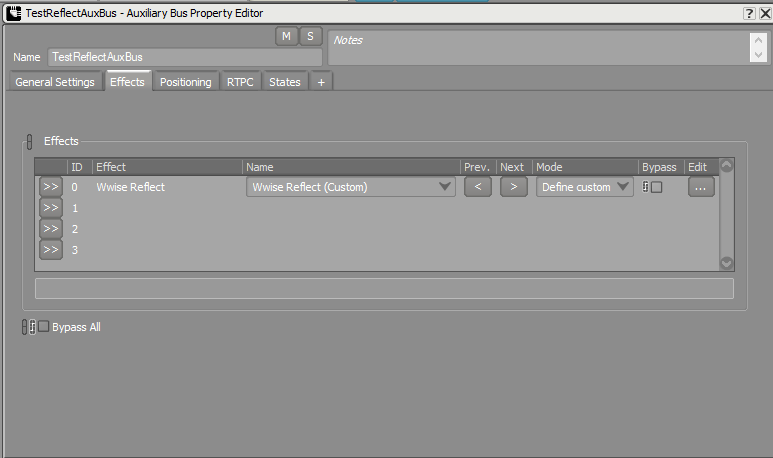
- Create an aux bus Called "TestReflectAuxBus" on the Master Audio Bus and put a Reflect plug-in on it.
Create new Event in Wwise
- Make sure to select Use game-defined auxiliary sends and enable 2D positioning for this bus.
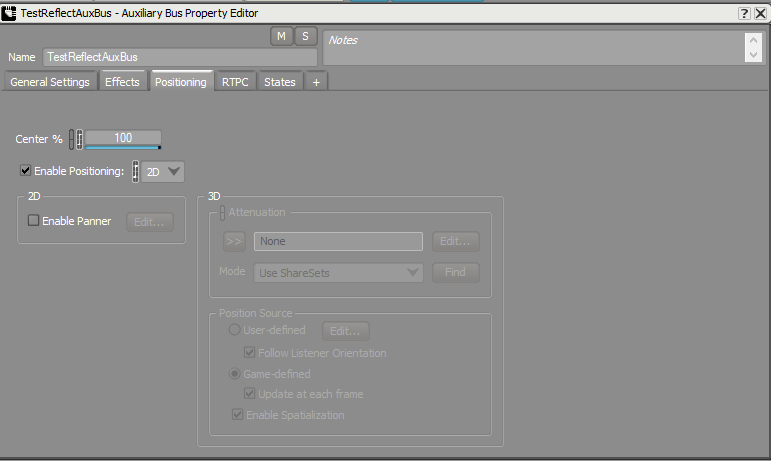
Enable 2D positioning for Auxiliary Bus
- Set Reflect's Max Distance to 10,000 and Speed of Sound to 34,500.
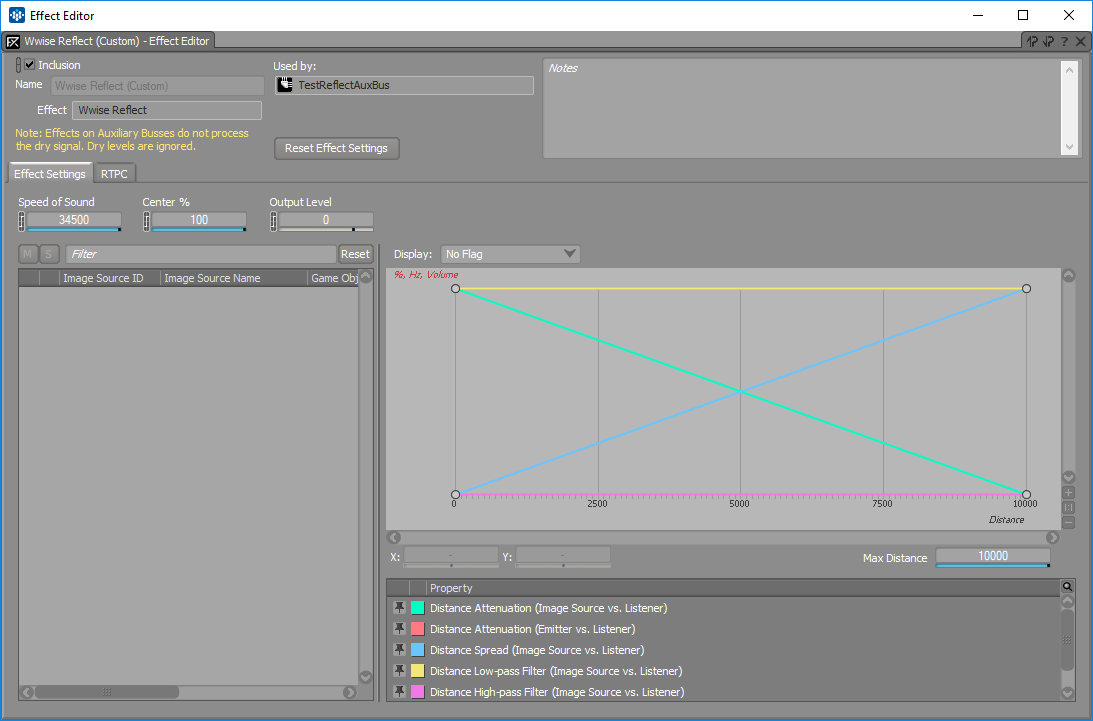
Set Reflect Speed of Sound and Max Distance
- Save Project
- In Unreal, drag and drop the PlayReflectTest and TestReflectAuxBus from the Wwise Picker into the Content Browser
- Double-click the PlayReflectTest Event and assign it to the TestSpatialAudioBank.
- Drag and Drop the PlayReflectTest into the scene to create an
AkAmbientSound:- Set Location to (x=500.0, y=500.0, z=100.0).
- Drag n drop a AkSpatialAudioVolume into the scene
- Set Location to (x=500.0, y=500.0, z=100.0).
- Set relative scale to (x=5.0, y=5.0, z=1.0).
- Make sure that "Enable Surface Reflectors" is enabled, and that "Enable Late Reverb" and "Enable Room" remain disabled for this
AkSpatialAudioVolume.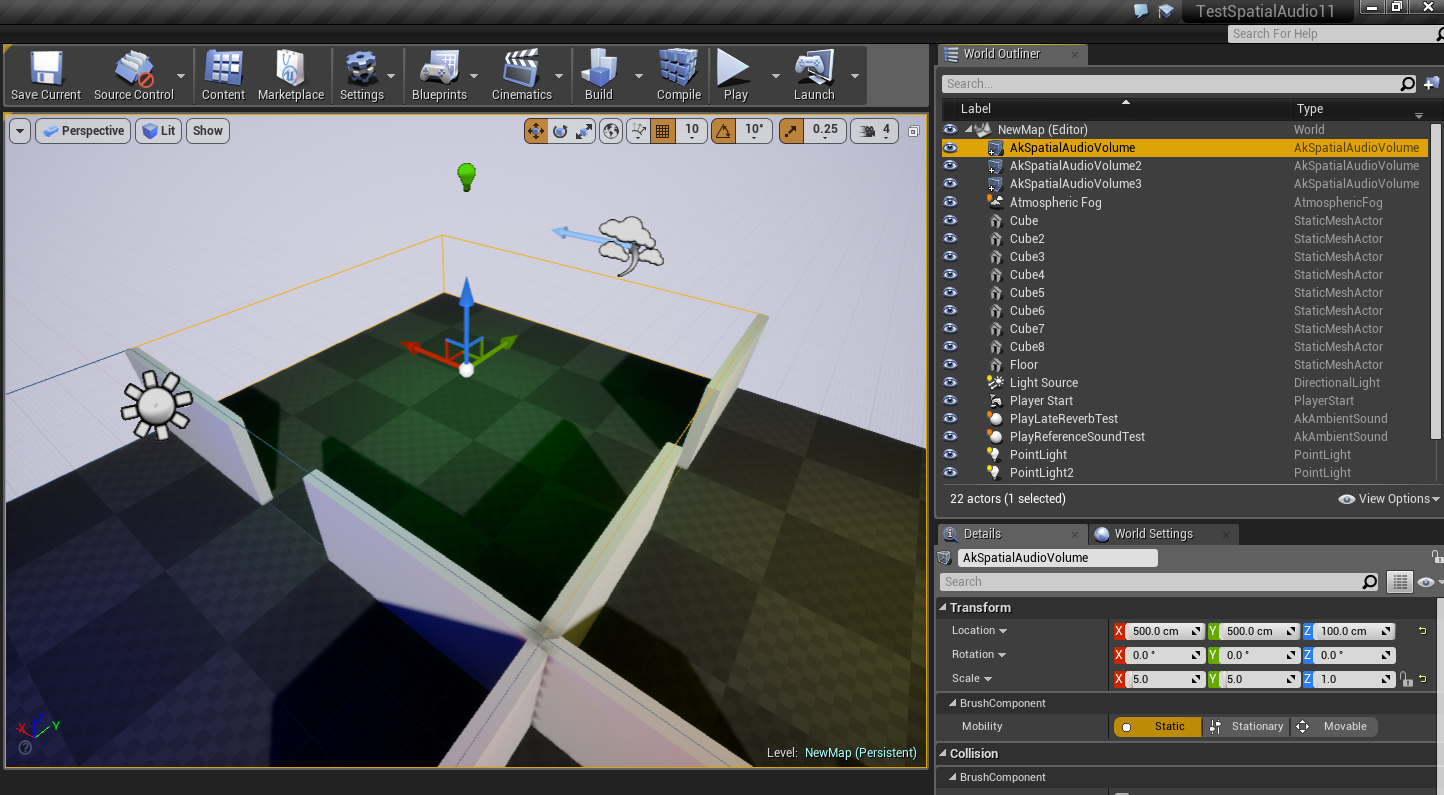
Add spatial audio volume to scene
- The PlayReflectTest
AkAmbientSoundshould be inside theAkSpatialAudioVolume. - Select the PlayReflectTest
AkAmbientSound, go to the Spatial Audio option and set "Early Reflection Aux bus" to "TestReflectAuxBus". - You can also enable Debug Draw and display 1st order reflections for this
AkAmbientSound(in Ak Component > Spatial Audio > Debug Draw).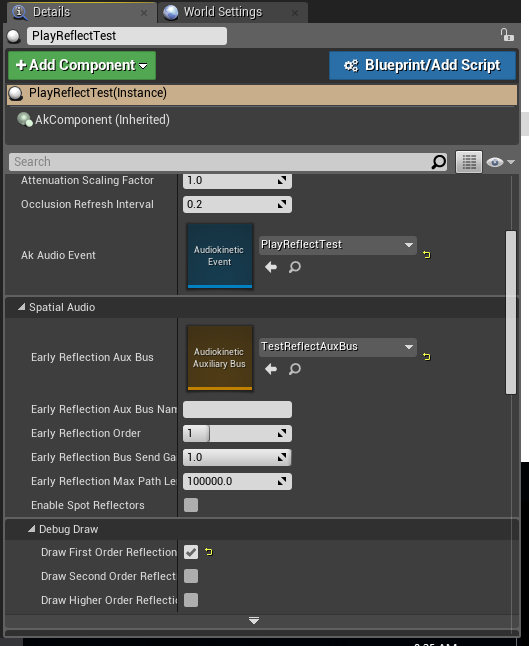
Debug draw option for reflections
- Reproduce steps C-11 to C-15 for PlayReflectTest to trigger the sound. (You can map a keyboard key, instead of a mouse button.)
User input to trigger the sound
- Regenerate the SoundBanks.
- Start the scene and go inside the volume. You should see reflections being drawn and your sound being routed to an aux bus that uses the Reflect plug-in when triggering
PlayReflectTest.
F - Add Rooms and Portals
In a realistic acoustic environment, portals (such as windows or any other opening) will act as new sources for any listener outside the acoustic volume in which a sound is emitted. AkAcousticPortals are useful to model this situation using an Auxiliary Bus to route the audible content of a volume and expose it as a new 3 dimensional source in an adjacent acoustic space.
- In the Wwise project, create a new Auxiliary Bus called "TestPortalAuxBus".
- Make sure to select Use game-defined auxiliary sends and to enable 3D positioning.

Create new Auxiliary Bus with 3D positioning
- Add a Wwise RoomVerb Effect with Room_Medium parameters.
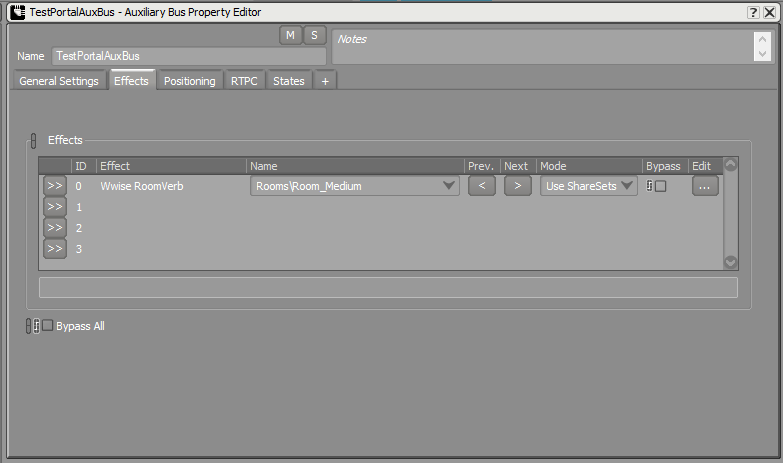
Add reverb to Auxiliary Bus
- Create a fourth Event called "PlayPortalTest" and drag the "ReferenceSound" Sound SFX on it.
Add new Play Event
- Save the project.
- In Unreal, drag and drop the PlayPortalTest from the Wwise Picker into the Content Browser.
- Drag and drop the TestPortalAuxBus into the Content Browser.
Add Event and Auxiliary Bus to the Content Browser
- Double click the "PlayPortalTest" Event and assign it to the TestSpatialAudioBank.
Select SoundBanks for the Event
- Add a new
AkSpatialAudioVolume.- Set Location to (x=-500.0, y=500.0, z=100.0).
- Set Absolute Scale to (x=5.0, y=5.0, z=1.0).
- Select the "TestPortalAuxBus" as an aux bus in the Late Reverb section.
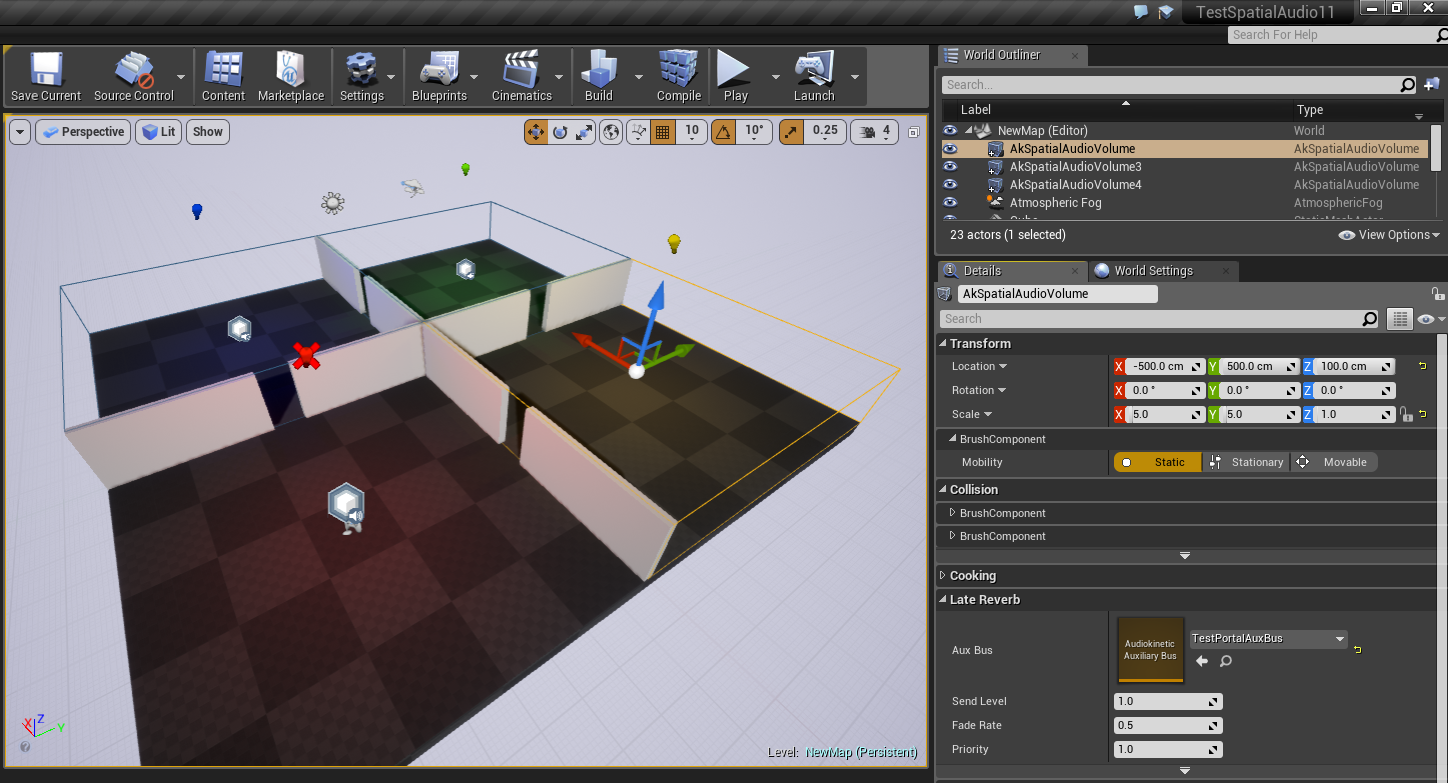
Add the spatial audio volume to scene and select late reverb auxiliary bus
- Make sure the Enable Late Reverb and Enable Room are both enabled and Enable Surface Reflectors remains disabled for this
AkSpatialAudioVolume.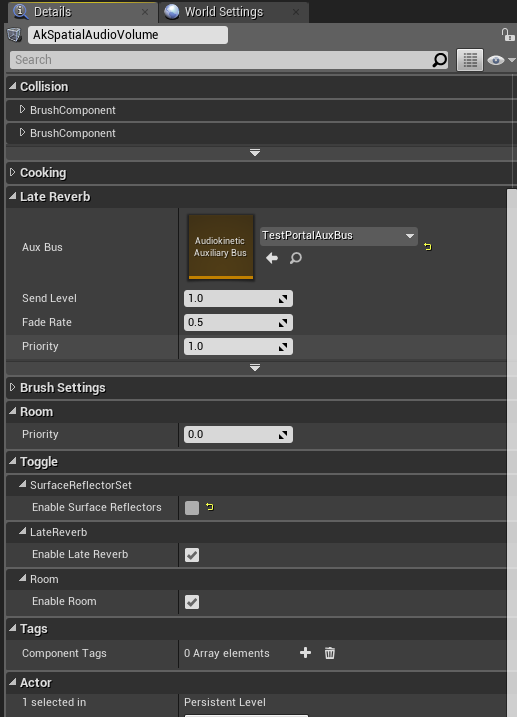
Make sure the room is enabled
- Add another
AkSpatialAudioVolume.- Set Location to (x=-500.0, y=-500.0, z=100.0).
- Set Absolute Scale to (x=5.0, y=5.0, z=1.0).
- Make sure Enable Late Reverb and Enable Room are both enabled and Enable Surface Reflectors remains disabled for this
AkSpatialAudioVolume.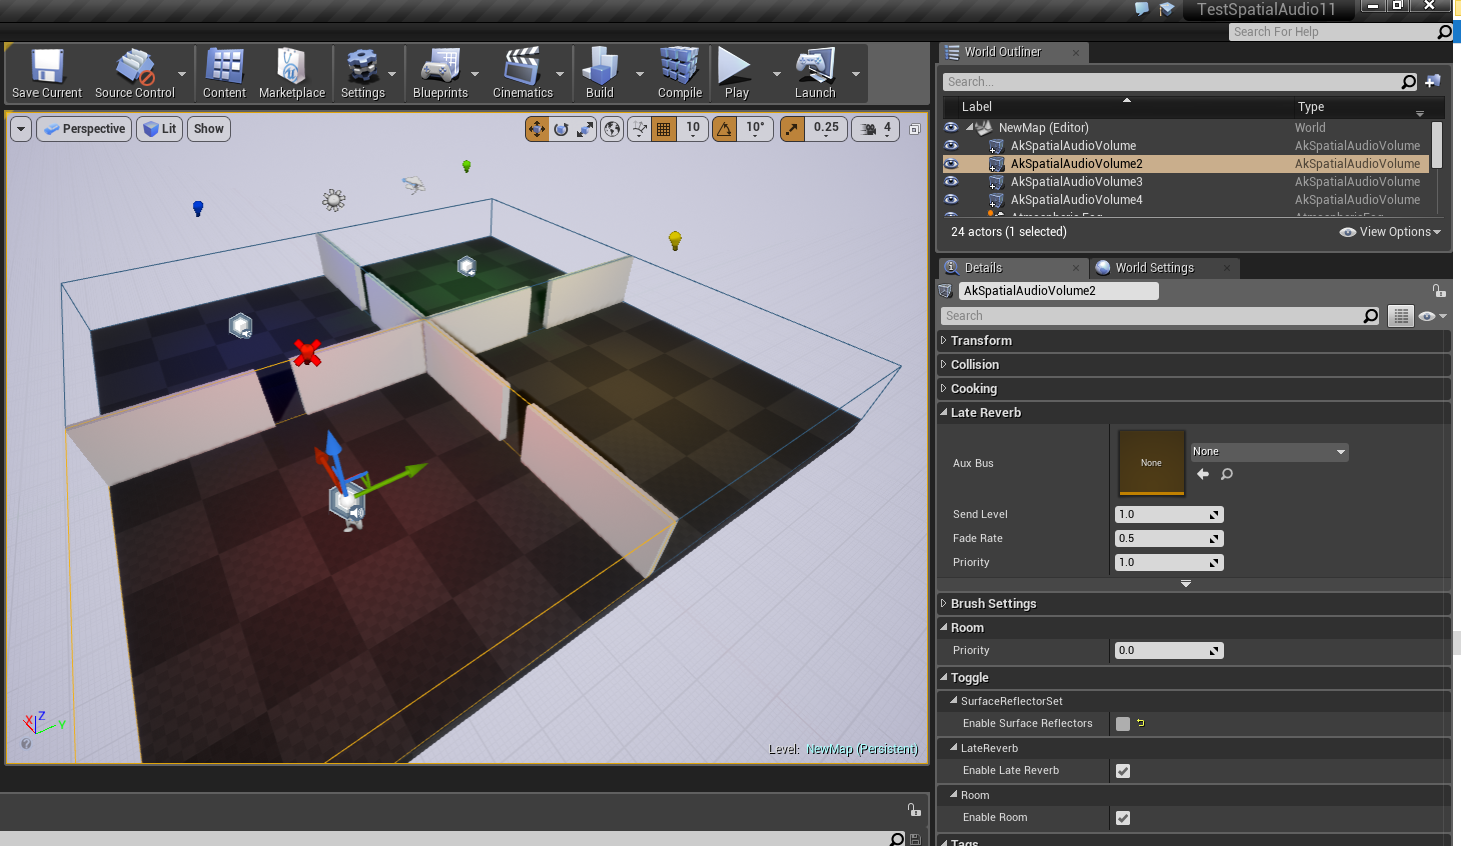
Add a second audio volume and enable room
- Add a new
AkAcousticPortal.- Set Location to (x=-500.0, y=0.0, z=100.0).
- Set Scale to (x=0.5, y=0.5, z=1.0).
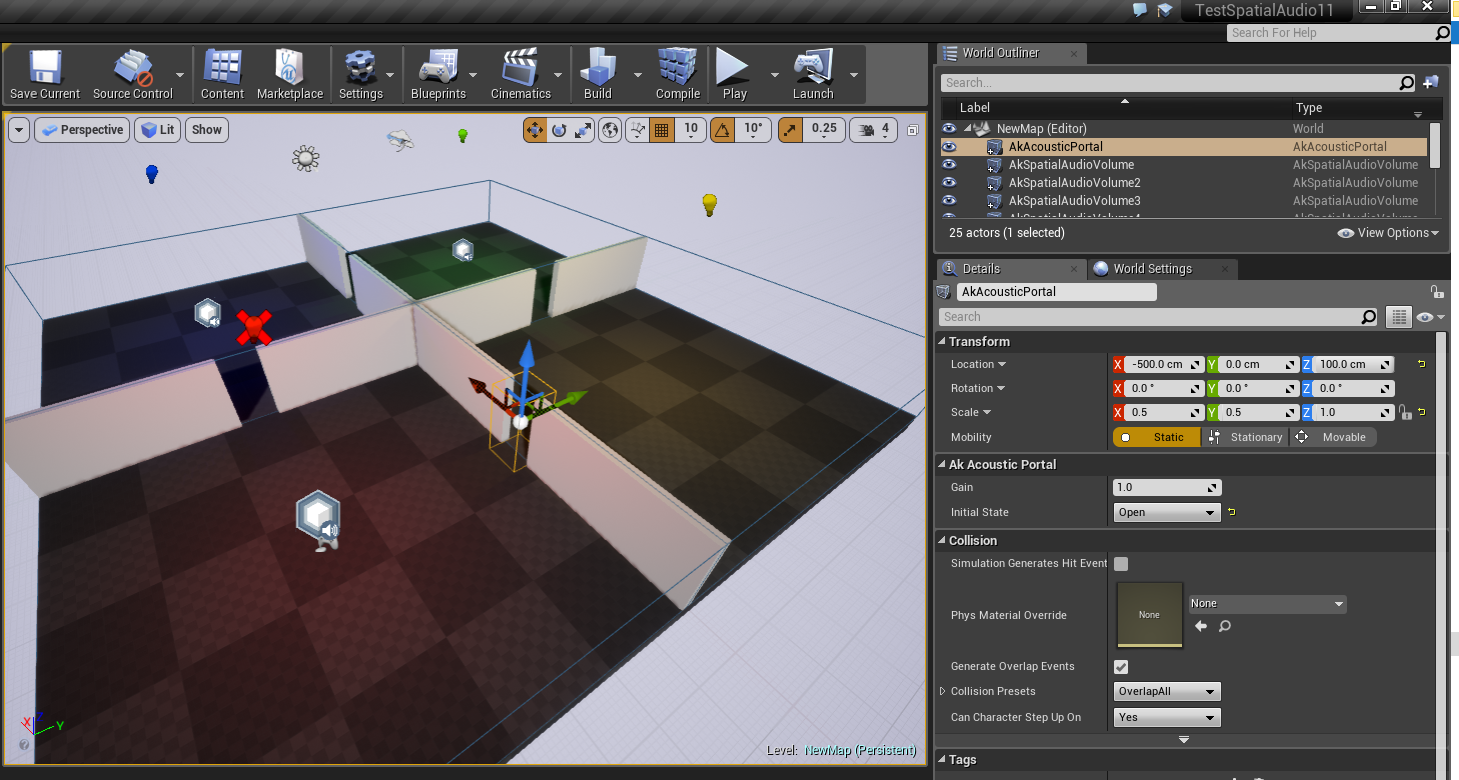
Drag a new acoustic portal into the scene
- Select the new Portal and set the initial state to Open in the "Ak Acoustic Portal" section.
- Also set the Acoustic Portal gain to 2.0 in the same section.
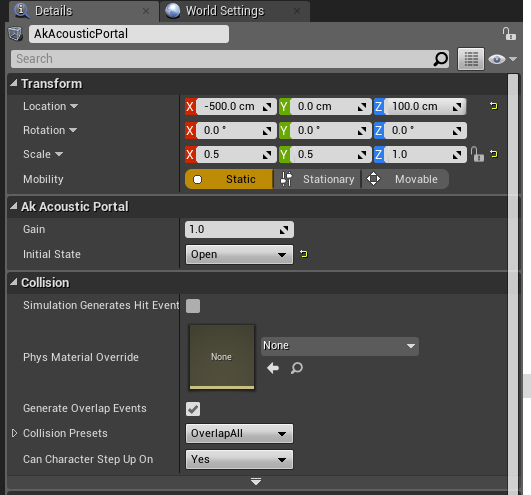
Make sure the portal is opened
- Drag and drop the PlayPortalTest into the scene.
- Set Location to (x=-500.0, y=500.0, z=100.0).
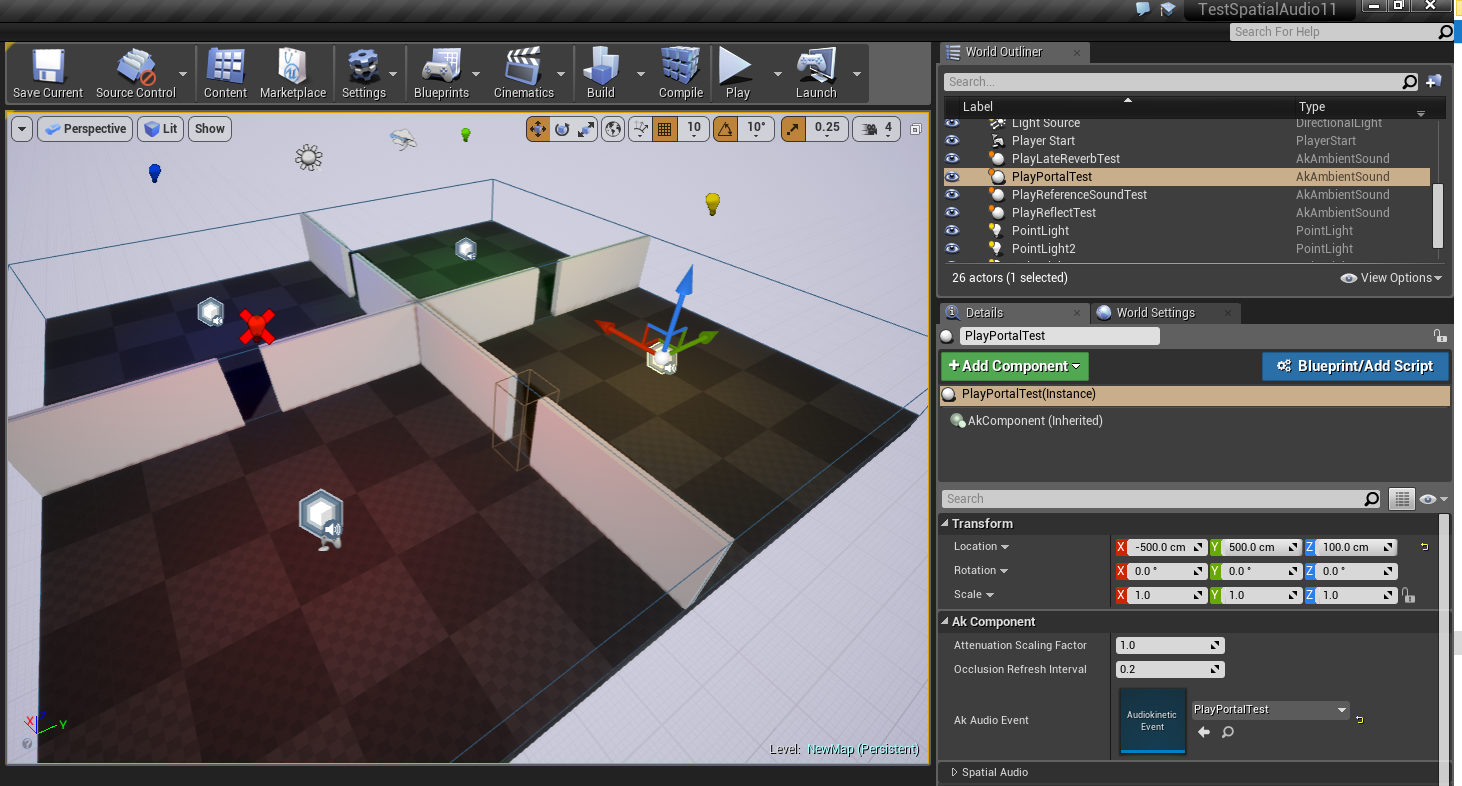
Drag new Event into the scene
- Set Location to (x=-500.0, y=500.0, z=100.0).
- Reproduce steps C-11 to C-13 for PlayPortalTest to trigger the sound. (You can map a keyboard key, instead of a mouse button.)
- Regenerate the SoundBanks for Windows.
- Start the scene and stay at the start location. You should hear the sound from the portal when triggering PlayPortalTest.
Note: When using portals, Enable Room must be checked for all AkSpatialAudioVolume using Late Reverb auxiliary send in order to restrain the reverb to that room only.
Note: If the world contains one or more spatial audio rooms, then the behavior of the occlusion/obstruction algorithm changes to utilize the additional information that spatial audio rooms provide. If the line-of-sight test between the emitter and listener fails:
- When the listener and emitter are in the same room, the Wwise obstruction filter (dry path only) is set.
- When the emitter and listener are in different rooms, the Wwise obstruction filter (both wet and dry path) is set.
- In the absence of spatial audio rooms, the algorithm assumes that all sounds that do not have a line of sight to the listener are occluded, and the Wwise occlusion filter (both wet and dry path) is set.
G - Add Spot Reflector
Spot reflectors are the last feature introduced in this tutorial and are mainly used to model singular acoustic reflections. They can be used to model distant virtual man-made or naturally created geographic features which create a singular distinctive acoustic echo. For example, mountains or large walls. A spot reflector can simply be dropped inside the environment for the engine to compute the appropriate acoustic delay between the emitter and the listener, based on the physical distance between their respective location and the point reflection.
- In the Wwise project, create a new Auxiliary Bus called "TestSpotReflectorAuxBus" and put a Reflect plug-in to it.
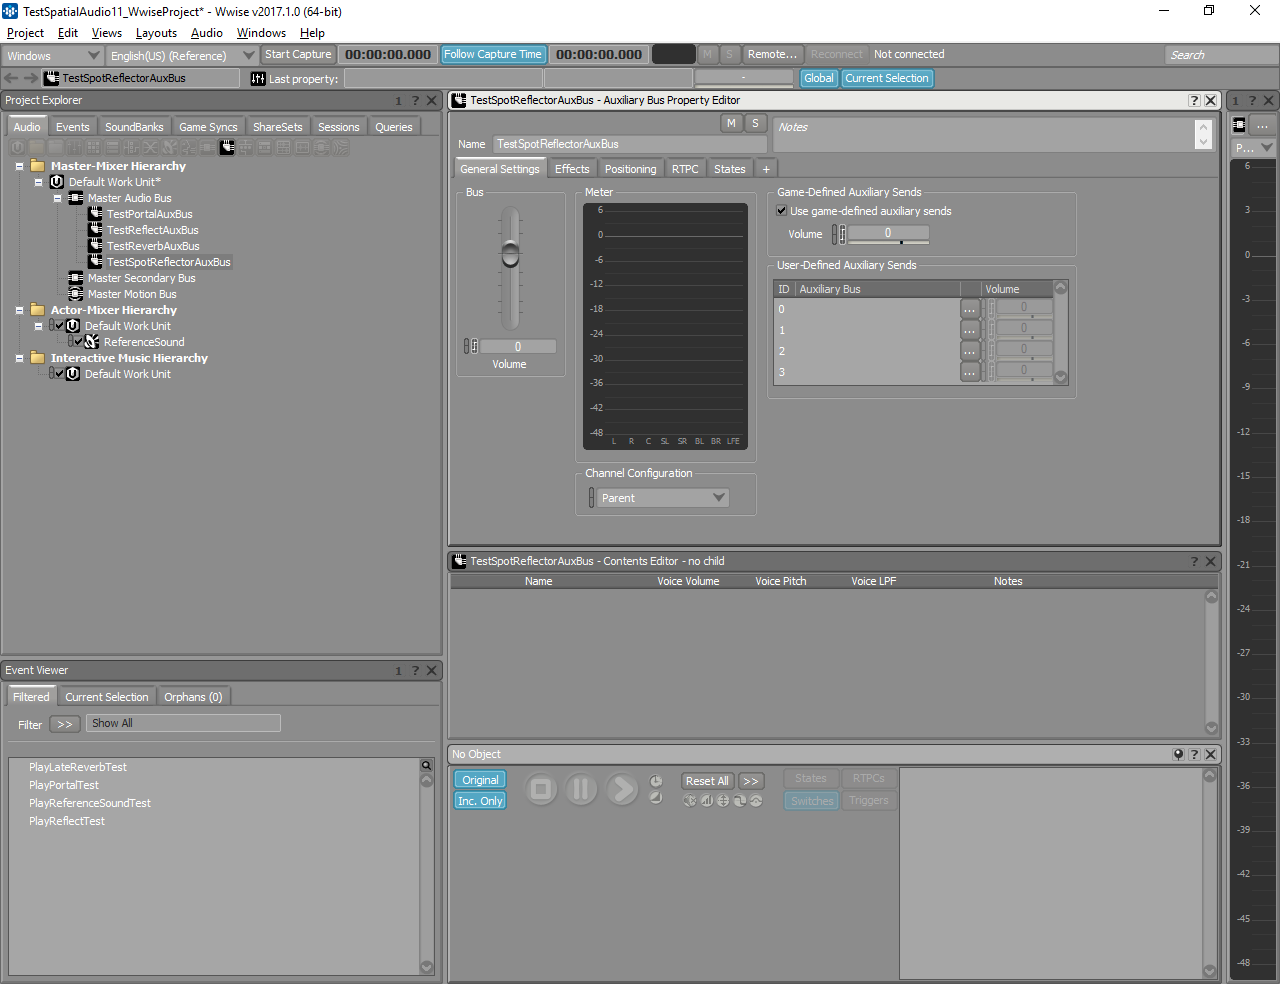
Add new Auxiliary Bus with Reflect
- Make sure to enable Use game-defined auxiliary sends and enable 2D positioning.
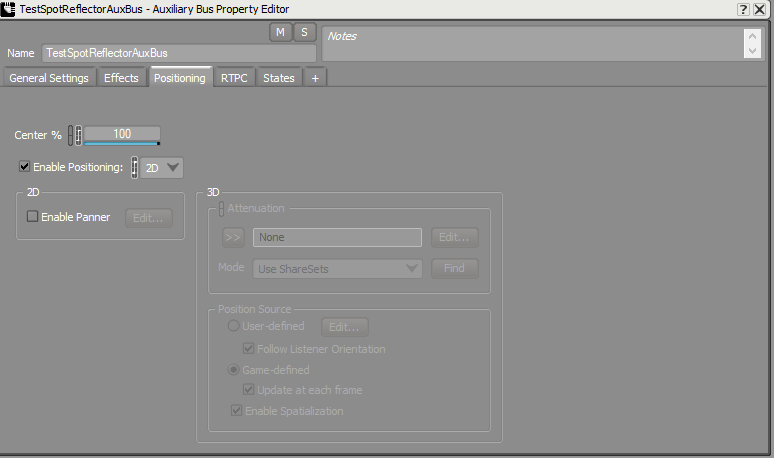
Make sure to enable 2D positioning
- Set Reflect's Max Distance to 10,000 and Speed of Sound to 34,500.
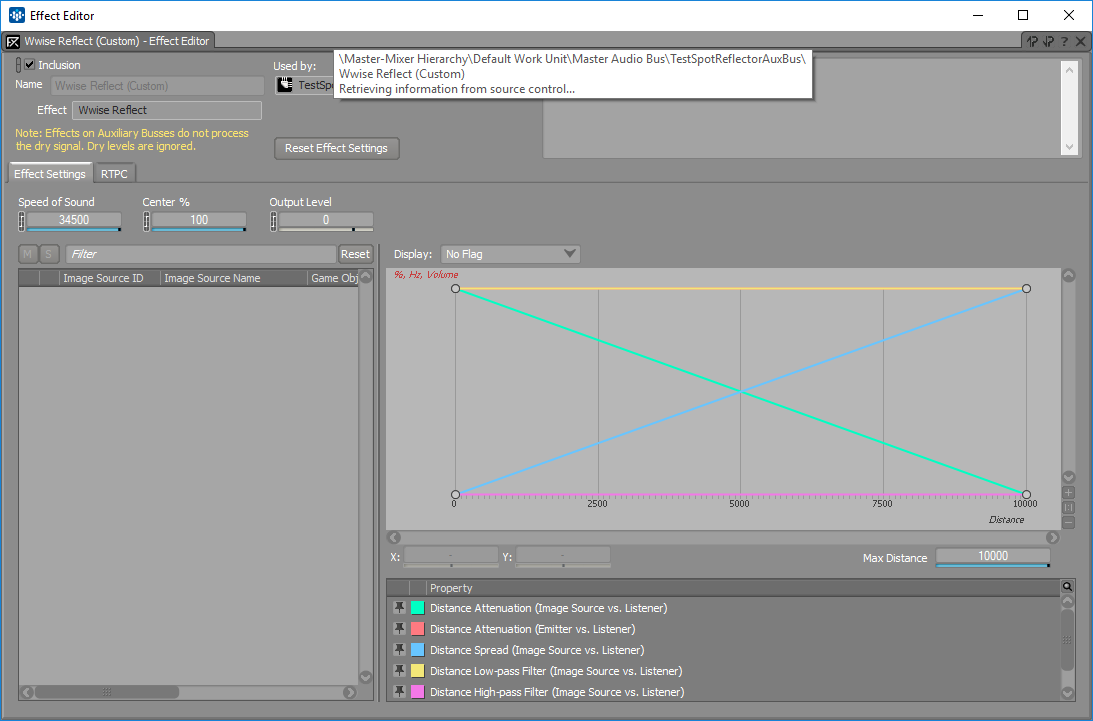
Make sure to set Reflect's Speed of Sound and Max Distance
- Save the project.
- In Unreal, from the Wwise Picker, drag and drop the TestSpotReflectorAuxBus into the Content Browser.
- Select the PlayReferenceSoundTest
AkAmbientSoundand set "Enable Spot Reflector" in the "Spatial Audio" section.
Enable spot reflector for Event
- Drag a new
AkSpotReflectorobject into the firstAkSpatialAudioVolume.- Set Location to (x=-150.0, y=-150.0, z=100.0).
- On the
AkSpotReflectorObject, set the option Aux Bus to your "TestSpotReflectorAuxBus".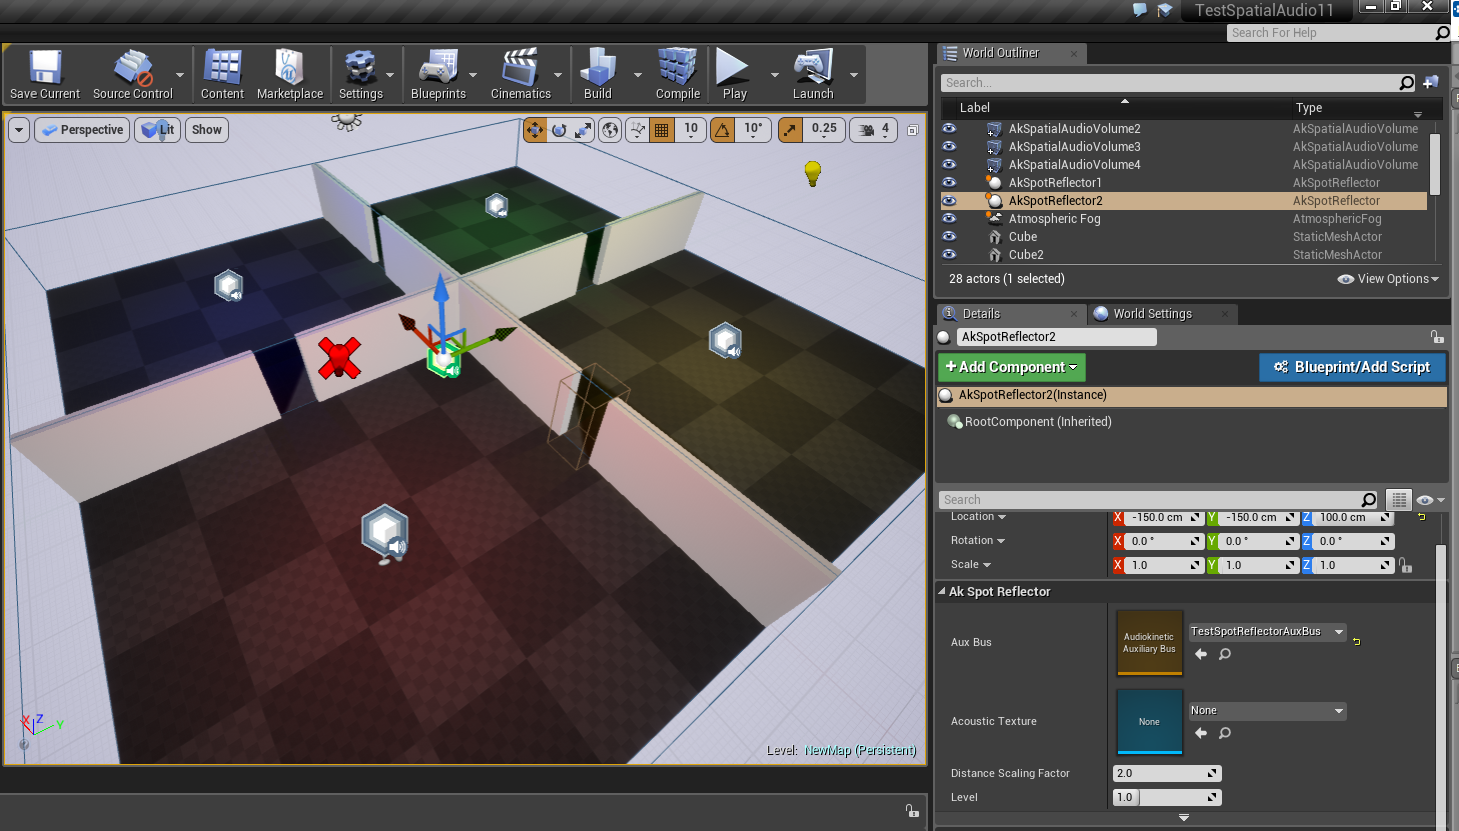
Drag new spot reflector into the scene
- Regenerate the SoundBanks.
- Start the scene and go inside the volume. You should see the reflection being drawn in the Wwise Reflect - Effect Editor window when triggering the PlayReferenceSoundTest.
Note: If Enable Room is enabled for the AkSpatialAudioVolume, the Auxiliary Bus containing the reverb must have 3D positioning enabled as well.
Generated by
 1.6.3
1.6.3 Was this page helpful?
Need Support?
Questions? Problems? Need more info? Contact us, and we can help!
Visit our Support pageTell us about your project. We're here to help.
Register your project and we'll help you get started with no strings attached!
Get started with Wwise