
Introduction
With the development of the gaming industry and the emergence of large racing projects and simulators, the demand for high-quality engine sounds has also increased. Modern racing games offer photorealistic graphics and meticulous attention to the smallest details of vehicles, which means that the same level of detail is required for sound design.
The soundscape must change in real-time depending on in-game events and physics, far beyond the simple playback of pre-recorded samples.
Recording real engine sounds involves significant costs: it requires access to a large fleet of exclusive cars, the rental of which is quite expensive. Additionally, the recording process itself demands specialized equipment, specific conditions, and expertise, which are not always accessible for smaller projects developed by small studios or teams.
Fortunately, progress does not stand still, and today, there are several approaches to implementing engine models for different setups and budgets.
Table of Contents
Article Overview
Creating an Engine Using Samples
The Sample Approach
Source Material: Where to Find and What to Use
Content Preparation: Slicing, Processing, and Shaping Your Loops
Wwise Integration
Adjusting and Fine-Tuning the Pitch Parameter
Wwise Effects: Adding Polish and Character
Sample Engine: The Final Sound
Creating an Engine Model Using Granular Synthesis
Granular Synthesis: What is REV 2 and Why Use It?
Selecting the Right Content
DAW Processing: Preparing RAMPs for Granular
Creating an Engine Model & RAMP Capture
REV 2 Parameter Tuning
Wwise Integration: Setting Up Parameters and Effects
Granular Engine: The Final Sound
Conclusion: Choosing Your Engine Modeling Approach
Weighing the Pros and Cons
Conclusion
Article Overview
The main goal of this article is to share the experience gained in creating various engine models for gaming projects. It highlights key ideas and approaches that can help improve results and guide developers facing similar challenges in the right direction.
We will cover the following topics:
- Creating engine audio models based on samples in Wwise.
- Granular synthesis using the REV 2 plugin from Crankcase in combination with Wwise.
The methods described in this article are based on the Wwise audio engine; however, they can be adapted to any other preferred setup if needed.
Creating an Engine Using Samples
The Sample Approach
Creating an engine model using samples is the most accessible, popular, and cost-effective method.
The simplest way to apply this approach is to control the Pitch parameter of a looping sound in real-time based on the engine's RPM.
It can also be a good solution to use two different layers with engine recordings: one for the engine running off-load and another for the engine on-load. Switching between the layers can be done using a parameter from the game engine, depending on the impact on the vehicle.
This method works well for smaller projects where vehicles are present, but engine sound is not a primary focus.
Advantages:
- Low-cost
- Minimal processing of source material
- Easy integration
The main drawback of this approach is that the model does not always sound realistic — at high Pitch values, the engine may start to resemble a lawnmower.
A more advanced approach to implementing this method is the use of a Blend Container and source files containing static looped recordings of a car engine at different RPM levels.
Let's take a look at the Ferrari Testarossa engine as an example:
The principle remains the same: we control the Pitch parameter, but at the same time, the RPM parameter moves within the Blend Container, playing loops of various engine speeds.
Source Material: Where to Find and What to Use
- Self-recording (the most expensive and complex option).
- Specialized engine sound libraries (usually costly but provide high-quality sources with various perspectives and scenarios, making them a good choice for projects with a decent audio budget).
- Cloud-based subscription services that also offer engine recordings (the most budget-friendly option, though it comes with drawbacks such as a limited selection and often a lack of necessary resources for full implementation).
- Free libraries or websites (a complete gamble—you might find something for small projects, but you should always check the license under which the audio resources are distributed).
Working with Libraries
In most libraries containing vehicle recordings, there is typically a Steady RPM folder, which holds recordings of the engine at static RPM levels. This is exactly what we need. Ideally, we should have several static loops (e.g., Idle, 1000 RPM, 2000 RPM, 3000 RPM, etc.), which will later be combined into a single source in a Blend Container using crossfading. We will explore this process further.
Content Preparation: Slicing, Processing, and Shaping Your Loops
The recorded content is sliced into separate loops corresponding to the RPM levels — for example, five files (four RPM loops and one idle loop).
The beauty of working with samples is that we can process the source material in any way we want without affecting the tonal characteristics of the signal — something that, for example, does not fully apply when using granular synthesis.
The tonal characteristics of the signal are an important factor to consider when processing in a DAW. The clearer the engine tone, the easier it is for a granular plugin to capture a “snapshot” of the signal without artifacts or distortions. We will discuss this in more detail when we explore the engine modeling method using the REV 2 plugin.
During processing, you can use various plugins to your liking — enhancing character with saturation or boosting the low frequencies with EQ. It all depends on your creativity!
Loops Processing
Follow the balance rule: each individual loop should match the previous one in terms of frequency response and style, as all the separate segments will ultimately blend into one long file.
Tip: When creating loops, it's best to complete all processing and editing first before moving on to looping.
Wwise Integration
You need to set up a parameter that will receive the RPM values of your engine from the game engine.
I will use an RTPC with a maximum value of 1 and a minimum value of 0.
The prepared, rendered files are then uploaded into a Blend Container in Wwise.
Tip: It’s useful to follow a consistent naming convention for your files. The idle loop should be named something like CARNAME_0RPM_IDLE so that when automatically sorted in descending order, the content is arranged in ascending RPM. This saves a lot of time during the blending process.

Blend Fade-In, Out Demonstration
Crossfade the loops as shown in the image above — there should be no gaps. The files should overlap, forming a grid-like structure.
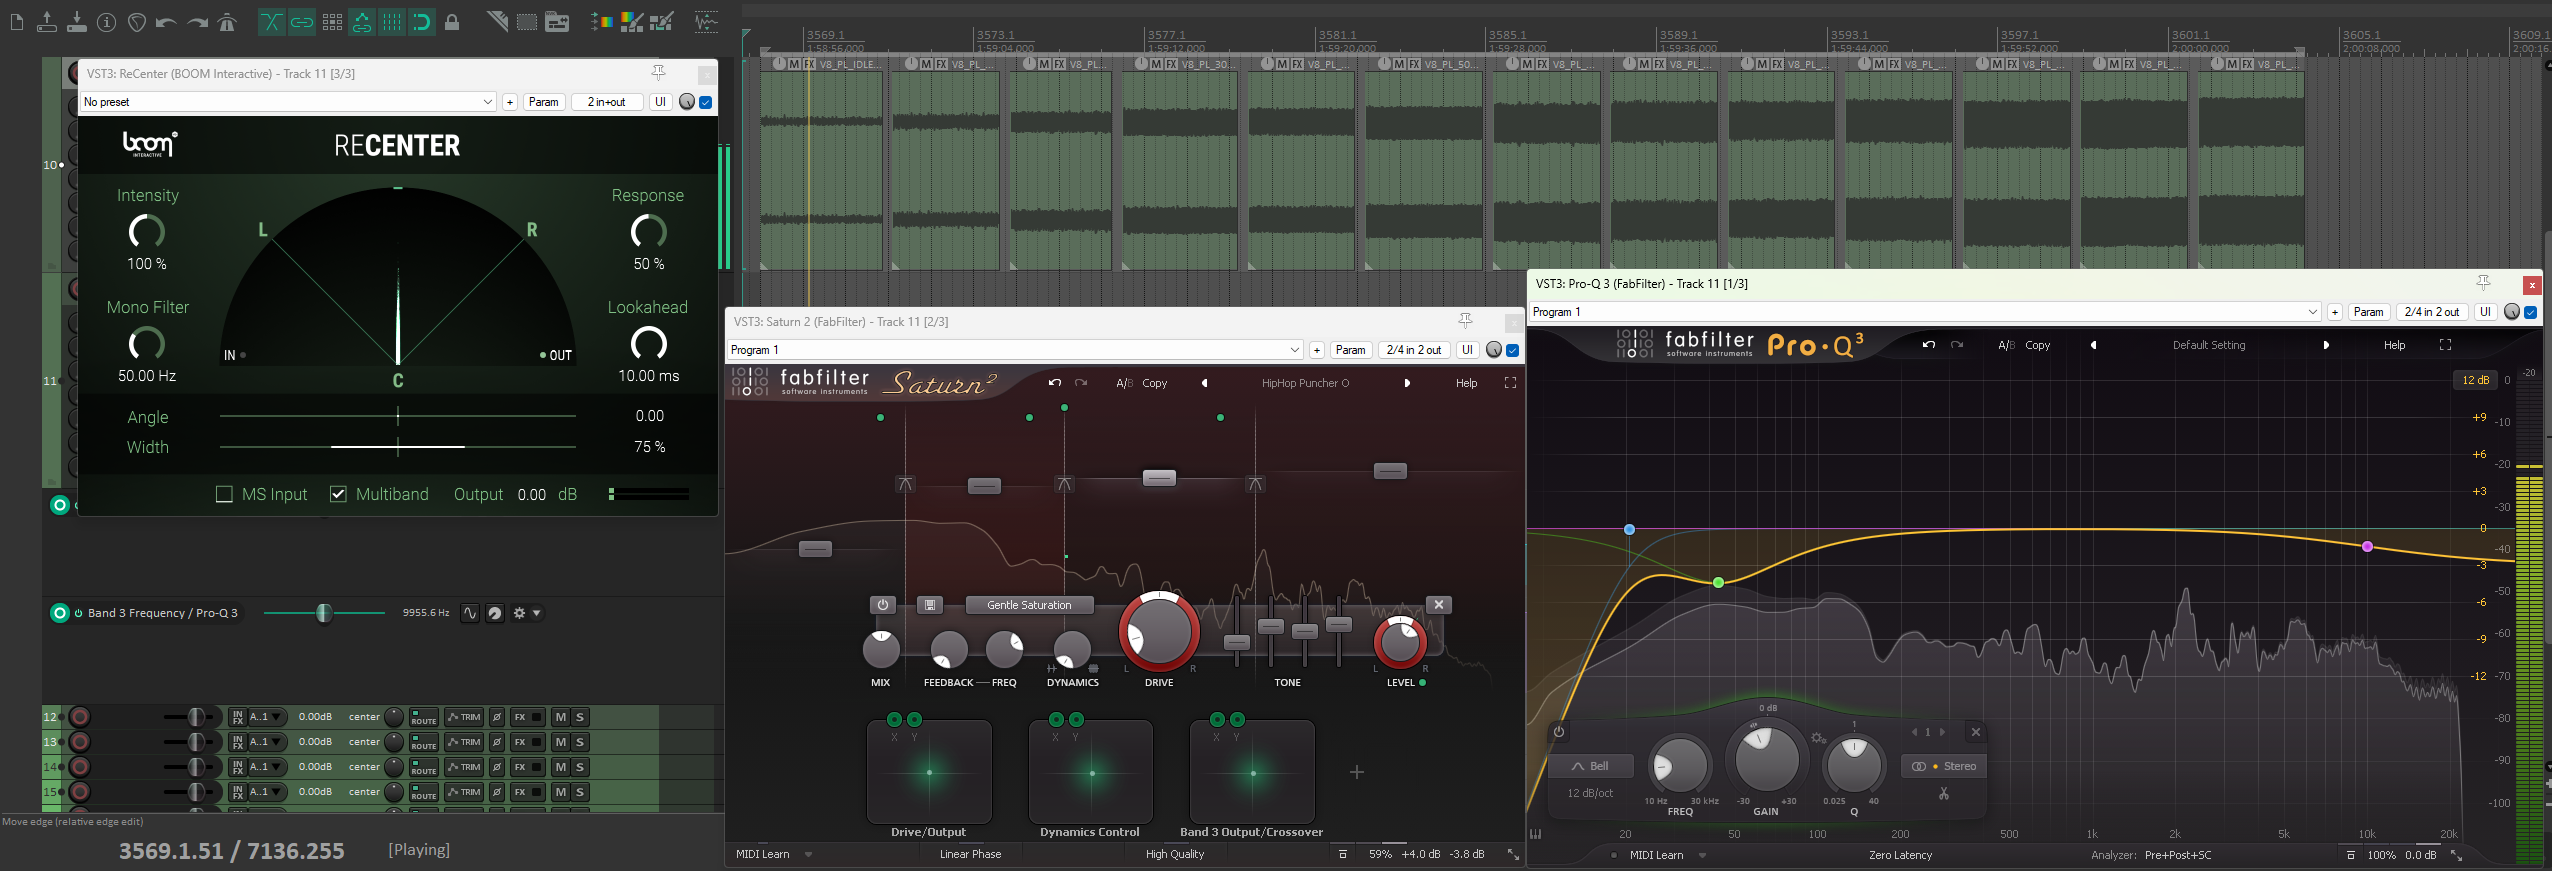
Tip: Use different combinations of Fade-in, Fade-out to minimize volume dips during the transition. The best combination was Sine (Constant Power Fade In) and Logarithmic (Base 1.41)
You can also manually adjust crossfade curves if the default settings don’t produce the desired results.
Curves Demonstration
Adjusting and Fine-Tuning the Pitch Parameter
Once you have integrated the files into the Blend Container and linked the container to an RTPC controlling RPM, you’ll notice that the files start transitioning between each other. However, instead of a smooth and natural shift, there may be pitch jumps that make the engine sound unnatural.
After setting up the fades, a crucial step is to adjust the pitch of the loop transitions to eliminate these jumps.
To do this, we need to create another RTPC to control Pitch separately for each loop.
Typically, you set two points — one at the beginning of the sound and one at the end. The first point is lowered in pitch, while the second is raised. A common optimal range is -100 to +200–300.
Then, place the playback marker at the crossfade overlap and fine-tune the Pitch using additional points until both loops blend seamlessly and sound like a continuous engine rev.
Repeat this process for all other crossfade points until all transitions between samples are smooth and natural.
It’s a good idea to perform a final check of the entire engine setup, listening to each section separately to ensure there are no unwanted artifacts and that everything functions correctly.
Wwise Effects: Adding Polish and Character
Usually, I prefer to apply final polishing and add extra character using Wwise’s built-in effects. These help smooth out the frequency response of the overall signal or enhance the aggressiveness of the engine sound.
Some useful tools for this process:
- Wwise Guitar Distortion – Adds character and harmonics to the signal, for example, enhancing the engine roar at high RPMs.
- Wwise Parametric EQ – For shaping the frequency response of the signal.
- Wwise Harmonizer (Optional) – Can add width and depth to the sound, especially useful if the source signal is in mono.
Sample Engine: The Final Sound
That’s it — our engine model is ready! From here, it’s all about your creativity. You can shape the sound to your taste using Wwise’s built-in effects, add extra layers, introduce new parameters, automate effects, and much more.
We've laid the foundation, and now it's up to you to decide what to build on it!
Creating an Engine Model Using Granular Synthesis
Granular Synthesis: What is REV 2 and Why Use It?
In modern sound design for games like driving simulators and racing simulators, special attention is given to creating realistic audio models of engines, with granular synthesis being increasingly applied.
Granular synthesis is a method in which an audio signal is broken down into the smallest fragments (grains), allowing for the creation of a complex and dynamic sound texture. Thanks to this technique, engine sound effects become more deeply developed and realistic, which is particularly important for an immersive gaming experience. An example of effective application of this technology is the Crankcase REV 2 plugin, which integrates directly into Wwise. This tool not only models the characteristic engine sound but also provides extensive opportunities for fine-tuning, allowing developers to achieve unique results.
We will not delve into all the intricacies of plugin configuration, but will discuss the most effective approaches and tricks that will help achieve good results in the shortest possible time.
Selecting the Right Content
For creating the engine model using Samples + Blend Container, we used Steady RPM (static engine speed recordings without acceleration).
REV 2 works with a different recording format, known as RAMPs. RAMPs is a method of recording where the vehicle smoothly increases its speed from idle to the maximum RPM value, and then smoothly decreases the RPM.
The gearbox is not involved in this process.
The main difficulty when working with granular synthesis is finding content. Not many library vendors include suitable RAMPs in their bundles, and even if they do, not every recording can be effectively captured by the plugin.
Always check the documentation before purchasing a library to see whether it includes the format you need.
It’s also important to understand which recordings are suitable for use and which may cause difficulties. The main criterion is the tonal component (we discussed this earlier). RAMPs that mainly contain noise may be poorly analyzed and captured by the plugin, and unfortunately, this cannot be corrected.
It’s also worth noting that REV 2 captures not only the increase in RPM (Accel) but also the decrease (Decel). To create the ideal "complete" model in REV 2, you will need three source files: Accel, Decel, and Idle. However, the model can be created from a minimal set of files, which should include only acceleration and the static idle cycle (deceleration is simulated during playback by playing acceleration in reverse and applying a low-pass filter).
Let’s consider examples of good and bad recordings for creating a snapshot.
Good RAMP

Bad RAMP
DAW Processing: Preparing RAMPs for Granular
Before integration into the granular plugin, the content usually needs to be prepared. As practice shows, the process of processing RAMPs sources differs from what we discussed in the engine model creation section with samples. The main task here is not to damage the tonal foundation of the sound. Typically, during the recording correction process, focus on fixing flaws, adjusting dynamics, and the frequency response of the signal, and avoid radical interventions in the sound, as this may affect the final result during capture. If you decide to use saturation, do so carefully. It is preferable to use an exciter to enrich the high frequencies of the signal.
Parameter automation is a good solution because the RAMPs sound is dynamic, and the signal's frequency response changes with the increase/decrease in engine RPM. Use an automated EQ band to reduce low frequencies at low RPMs and boost them at high RPMs.
Let's consider automation using the example of a Porsche 911 engine:
Thus, prepare three files for rendering: Accel, Decel, and Idle.
Creating an Engine Model & RAMP Capture
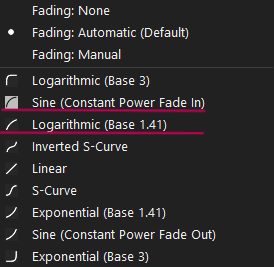
Content analysis and capture are done in the REV Tool, a tool specifically designed for working with engine RAMPs and creating Partial Documents, specialized files containing information about Accel and Decel.
Load the previously prepared content using File -> Open wav file.
We won’t go into detail on the settings of each parameter, but will touch on the main things that most affect the final result.
Using special markers, select the boundaries within which REV will analyze our RAMP file. Ctrl + LMB for the left marker, Alt + LMB for the right marker. Then, capture the harmonics.
I prefer to use the manual capture method for greater control and accuracy, but in most cases, the automatic method will work fine.
When manually capturing harmonics, it is important that the harmonic lines precisely match the dashed lines of the selector.
Using Min\Max Harmonic to track, adjust the vertical analysis area to cut off very low harmonics and unclear (ragged) high harmonics. This helps avoid excessive rumble at low frequencies and artifacts at high frequencies.
Choose the Window Size parameter. I recommend trying different values depending on the duration of your RAMP file.
In short:
Window Size determines how sound analysis is performed using the Fast Fourier Transform (FFT), which is used for audio processing.
- Window Size is a parameter that defines how accurately the program analyzes the frequencies in the sound.
- Larger values (e.g., 32768 and above) provide more accurate results when working with long sounds or high sample rates but may "blur" the result during sharp sound changes.
- Smaller values allow better tracking of rapid pitch changes but result in less precise frequency analysis.
Click Start Cycle Tracking and wait for REV to build the Accel model.
You can check the built model for artifacts by dragging the slider across the workspace or running the simulator using the Send to Simulator button.
Experiment with the Crossfade Style parameter.
Crossfade Style
3Layer - provides a smoother result when transitioning between grains, but the detail and clarity of the signal may be slightly lost.
2Layer - provides greater detail, but we begin to hear more clearly where the crossfading of the signal occurs.
Once the settings are made, you can save your Accel Partial Document and proceed to analyze the Decel file.
The Decel analysis process is generally similar; experiment with the parameters until you get the best result!
You may encounter situations where the Decel file is missing or damaged and cannot be analyzed correctly. REV can build a model without the Decel module, automatically modulating it, or you can create Decel manually using the Reverse function. Instead of the Start Cycle Tracking button, go to Tools -> Reverse and save the Reverse file in a separate folder. Afterward, analyze the resulting file as you would a regular Decel.
Tip: For more variety, you can use two different Accel RAMP recordings if available — one will be used as Accel, and the other, processed through the REVERSE algorithm, will serve as Decel. This allows for more diversity and provides a slightly different result.
Once the Partial Documents are ready, they need to be combined to create the model. This can be done in the Model tab of REV Tool. Select your Accel file in the Accel ramp window, the Decel file in the Decel ramp window, and the Idle Loop if available.
Make sure the values in such windows as Min\Max Freq are close to each other. This indicates that you have properly analyzed the RAMP files; otherwise, the finished model may sound incorrect.
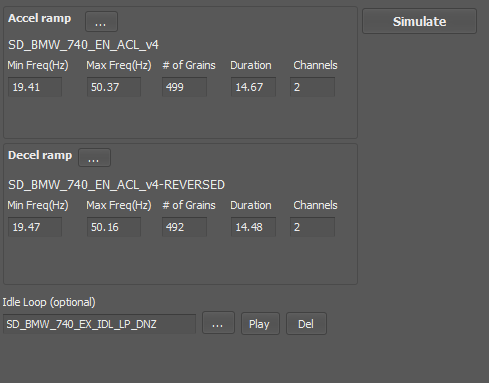
Combining Partial Documents
Click the Simulate button and begin fine-tuning your finished model.
REV 2 Parameter Tuning
Fine-tuning the physical parameters of the model is best done by directly testing the result in the game or game prototype. In the Simulator window of REV Tool, you can adjust various parameters, from the car's mass to the transmission behavior and much more.
It all depends on your needs and the desired outcome. You can find more information about what each parameter controls in the User Manual.
Here, we are interested in parameters that affect the engine's sound character.
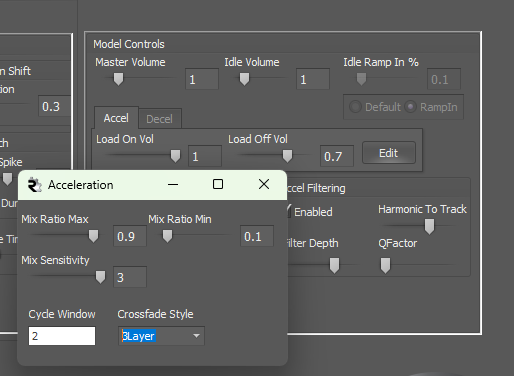
In the Model Controls section, you can regulate the blending of Accel into Decel and vice versa.
In the Accel tab, try adjusting the Load Off Vol parameter, starting with 0.3 and experimenting.
In the Decel tab, set the Load On Vol to taste. You will notice how the Accel sound changes when adjusting this parameter.
Also, by clicking the Edit button, you can modify the crossfade algorithm if you haven't done so earlier.
Tip: For convenience while working in simulator mode, you can use an XBOX controller. It's a great way to model a gameplay scenario and adjust the model parameters comfortably.
Once the model sounds good, with no artifacts, volume fluctuations, etc., you can save it by clicking the Save button in the simulator window. You can always easily return to edit the model later by simply loading it in the Model tab in REV Tool.
Wwise Integration: Setting Up Parameters and Effects
Processing the finished engine model is entirely a creative task, and there are no strict rules here. Wwise offers a wide range of built-in effects that can help you give character to your engine sound and fix any issues if needed.
Typically, I use the following set of effects as a starting point. These tools work well for this:
- Wwise Parametric EQ - helps fix frequency spectrum issues. Using an equalizer is convenient for correcting the model, removing excessive low frequencies, rumble, or artifacts that occur during granular engine processing. The combination of EQ (subtracting something) + Distortion (adding something) almost always works well.
- Wwise Guitar Distortion - great for coloring the signal. Distortion can add power and aggression to even the dullest model. Let’s look at a couple of examples before and after.
- Wwise RoomVerb - used to place the engine in a space, a situational plugin.
- Wwise Harmonizer - can be used to add low frequencies to engine models that lack them. The harmonizer can also add width and depth.
Tip: Since the engine sound constantly changes depending on the parameters from the game engine, automating effect parameters using RTPC is a good solution. RPM RTPC is commonly used for this. It allows us to control the amount of processing in specific parts of the signal. A frequent example is the difference in the amount of low frequencies across different parts of the signal.
Granular Engine: The Final Sound
That’s it — our engine model is ready. We can now add additional layers such as Backfire, Compressor, Suspension, Car Foley, etc., to make the sound even more interactive and dynamic. Add more variables, effect automation, randomization, and much more. Here, you're only limited by your creativity!
Let's take our finished 911 model for a spin in the simulator and also check out a few other engine models created in a similar way.
Conclusion: Choosing Your Engine Modeling Approach
In this article, we’ve looked at two modern approaches to creating engine sound models. The traditional sample-based approach offers a way to balance production costs, technology availability, and sound quality, while using granular synthesis via REV enables the creation of more natural and dynamic sound models. Both approaches have their own characteristics, and the optimal method depends on the specific requirements of the project.
Weighing the Pros and Cons
Sample-based Approach in Wwise
Pros:
- Cost-effectiveness: Creating a model based on samples is generally cheaper.
- Ease of integration: Native RTPC support in Wwise makes real-time parameter adjustment easy.
- Reliability: This method is well-tested and widely used in the game industry.
Cons:
- Time-consuming: Creating a model from samples takes more time, especially when producing engine sounds in bulk.
- Sound quality: The final model is often of lower quality than one created with granular synthesis.
- Specific recording requirements: Car recordings must be made in a certain way, which is not always accounted for by many audio libraries.
Granular Synthesis Approach
Pros:
- Flexibility and creativity: Allows experimentation with parameters and creation of unique, dynamically changing sound models that often sound more natural.
- Innovation: Using REV opens up new possibilities for creating complex sound textures that are hard to achieve with traditional methods.
- Adaptability: Easy to adjust the sound to changing gameplay conditions.
Cons:
- Complex setup: Requires in-depth understanding of granular synthesis and REV parameters, which can increase development time.
- Risk of artifacts: Incorrect usage may lead to undesirable sound artifacts that degrade the final product.
Conclusion
Both methods—the sample-based approach in Wwise and granular synthesis via REV—are effective tools for engine sound modeling. The model created using granular synthesis typically sounds more natural and offers more creative possibilities, while the sample-based approach is optimal for balancing cost, production time, and quality. The choice of method depends on the project's specifics and available resources, and in some cases, combining both approaches may yield the best results!

Comments