When working with dialogue you need to distinguish between spoken and non-verbal dialogue. Spoken dialogue usually needs to be localized in different languages whereas non-verbal dialogue represents the palette of emotional vocalizations not usually translated. In the case of non-localized audio files, variations can be added directly to a sound object, organized within the Actor-Mixer Hierarchy, and added to events just like any other sound effect. To handle these dialogue considerations, the process for importing Voice assets into the project differs from music and sound effects. The fundamental difference being the opportunity to determine project languages in preparation for localization.
First you need to define the game project languages in the Language Manager located in Wwise>Project>Languages menu. You also need to define the reference language used throughout the project.
The reference language for the project is used in various situations:
-
Importing language files - when you are importing an audio file, the import conversion settings of the reference file are used.
-
Converting language files - when you are converting a language file, the conversion settings of the reference language can be selected.
-
Before language files are available - when certain language sources are not ready, the reference language can be used in their place.
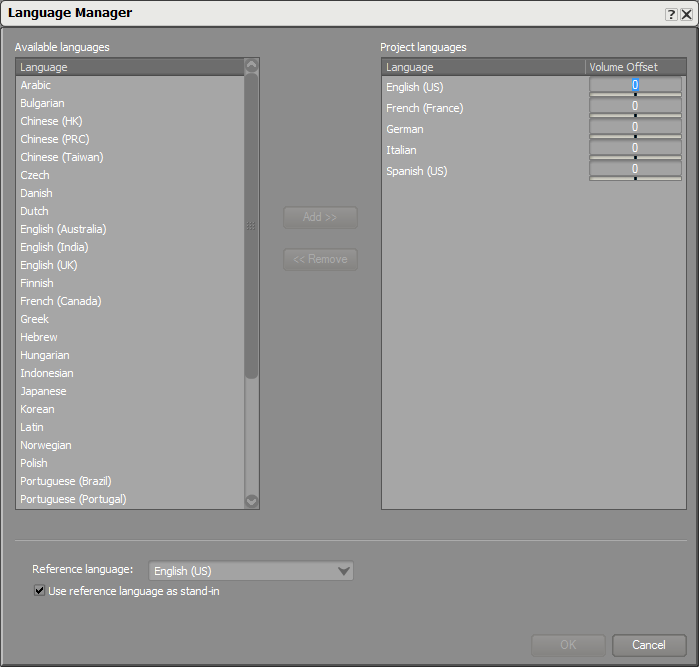
Defining project languages in the Language Manager
After you have selected the languages, localized voice files can be imported either through the Project menu, or by simply dragging and dropping files into the Project window. Selecting Import as Sound Voice prepares the object for localization based on project languages established in the Language Manager.

Importing dialogue as a Sound Voice in the Audio File Importer
After a Sound Voice has been imported in the reference language, additional localized files can be added.
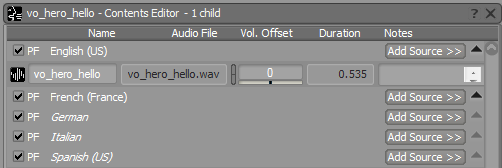
Adding an audio source for English language
A copy of the source audio files are then added to the project based on language. By default these files are copied to the Originals/Voice location within the project directory.
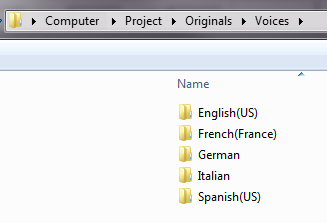
The folder hierarchy for copied Originals in the project Voices file folder
이 페이지가 도움이 되었나요?
작업하는 프로젝트에 대해 알려주세요. 언제든지 도와드릴 준비가 되어 있습니다.
프로젝트를 등록하세요. 아무런 조건이나 의무 사항 없이 빠른 시작을 도와드리겠습니다.
Wwise를 시작해 보세요