-
-
-
-
-
-
-
-
-
-
-
-
-
-
-
-
Glossary
-
-
-
-
-
-
Before dividing up your project, you must first decide on the best way to organize the different elements in your project to streamline your workflow and minimize conflicts. Because there are many ways to divide up a project, it's worth spending the time to decide on the best way for yours.
After the Work Units are created, you can divide up the work in your project by dragging the Sound structures, Events, SoundBanks, and so on into their respective Work Units. You can also unload specific Work Units from your version of the project, keeping only those that you are working on, to reduce project load times and memory usage.
You can create new Work Units for the following elements in your project:
Sound structures in the Actor-Mixer Hierarchy
Music structures in the Interactive Music Hierarchy
Action Events and Dialogue Events
SoundBanks
Bus structures in the Master-Mixer Hierarchy
Switches, States, Game Parameters, and Triggers
Effect and Attenuation ShareSets
Soundcaster and Mixing Desk sessions
Queries
Each Work Unit can only contain those project elements for which it was created. For example, an Event Work Unit can only contain Events, an Effects Work Unit can only contain Effects, and so on.
If you plan to use a source control system to manage your project files, you can add all the Work Units, including the Default Work Units, to the central repository or depot of your source control system. If you create a Work Unit while using a source control plug-in, you will be prompted to add the file to the repository.
To create a Work Unit:
In the Project Explorer, right-click one of the Physical Folders (such as Actor-Mixer Hierarchy or Interactive Music Hierarchy).
A shortcut menu is displayed.
Click New Child > Work Unit.
The Work Unit dialog opens.
In the Name field, type the name of the Work Unit.
![[Note]](/images/2023.1.3_8471/?source=Help&id=note.png)
Note The following characters may not be used when naming Work Units in Wwise: ‘:<>*?”/\|.’
Click OK.
A new Work Unit is created.
Note You can delete or rename this Work Unit directly in the Project Explorer or in the File Manager. To open the File Manager, click Projects > File Manager. Shortcut: Shift + F1.
By default, all the elements in your project, including Sound structures, Events, and SoundBanks, are automatically assigned to their respective Default Work Units. After creating new Work Units, you can assign the different elements in your project to the newly created Work Units. You can assign a project element to a Work Unit by simply dragging it into a particular Work Unit.
| Note |
|---|---|
Before moving project elements to a new Work Unit or between existing Work Units, you should make sure that other people within your project team aren't currently working on the affected project elements. |
To assign project elements to Work Units:
In the Project Explorer, click one of its tabs. (These include the Audio, Events, SoundBanks, Game Syncs, ShareSets, Sessions, and Queries tabs.)
Drag one or more project elements from under the Default Work Unit to one of the Work Units you created.
The project element is now assigned to the new Work Unit.
Work Units can be organized into Physical Folders on disk inside the root folder associated with a specific category of objects, such as the Actor-Mixer Hierarchy. This is especially useful when you have hundreds of Work Units and don't want to have them flat in the same folder.
The Physical Folder and Virtual Folder are two very distinct entities. The Physical Folder represents an actual directory on disk, while the Virtual Folder is part of its containing Work Unit file. Both are used to organize content, but the Physical Folder is an ascendant of a Work Unit and the Virtual Folder is a descendant of a Work Unit.
Physical folders can be created directly inside the Project Explorer by using the shortcut menu on other Physical folders, or by using the Project Explorer toolbar button.
Physical folders can only contain other Physical folders or Work Units files.
Work Units can be nested inside other Work Units. When this is done, the content of the Work Unit is delegated to the nested Work Unit, instead of the parent Work Unit. This allows placing several Work Units under a common Actor-Mixer object, providing common behavior and mixing properties for the nested Work Units.
The nested Work Units allows a finer granularity in the file separation, reducing potential conflicts when merging.
Nested Work Units are saved in their containing Physical Folder. For Work Units, names must be unique across a single Physical Folder.
 |
Nested Work Units can be created under the following object types:
Physical folders
Work Units
Virtual folders
Actor-Mixers
Audio Busses
| Note |
|---|---|
Nested Work Units are stored on disk at the same level as their root Work Unit. |
After your project has been divided up into Work Units, you may want to unload some of these Work Units, keeping only those that you are working on. The main reason for unloading Work Units from a project is to speed up project load times, reduce memory usage, and improve overall performance. If your project is very large, you can improve performance significantly by unloading one or more Work Units.
The following types of user-created Work Units can be unloaded from a project:
Actor-Mixer Hierarchy Work Units
Interactive Music Hierarchy Work Units
Event Work Units
| Note |
|---|---|
Default Work Units are critical to the project, so they can never be unloaded. |
| Note |
|---|---|
Nested Work Units can be unloaded individually. They will also be unloaded if you unload their root Work Unit. |
When Work Units are unloaded from a project they will be unavailable in the Project Explorer. You will not be able to work with them until they have been loaded back into the project.

 |
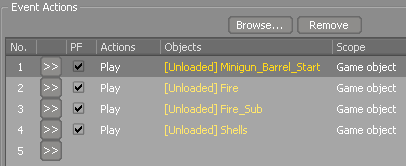
Unloaded Work Units. |
You can continue to work with the objects and Events within the loaded Work Units. You may, however, discover that some of these objects and Events contain references to objects and/or Events that have been unloaded. For example, you may have references to unloaded objects or Events in the following project elements:
Dialogue Events
Events
Music Stingers
Music Transitions
Queries
SoundBanks
Soundcaster and Mixing Sessions
In these cases, the unloaded elements will be marked as [Unloaded] and will be highlighted in yellow.
 |
You can still add/remove objects, modify property values, generate SoundBanks, and so on, but you won't be able to play back these objects and Events in Wwise.
When you unload a Work Unit from a project it is unloaded immediately. If you need to access the contents of an unloaded Work Unit, you can easily load it back into the project at any time. If any changes are made to the project that affect the objects or Events within the unloaded Work Unit, these changes will be listed in the Project Load Log when the Work Units are loaded back into the project.
| Note |
|---|---|
When Work Units are unloaded from a project, Wwise can't distinguish between source files that are not being used and those that haven't been loaded into the project. As a result, all source files that don't appear to be used by the project will be marked as “Unknown” in the Usage column of the File Manager until all Work Units are loaded back into the project and Wwise can perform a complete verification. |
To unload a Work Unit from your project:
In the Project Explorer, select the Work Units that you want to unload.
Right-click the selection and select Unload Work Unit from the menu.
The Work Units are unloaded and are unavailable in the Project Explorer.
To load a Work Unit back into your project:
In the Project Explorer, select the unloaded Work Units that you want to load back into the project.
Right-click the selection and select Load Work Unit from the menu.
The Work Units are loaded back into the project.
Note If any changes were made to the project that affected the objects or Events within the unloaded Work Unit, these changes will be listed in the Project Load Log when the Work Units are loaded back into the project.
If a Work Unit is modified outside of Wwise, you can reload the file without reopening your project.
To reload a Work Unit in your project:
When Wwise detects a change to a Work Unit in your project directory, the External Project Changes dialog will open.

In the External Project Changes dialog, select the Work Units that you want to reload.
Click Reload.
The selected Work Units are reloaded in the project.
If you are authoring on Mac, Wwise will not automatically detect changes to Work Units on your hard drive. You will need to manually check for external changes.
To check for external changes:
From the menu bar, click Project > Check for External Changes.
If changes are detected, the External Project Changes dialog will open listing all external changes. These changes can be reloaded, as usual.
If no changes are detected, a dialog will open indicating this. Click OK to close the dialog.
At some point you may need to rename a Work Unit that you have created in your project. You can rename Work Units in the Project Explorer and you can rename them in the File Manager. Work Units should not be renamed or deleted in Windows Explorer or Mac Finder because you may cause integrity errors or lose project data.
![[Caution]](/images/2023.1.3_8471/?source=Help&id=caution.png) | Caution |
|---|---|
The Default Work Units are critical project files and should not be renamed or deleted. If you do, Wwise will automatically re-create them the next time you open the project. |
To rename a Work Unit:
From the Project Explorer, press F2 or use the Rename shortcut menu option.
The editable text box appears over the Work Unit name.
In the edit box, type the new name and press Enter.
The Source Control Operation dialog appears.
Verify the operation to be applied and click Continue.
If you are using a source control plug-in, verify if the operation was successful.
Click OK to close the Process Log.
You may need to delete a Work Unit that you have created and no longer need in your project. You can delete Work Units in the Project Explorer and you can delete them in the File Manager. Work Units should not be deleted in Windows Explorer or Mac Finder because you may cause integrity errors or lose project data.
If you delete a Work Unit file from your source control system, the project elements within that Work Unit will no longer exist in the project, which can cause integrity errors. These errors are identified when you open the project along with a description of how they will be fixed, if necessary. For more information about project inconsistencies, refer to Resolving project inconsistencies.
| Caution |
|---|---|
The Default Work Units are critical project files and should not be renamed or deleted. If you do, Wwise will automatically re-create them the next time you open the project. |
To delete a Work Unit:
Do one of the following:
From the Project Explorer, select the Work Unit to delete and press Delete or use the Delete function in the shortcut menu.
The Source Control Operation dialog appears.
Verify the operation to be applied and click Continue.
If you are using a source control plug-in, verify if the operation was successful.
Click OK to close the Process Log.
Was this page helpful?
Need Support?
Questions? Problems? Need more info? Contact us, and we can help!
Visit our Support pageTell us about your project. We're here to help.
Register your project and we'll help you get started with no strings attached!
Get started with Wwise