-
-
-
-
-
-
-
-
-
-
-
-
-
-
-
-
Glossary
-
-
-
-
-
-
Before you can use the Mixing Desk to fine-tune the mix of your game audio, you need to create and populate a Mixing Session. A Mixing Session is similar to a Preset or Soundcaster session in that it saves the contents of the Mixing Desk within your project so that you can go back to it at a later time. Each Mixing Session is saved on the Sessions tab of the Project Explorer, under its corresponding Work Unit.
To help you easily identify a Mixing Session in the interface, Wwise uses a unique icon to represent it.
|
Icon |
Represents | |
|---|---|---|
|
|
Mixing Session |
Before you can use the Mixing Desk, you need to create a Mixing Session. Mixing Sessions contain a series of busses and/or objects that are arranged within a type of mixing console. A series of sliders and property value controls are displayed for each bus and/or object in the Mixing Session so that you can fine-tune the audio mix of your game..
You can create Mixing Sessions in the following two places in Wwise:
The Sessions tab of the Project Explorer.
From within the Mixing Desk.
To create a Mixing Session from the Project Explorer:
In the Project Explorer, switch to the Sessions tab.
Under the Mixing Sessions heading, do one of the following:
Select a Work Unit or Virtual Folder and then click the Mixing Session icon in the Project Explorer toolbar.
Right-click a Work Unit or Virtual Folder and click New Child > Mixing Session from the shortcut menu.
A new Mixing Session is added to the Virtual Folder or Work Unit.
Replace the default name with one that best represents the Mixing Session.
Double-click the new Mixing Session to load it into the Mixing Desk.
You are now ready to populate the Mixing Session with busses and objects.
To create a new Mixing Session from the Mixing Desk:
In the Mixing Desk, click the Mixing Session Selector button (>>) and select New from the list.
The New Mixing Session dialog opens.
Select the Work Unit into which you want to create the new Mixing Session.
In the Name field, replace the default name with one that best represents the Mixing Session.
Click OK.
The Mixing Session is created and you are ready to start populating it with busses and objects.
After you have created your Mixing Session, you can start populating it with the busses and/or individual objects within your project. When you add a bus or object to the Mixing Desk, a mixing strip is created. A mixing strip gives you an overview of the object's or bus' property settings. It also has a series of controls that allow you to monitor various activities, modify properties, set effects and states, and define positioning properties.

 | Mixing strips. |
You can add any of the following objects to the Mixing Desk:
busses
Actor-Mixers
Containers
Sounds
Music Containers
Music Segments
Music Tracks
![[Note]](/images/2023.1.3_8471/?source=Help&id=note.png) | Note |
|---|---|
If a Mixing Session contains a mixing strip that relates to an object or bus that has been unloaded from the project, the mixing strip will be empty. |
To add objects/busses to a Mixing Session:
Load a Mixing Session into the Mixing Desk by doing one of the following:
Click the Mixing Desk Selector (>>)and select a Mixing Session from the list.
Double-click a Mixing Session from the Sessions tab of the Project Explorer.
From the Project Explorer, drag a bus or object into the Mixing Desk.
A mixing strip is created in the Mixing Desk, representing the object or bus.
Continue to add objects and/or busses to the Mixing Desk.
Note When you have several mixer strips in the Mixing Desk, a blue insertion line displays the location where the mixing strip will be added.
After you have added busses and objects to a Mixing Session, you can arrange the mixer strips in any order by dragging them from one position to another.
To re-order the mixing strips within a Mixing Session:
Load a Mixing Session into the Mixing Desk.
Click the title bar of a mixing strip and then drag it to a new location in the Mixing Desk.
A blue insertion line displays the location where the mixing strip will be moved.
Continue to re-arrange the mixer strips, as required.
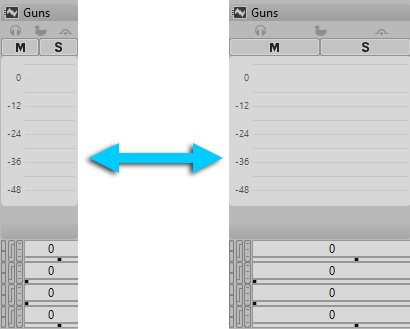
If you find the mixing strips too narrow or too wide, you can resize them, as follows, with the narrower strip on the left and the wider strip on the right.
To resize a mixing strip:
Load a Mixing Session into the Mixing Desk.
Click in the grid section of the Mixing Desk.
Do one of the following:
To make the mixing strips larger, press the Ctrl key while rolling the mouse's scroll wheel upwards or click the + sign next to the scroll bar.
To make the mixing strips smaller, press the Ctrl key while rolling the mouse's scroll wheel downwards or click the - sign next to the scroll bar.
At any point in your Mixing Session, you can remove one or more mixing strips from the Mixing Desk.
To remove a mixing strip from a Mixing Session:
Do one of the following:
Right-click the title bar of the mixing strip and select Remove from the menu.
Click the title bar of the mixing strip you want to remove and press the Delete key.
The mixing strip is removed from the mixing desk.
Was this page helpful?
Need Support?
Questions? Problems? Need more info? Contact us, and we can help!
Visit our Support pageTell us about your project. We're here to help.
Register your project and we'll help you get started with no strings attached!
Get started with Wwise