Table of Contents
-
In the Project Explorer, open the Items Actor-Mixer, and then choose and play the Teleport object.

The Teleport sound is played when the player goes through the teleporter, which instantly takes the player to another physical location on the map. The problem is that the teleport sound is a bit short in duration. To lengthen the sound and provide even more of a special effect, you’ll add a delay or echo to the teleport sound.
-
In the Teleport Sound Property Editor, click the Effects tab.
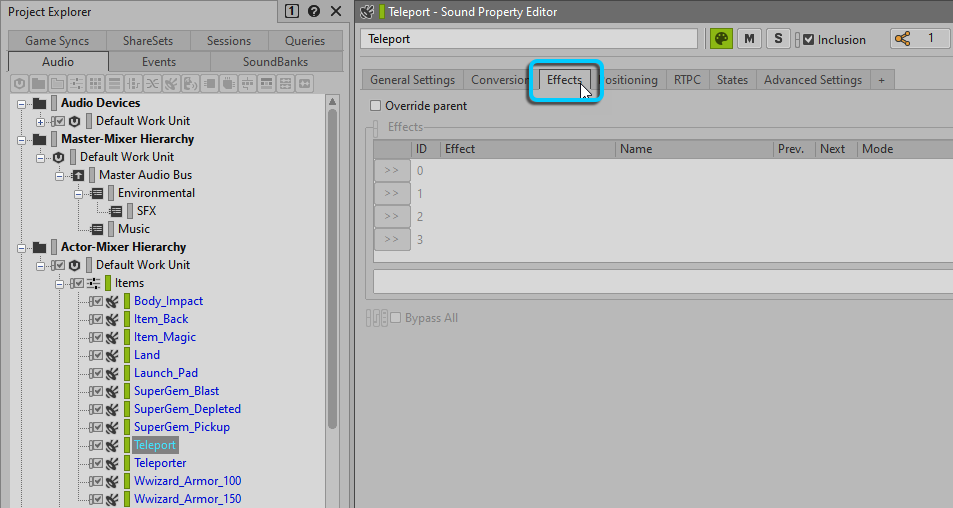
In the Effects group there are four rows, each of which holds any of the available Effect plug-ins. Currently, none are available because the Teleport object resides within the Items Actor-Mixer, so by default the Teleport inherits the Effects configuration from the Items Actor-Mixer. To uniquely configure Effects for the Teleport object, you’ll need to indicate that you want to ignore the parent object configuration.
-
Select the Override parent check box.

-
Click the [>>] selector button for Effect ID 0.

The menu displays an extensive list of Effect plug-ins to choose from.
![[Note]](/images/wwise101/?source=wwise101&id=note.png)
While you can choose anything from the list, the Wwise Convolution Reverb or any of those that do not begin with Wwise, are third party plug-ins that involve additional licensing fees when the game is released.
As you select an Effect, you may see an additional subselection, which represents Presets for that particular plug-in.
-
Choose Wwise Delay > Delay > Echoes_Linear.

The Wwise Delay plug-in with the Echoes_Linear Preset is inserted directly onto the Teleport sound object.
The Prev. and Next arrows let you quickly cycle through the available Effect Presets.
-
Play the Teleport object while clicking Next to audition different delay settings, finally selecting Delay\One_Tap_Quarter_Second.

Presets can get you close to a desired sound, but in this case, the echo goes on a bit long. Adjusting the Effect properties allows you to dial in the exact sound you want.
-
Click the […] button in the Edit column to open the Effect Editor.
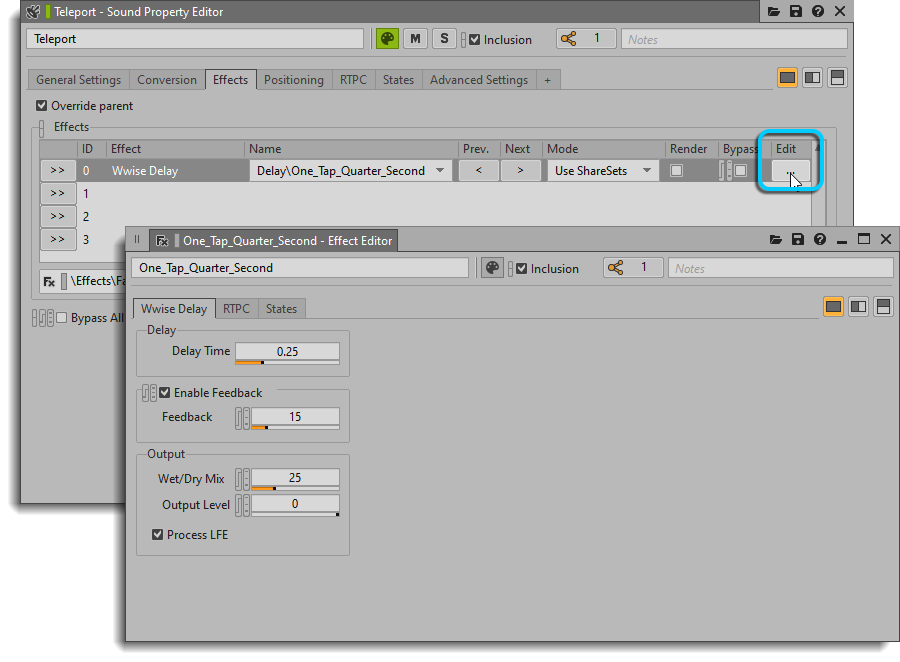
The Wwise Delay properties are displayed. The available properties can vary dramatically depending on the complexity of the Effect plug-in.
![[Tip]](/images/wwise101/?source=wwise101&id=tip.png)
One parameter that most Effects have is a Wet/Dry Mix. Setting this value to 0% means that no Effect is heard and only the original dry signal is heard. 100% means that only the Effect is heard. Adjust the Wet/Dry ratio to find the right blend for what you’re trying to achieve.
-
Set the Feedback property to 25, and close the Effect Editor window.

This Effect is generated in real time when the game is played. Applying Effects in real time uses up the game system's CPU power when there are many different objects running various real-time Effects. To eliminate most of the CPU load, you can choose to render the Effect as a new audio file when you re-generate your SoundBank.
-
Select the Render check box.
