Table des matières
Si le mode de mesure RMS permet de mieux réfléchir à la façon dont nous entendons le volume d'un son, il n'est pas sans limites. Les vumètres RMS réagissent visuellement de la même manière à toutes les fréquences qui les traversent. Un vumètre RMS ne fait pas la distinction entre un son de haute fréquence et un son de basse fréquence, contrairement aux êtres humains qui ont des sensibilités différentes aux sons de différentes fréquences. Par exemple, nous percevons les changements dans les fréquences moyennes de manière beaucoup plus précise que les changements de volume dans les fréquences plus basses. Pour tenir compte de ce fait, une échelle de mesure entièrement nouvelle a été créée pour spécifiquement prendre en compte la façon dont les êtres humains perçoivent l'intensité sonore. L'échelle est appelée LUFS : Loudness Units Full Scale (unités d'intensité sonore à pleine échelle). Le LUFS est une amélioration de l'échelle appelée LKFS. Aujourd'hui, les termes LUFS et LKFS peuvent être utilisés indifféremment.
L'échelle LUFS est largement utilisée dans l'industrie de la télévision. Pour garantir des volumes cohérents lorsque vous passez d'une chaîne à l'autre, il existe des normes gouvernementales qui imposent aux programmes de respecter un niveau moyen de LUFS pendant toute la durée du programme. L'utilisation de l'échelle LUFS comme référence pour comprendre le volume sonore s'est étendue à la diffusion web, et même aux jeux vidéo. Il est très possible qu'une société de jeux demande que le mixage d'une piste musicale se situe dans un niveau LUFS moyen défini, afin de rendre les choses plus prévisibles en termes d'équilibre de la musique avec le reste des sons du jeu.
Les vumètres du Mixing Desk n'ont pas l'option LUFS, mais Wwise fournit un vumètre de Loudness LUFS spécifique. Celui-ci offre quatre Sync Groups qui peuvent être assignés à des objets dans la Master-Mixer Hierarchy, d'une manière similaire à ce que vous avez fait avec la vue Meter dans le dernier exercice. Par défaut, le Sync Group 1 du Loudness Meter est assigné au Master Audio Bus, vous assignerez donc le Sync Group 2 au Wwise 201 Music Audio Bus.
-
Dans le menu principal, choisissez Views > Loudness Meter > Loudness Meter - Sync Group 2.

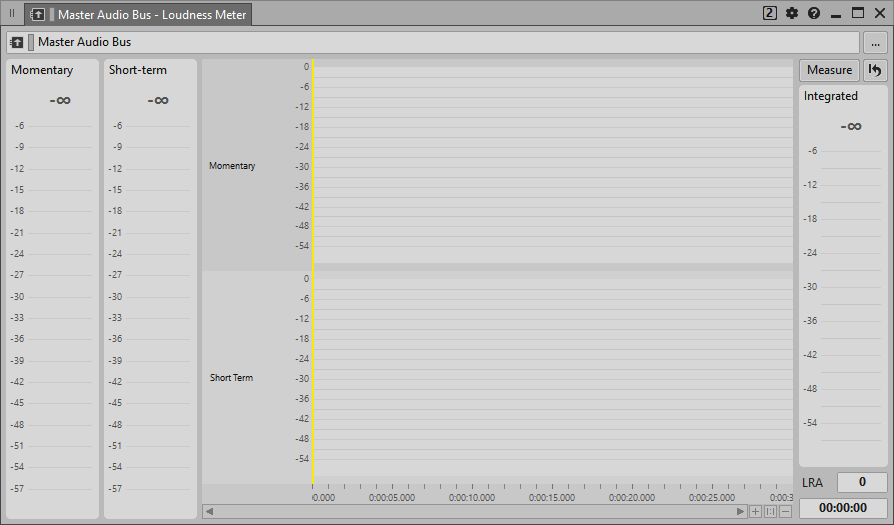
Le Loudness Meter est affiché, mais il est assigné par défaut au Master Audio Bus.
-
Affectez le Loudness Meter au bus Wwise 201 Music.

-
Jouez la musique pour voir comment le Loudness Meter réagit.

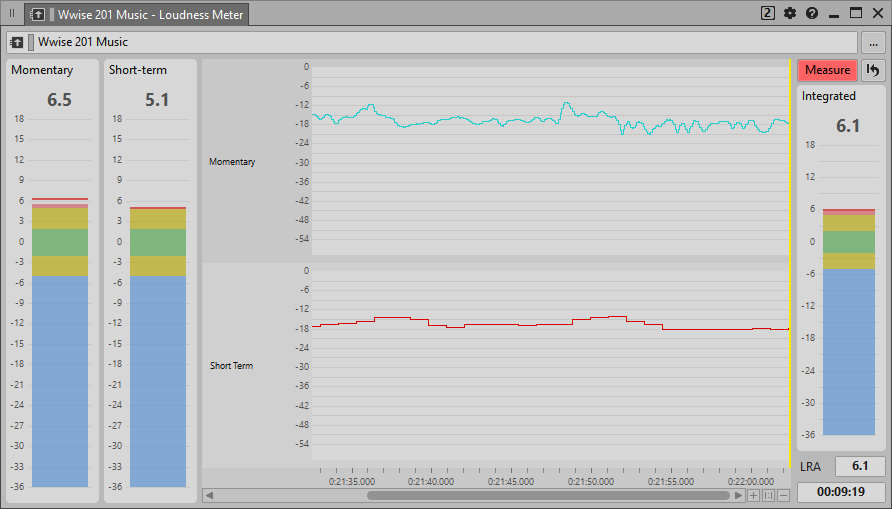
Vous pouvez voir que le vumètre Short-term (court terme) réagit plus lentement que le vu-mètre Momentary (momentané). Cela s'explique par le fait que le vumètre Momentary réagit rapidement en calculant la moyenne de l'intensité sonore perçue sur 0,4 seconde, tandis que le vumètre Short-term calcule la moyenne sur les 3 dernières secondes.
La grande section Integrated du vumètre n'affiche rien. La mesure Integrated est utilisée pour comprendre l'intensité sonore sur de longues périodes, mais elle n'est pas activée tant que vous ne cliquez pas sur le bouton Measure. De même, les niveaux qui descendent en dessous de -70 LUFS ne sont pas pris en compte dans la moyenne du vumètre Integrated. Cela vous permet d'arrêter et de démarrer votre musique sans que le silence ait un impact sur le relevé du vumètre Integrated.
-
Cliquez sur Measure et continuez à jouer la musique.

Le vumètre Integrated continuera à calculer la moyenne de l'intensité sonore jusqu'à ce que vous cliquiez sur le bouton Reset. Cette fonction est utile pour se faire une idée de l'intensité sonore globale d'un segment de chanson, comme la musique de Combat, lorsqu'elle est jouée pendant une longue période. Vous pourriez ensuite remettre ce vumètre à zéro et voir comment cela se compare à la musique Explore jouée pendant une longue période également. Il est raisonnable de dire que l'on veut que la musique de Combat soit perçue comme étant plus forte ; mais de combien elle l'est, c'est quelque chose qu'il est difficile de chiffrer et de comparer à l'aide de mesures conventionnelles.
Vous verrez également dans le coin inférieur droit une valeur appelée LRA, qui représente Loudness Range. La Loudness Range est un calcul de l'étendue dynamique du matériau exprimé en Loudness Units (unités d'intensité sonore, ou LU). Il vous aide à comprendre la variation de l'intensité sonore perçue entre les sections les plus faibles et les plus fortes de l'audio. Cet affichage est également lié au vumètre Integrated, de sorte qu'il ne s'affiche que lors de la capture. La musique qui a une grande LRA peut parfois être un défi lorsqu'elle est écoutée dans le contexte du jeu, car il est parfois difficile de trouver un volume musical où les sections les plus fortes peuvent être entendues de manière appropriée avec les effets sonores sans que les sections les plus faibles soient complètement noyées par les autres sons qui se produisent pendant le jeu. Vous apprendrez dans l'exercice suivant quelques approches pour gérer ce problème.
Il est également possible d'afficher les valeurs des vumètres Momentary et Short-term sous forme de graphique dans le temps dans la section centrale du Loudness Meter. Pour ce faire, vous devez lancer une session de capture.
-
Cliquez sur Capture et continuez à jouer la musique.

Vous pouvez maintenant voir les valeurs Momentary et Short-term s'afficher dans le temps. Il est ainsi beaucoup plus facile d'examiner les niveaux sur de longues périodes sans avoir à surveiller constamment les vumètres en temps réel.
Vous avez sans doute remarqué que les segments des différents appareils de mesure du Loudness Meter apparaissent en bleu, jaune ou vert. La zone verte est appelée la zone cible, ou le niveau sonore « idéal ». En radiodiffusion, l'objectif pour le niveau moyen au cours d'une émission de télévision est d'environ -23 à -24 LUFS, selon l'organisme responsable. Pour le contenu diffusé sur le web, cet objectif est généralement fixé autour de -16 à -18 LUFS. En d'autres termes, la cible pourrait être différente selon l'application. Pour les jeux vidéo, il n'existe pas de norme unique, mais une société de jeux peut avoir des normes qu'elle utilise en interne, et peut même exiger que les mixages soient livrés à un niveau cible défini. La valeur cible peut être ajustée en utilisant les View Settings disponibles pour le Loudness Meter.
-
Cliquez sur l'icône View Settings.

Vous voyez une variété de paramètres et vous pouvez constater que la cible est fixée à -23, soit la norme de télédiffusion européenne. Les valeurs de l'intervalle cible indiquent de combien de dB au-dessus ou en dessous du Target Level le vumètre aura besoin pour passer au vert - sur la cible - ou au jaune - près de la cible. Vous pouvez laisser la valeur du Target Level à -23, mais il peut parfois être un peu étrange d'avoir une valeur de -23 comme repère. Au lieu de cela, vous pouvez changer l'échelle des unités de LUFS (Loudness Units Full Scale) à LU (Loudness Unit).
-
Changez la valeur de Unit à LU.

Vous pouvez voir que le point du vumètre qui était à -23 affiche maintenant un 0. Cela signifie que vous vous êtes écarté de 0 Loudness Units de la valeur cible idéale, les valeurs positives et négatives indiquant le nombre de LU qui vous séparent de la valeur cible.
-
Fermez la fenêtre.

Comme vous pouvez le constater, il s'agit d'un vumètre très utile. C'est tellement utile que c'est une bonne idée de l'ajouter à la disposition Mixer pour que vous puissiez toujours garder un œil dessus.
-
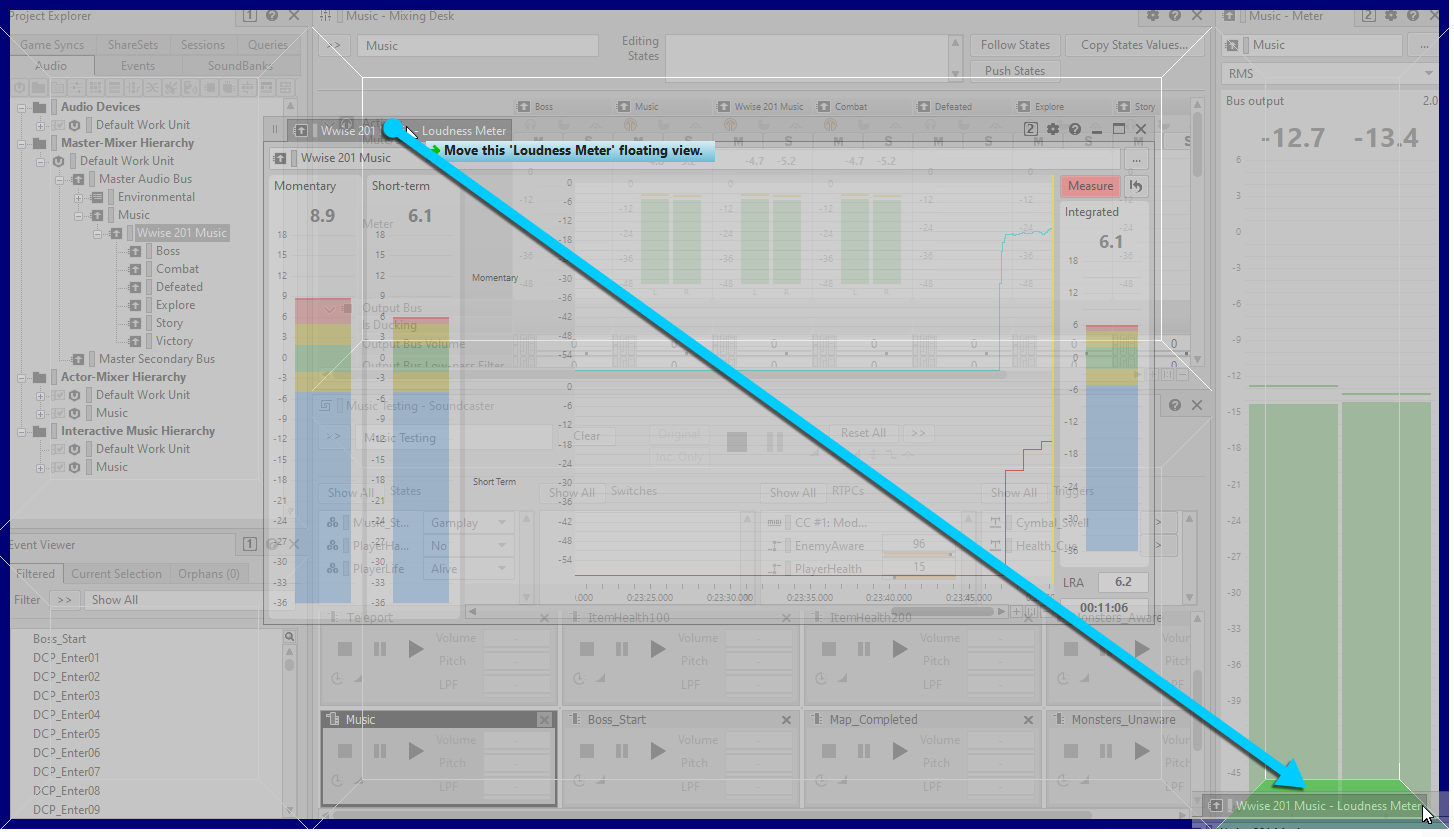
Faites glisser l'onglet Loudness Meter juste en dessous de la vue Meter.

Il peut vous être demandé de confirmer que vous souhaitez modifier la disposition.
-
Si l'on vous demande de confirmer que vous voulez modifier la disposition, cliquez sur le bouton Yes pour confirmer.

Le Music Loudness Meter est fixé au bas du Master Audio Bus Meter. Vous pouvez redimensionner la vue en faisant glisser la bordure située entre les deux vumètres.
-
Faites glisser le haut du Loudness meter pour l'agrandir.

Vous pouvez maintenant voir simultanément les Peak, RMS et les multiples Loudness Meters pour l'Audio Bus Wwise 201 Music. C'est beaucoup de retours visuels !
-
Désélectionnez le bouton Capture et arrêtez la lecture.